
https://medium.com/backticks-tildes/create-a-custom-app-intro-slider-in-react-native-4308fae83ad1
Create a custom App Intro Slider in React Native
One great way to give users a feel of what your application is about is to have a couple of screens be displayed to them the first time…
medium.com
3월 인턴일지 (3) 📝 : [React-Native] ScrollView로 간단한 carousel 구현하기!
React-Native에서는 다음과 같이 ScrollView로 슬라이더를 구현할 수 있다. 👍 Markup Animated.ScrollView를 사용한다. import 구문: import Animated from 'react-native-reanimated';
velog.io
https://developer.mozilla.org/en-US/docs/Web/CSS/scroll-snap-type
scroll-snap-type - CSS: Cascading Style Sheets | MDN
The scroll-snap-type CSS property sets how strictly snap points are enforced on the scroll container in case there is one.
developer.mozilla.org
* 랜딩페이지 구현하기 - 슬라이더
import React from 'react'
import { SafeAreaView, View, Text, StyleSheet, StatusBar, ScrollView, Dimensions } from 'react-native'
function LandingScreen({navigation}){
const { width, height } = Dimensions.get('window')
return (
<SafeAreaView style={styles.block}>
<StatusBar barStyle="dark-content"></StatusBar>
<ScrollView
style={{ flex: 1 }}
horizontal={true} // 수평 스크롤링
scrollEventThrottle={16} // 스크롤 이벤트 감지하는 시간간격 (ms)
pagingEnabled={true} // 스크롤시 페이지네이션
>
<View style={{ width, height }}>
<Text>랜딩페이지 1</Text>
</View>
<View style={{ width, height }}>
<Text>랜딩페이지 2</Text>
</View>
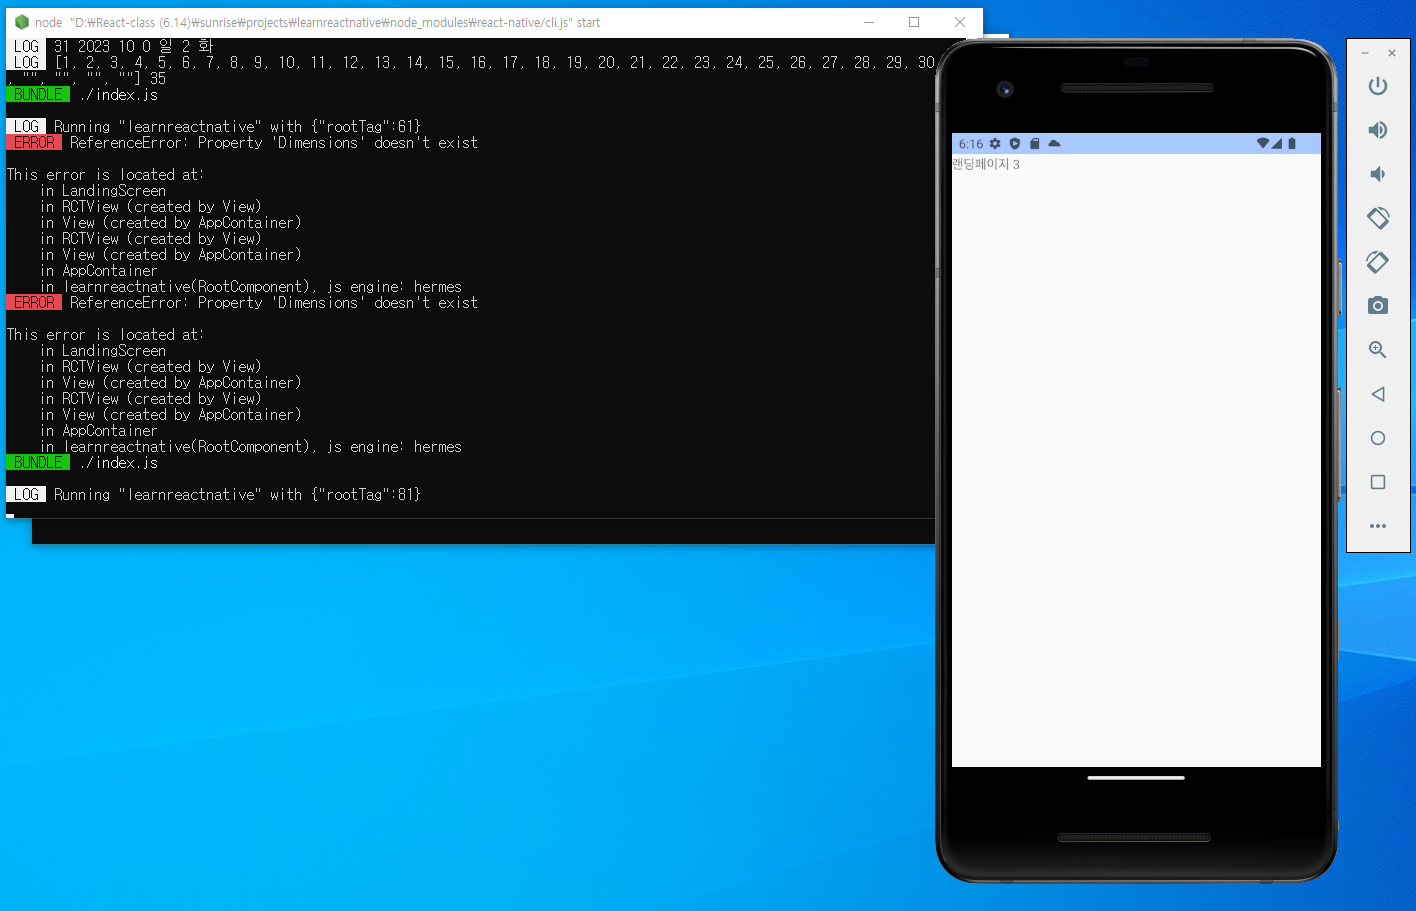
<View style={{ width, height }}>
<Text>랜딩페이지 3</Text>
</View>
</ScrollView>
</SafeAreaView>
)
}
const styles = StyleSheet.create({
block: {
flex: 1
}
})
export default LandingScreenscreens > LandingScreen.js 파일을 위와 같이 작성한다.
const { width, height } = Dimensions.get('window')디바이스 화면의 너비와 높이를 조회한다.
<ScrollView
    style={{ flex: 1 }}
    horizontal={true} // 수평 스크롤링
    scrollEventThrottle={16} // 스크롤 이벤트 감지하는 시간간격 (ms)
    pagingEnabled={true} // 스크롤시 페이지네이션
>
 // 중략
</ScrollView>
가로 슬라이드를 구현하기 위하여 ScrollView 컴포넌트를 사용한다. horizontal 속성을 true 로 설정하면 수평으로 스크롤한다. scrollEventThrottle 속성은 디바이스가 스크롤 이벤트를 감지하는 시간간격이다. 숫자가 낮을수록 스크롤 이벤트를 더 자주 감지하고 정확도도 높아지지만, 버벅거리는 등의 성능문제가 발생할 수 있다. pagingEnabled 속성을 true 로 설정하면 캐로셀과 같은 페이지네이션이 된다. css 의 scroll-snap-type 속성을 x mandatory 로 설정한 것처럼 동작한다.
<View style={{ width, height }}>
    <Text>랜딩페이지 1</Text>
</View>
<View style={{ width, height }}>
    <Text>랜딩페이지 2</Text>
</View>
<View style={{ width, height }}>
    <Text>랜딩페이지 3</Text>
</View>
ScrollView 컴포넌트 내부에 들어가는 각각의 슬라이드 뷰이다.
/**
 * @format
 */

import {AppRegistry} from 'react-native';
// import App from './App';
import LandingScreen from './screens/LandingScreen'
import {name as appName} from './app.json';

AppRegistry.registerComponent(appName, () => LandingScreen);
랜딩페이지 동작을 테스트하기 위하여 index.js 파일에서 App 컴포넌트 대신 LandingScreen 컴포넌트를 화면에 렌더링한다.
* 랜딩페이지에 이미지와 문구 추가하기
무료 이미지 다운로드 사이트(unsplash, pixabay 등)에서 필요한 이미지를 다운로드한 다음에 assets/imgs 폴더에 추가해준다.
import React from 'react'
import { SafeAreaView, View, Text, StyleSheet, StatusBar, ScrollView, Dimensions, ImageBackground } from 'react-native'
function LandingScreen({navigation}){
const { width, height } = Dimensions.get('window')
return (
<>
<StatusBar hidden></StatusBar>
<SafeAreaView style={styles.block}>
<ScrollView
style={{ flex: 1 }}
horizontal={true} // 수평 스크롤링
scrollEventThrottle={16} // 스크롤 이벤트 감지하는 시간간격 (ms)
pagingEnabled={true} // 스크롤시 페이지네이션
>
<View style={{ width, height }}>
<ImageBackground source={require('../assets/imgs/landing-1.jpg')} style={{ width, height }}>
<View style={[styles.textContent, { width, height }]}>
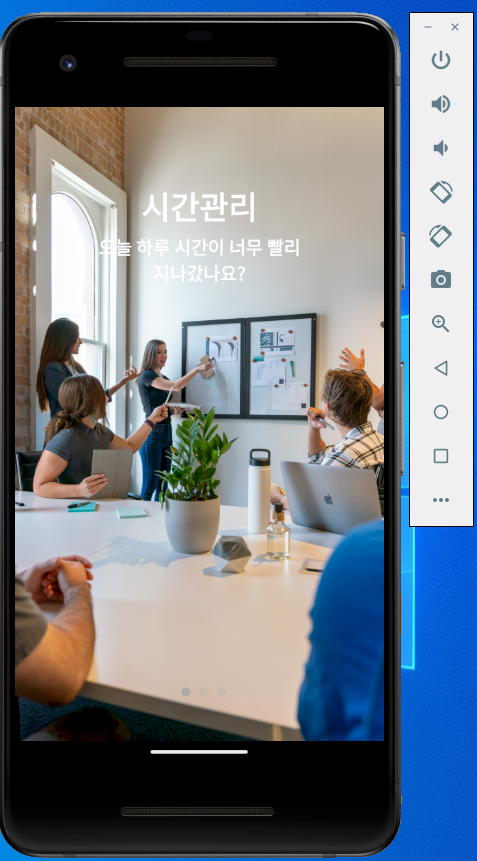
<Text style={styles.title}>시간관리</Text>
<Text style={styles.description}>오늘 하루 시간이 너무 빨리 지나갔나요?</Text>
</View>
</ImageBackground >
</View>
<View style={{ width, height }}>
<ImageBackground source={require('../assets/imgs/landing-2.jpg')} style={{ width, height }}>
<View style={[styles.textContent, { width, height }]}>
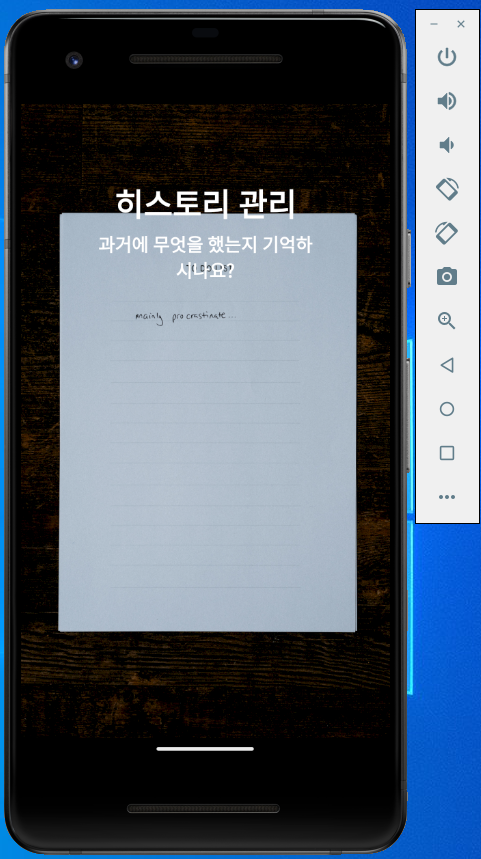
<Text style={styles.title}>히스토리 관리</Text>
<Text style={styles.description}>과거에 무엇을 했는지 기억하시나요?</Text>
</View>
</ImageBackground>
</View>
<View style={{ width, height }}>
<ImageBackground source={require('../assets/imgs/landing-3.jpg')} style={{ width, height }}>
<View style={[styles.textContent, { width, height }]}>
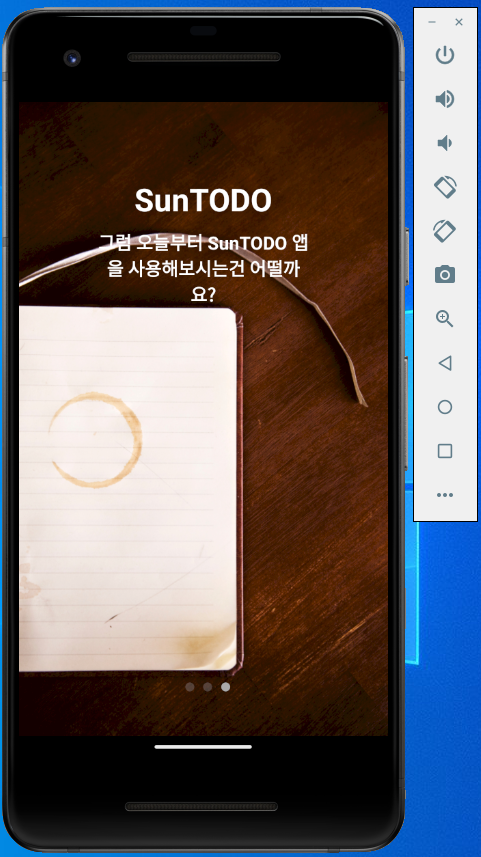
<Text style={styles.title}>SunTODO</Text>
<Text style={styles.description}>그럼 오늘부터 SunTODO 앱을 사용해보시는건 어떨까요?</Text>
</View>
</ImageBackground>
</View>
</ScrollView>
</SafeAreaView>
</>
)
}
const styles = StyleSheet.create({
block: {
flex: 1
},
textContent: {
justifyContent: 'flex-start',
alignItems: 'center',
padding: 85,
},
title: {
fontSize: 35,
fontWeight: 'bold',
color: '#fff'
},
description: {
fontSize: 20,
fontWeight: 'bold',
marginTop: 10,
color: '#fff',
textAlign: 'center'
}
})
export default LandingScreenscreens > LandingScreen.js 파일을 위와 같이 수정한다.
import { SafeAreaView, View, Text, StyleSheet, StatusBar, ScrollView, Dimensions, ImageBackground } from 'react-native'이미지를 보여주기 위하여 ImageBackground 컴포넌트를 추가로 임포트한다.
<StatusBar hidden></StatusBar>랜딩페이지이므로 상태바는 hidden 속성을 부여하여 화면에서 숨긴다.
<ImageBackground source={require('../assets/imgs/landing-1.jpg')} style={{ width, height }}>
    <View style={[styles.textContent, { width, height }]}>
        <Text style={styles.title}>시간관리</Text>
        <Text style={styles.description}>오늘 하루 시간이 너무 빨리 지나갔나요?</Text>
    </View>
</ImageBackground >
Image 컴포넌트는 내부에 Text 컴포넌트를 넣을수 없다. 그래서 대신에 ImageBackground 컴포넌트를 사용하여 이미지 위에 문구를 추가할 수 있도록 하였다. 사용방법은 Image 컴포넌트와 동일하다. ImageBackground 와 문구를 감싸고 있는 View 컴포넌트는 화면 전체 너비와 높이를 가지도록 width, height 을 디바이스 크기에 맞춰준다.
textContent: {
    justifyContent: 'flex-start',
    alignItems: 'center',
    padding: 85,
  },
  title: {
    fontSize: 35,
    fontWeight: 'bold',
    color: '#fff'
  },
  description: {
    fontSize: 20,
    fontWeight: 'bold',
    marginTop: 10,
    color: '#fff',
    textAlign: 'center'
  }
랜딩페이지에 보여지는 문구에 대한 스타일 코드이다.


* 랜딩페이지 스크롤 인디케이터 보여주기
import React, { useState } from 'react'
import { SafeAreaView, View, Text, StyleSheet, StatusBar, ScrollView, Dimensions, ImageBackground  } from 'react-native'

function LandingScreen({navigation}){
    const { width, height } = Dimensions.get('window')
    const [currentPageIndex, setCurrentPageIndex] = useState(0)
    console.log('페이지 번호: ', currentPageIndex)

    const setCurrentPage = (e) => {
        const { x } = e.nativeEvent.contentOffset // x : 스크롤 위치
        console.log("스크롤 위치: ", x, "화면너비: ", width)
        const nextPageIndex = Math.ceil(x / width) // x / width : 스크롤 위치 / 화면너비 -> 페이지번호
        console.log(nextPageIndex)
        if(nextPageIndex !== currentPageIndex){
            setCurrentPageIndex(nextPageIndex)
        }
    }
    return (
        <>
            <StatusBar hidden></StatusBar>
            <SafeAreaView style={styles.block}>
                <ScrollView
                    style={{ flex: 1 }}
                    horizontal={true} // 수평 스크롤링
                    scrollEventThrottle={16} // 스크롤 이벤트 감지하는 시간간격 (ms)
                    pagingEnabled={true} // 스크롤시 페이지네이션
                    showsHorizontalScrollIndicator={false} // 스크롤바 숨기기
                    onScroll={setCurrentPage}
                >
                    <View style={{ width, height }}>
                        <ImageBackground source={require('../assets/imgs/landing-1.jpg')} style={{ width, height }}>
                            <View style={[styles.textContent, { width, height }]}>
                                <Text style={styles.title}>시간관리</Text>
                                <Text style={styles.description}>오늘 하루 시간이 너무 빨리 지나갔나요?</Text>
                            </View>
                        </ImageBackground >
                    </View>
                    <View style={{ width, height }}>
                        <ImageBackground source={require('../assets/imgs/landing-2.jpg')} style={{ width, height }}>
                            <View style={[styles.textContent, { width, height }]}>
                                <Text style={styles.title}>히스토리 관리</Text>
                                <Text style={styles.description}>과거에 무엇을 했는지 기억하시나요?</Text>
                            </View>
                        </ImageBackground>
                    </View>
                    <View style={{ width, height }}>
                        <ImageBackground source={require('../assets/imgs/landing-3.jpg')} style={{ width, height }}>
                            <View style={[styles.textContent, { width, height }]}>
                                <Text style={styles.title}>SunTODO</Text>
                                <Text style={styles.description}>그럼 오늘부터 SunTODO 앱을 사용해보시는건 어떨까요?</Text>
                            </View>
                        </ImageBackground>
                    </View>
                </ScrollView>

                <View style={styles.scrollIndicatorWrapper}>
                    {Array(3).fill(0).map((_, index) => (
                        <View key={index} style={[styles.scrollIndicator, { opacity: currentPageIndex === index ? 1: 0.3}]}></View>
                    ))}
                </View>
            </SafeAreaView>
        </>
    )
}

const styles = StyleSheet.create({
  block: {
    flex: 1
  },
  textContent: {
    justifyContent: 'flex-start',
    alignItems: 'center',
    padding: 85,
  },
  title: {
    fontSize: 35,
    fontWeight: 'bold',
    color: '#fff'
  },
  description: {
    fontSize: 20,
    fontWeight: 'bold',
    marginTop: 10,
    color: '#fff',
    textAlign: 'center'
  },
  scrollIndicatorWrapper:{
    position: 'absolute',
    left: 0, right: 0,
    bottom: 50,
    flexDirection: 'row',
    justifyContent: 'center',
    alignItems: 'center'
  },
  scrollIndicator: {
    height: 10,
    width: 10,
    borderRadius: 10 / 2,
    backgroundColor: '#aaa',
    marginLeft: 10,
  }
})
export default LandingScreen
screens > LandingScreen.js 파일을 위와 같이 수정한다.
import React, { useState } from 'react'페이지 번호를 저장하기 위하여 useState 훅을 임포트한다.
const [currentPageIndex, setCurrentPageIndex] = useState(0)
console.log('페이지 번호: ', currentPageIndex)
페이지번호를 저장하기 위한 상태를 정의한다. 그리고 디버깅을 위하여 페이지번호를 화면에 출력한다.
const setCurrentPage = (e) => {
    const { x } = e.nativeEvent.contentOffset // x : 스크롤 위치
    console.log("스크롤 위치: ", x, "화면너비: ", width)
    const nextPageIndex = Math.ceil(x / width) // x / width : 스크롤 위치 / 화면너비 -> 페이지번호
    console.log(nextPageIndex)
    if(nextPageIndex !== currentPageIndex){
        setCurrentPageIndex(nextPageIndex)
    }
}
사용자가 랜딩페이지를 스크롤할때 실행되는 함수이다. 스크롤 위치를 화면너비로 나누면 현재 페이지번호(nextPageIndex) 를 계산할 수 있다. 이때 주의할점은 실제로 값을 출력해보면 소수점 아래 자릿수가 미비하게 달라서 우리가 원하는대로 동작하지 않는다는 점이다. 그래서 Math.floor 대신 Math.ceil 을 사용하였다. 이전 페이지번호와 스크롤한 페이지번호가 다르면 페이지가 바뀌었으므로 새로운 페이지번호를 state 에 저장해준다.
<ScrollView
    style={{ flex: 1 }}
    horizontal={true} // 수평 스크롤링
    scrollEventThrottle={16} // 스크롤 이벤트 감지하는 시간간격 (ms)
    pagingEnabled={true} // 스크롤시 페이지네이션
    showsHorizontalScrollIndicator={false} // 스크롤바 숨기기
    onScroll={setCurrentPage}
>
    // 중략
</ScrollView>
showsHorizontalScrollIndicator 속성은 스크롤바를 보여주거나 숨길수 있도록 설정할 수 있다. 스크롤 이벤트가 발생하면 setCuurentPage 함수가 실행되도록 한다.
<View style={styles.scrollIndicatorWrapper}>
    {Array(3).fill(0).map((_, index) => (
        <View key={index} style={[styles.scrollIndicator, { opacity: currentPageIndex === index ? 1: 0.3}]}></View>
    ))}
</View>
스크롤 인디케이터를 보여주는 UI이다. 현재는 3개의 랜딩페이지가 존재하므로 3개의 원소를 가지는 배열을 생성한 다음 index 값을 조회한다. index 값이 현재 페이지번호와 일치하면 인디케이터를 진한 색상으로 보여주고, 일치하지 않는 나머지 페이지의 인디케이터는 opacity 를 엷게 줘서 연한 색상으로 보여준다.
scrollIndicatorWrapper:{
    position: 'absolute',
    left: 0, right: 0,
    bottom: 50,
    flexDirection: 'row',
    justifyContent: 'center',
    alignItems: 'center'
  },
  scrollIndicator: {
    height: 10,
    width: 10,
    borderRadius: 10 / 2,
    backgroundColor: '#aaa',
    marginLeft: 10,
  }
스크롤 인디케이터는 항상 화면의 아래쪽에 위치해야 하므로 position 을 'absolute'로 설정하고, bottom 을 50 dp 정도로 설정하였다. 스크롤 인디케이터는 circle 형태이므로 width, height 을 동일하게 주고 borderRadius 는 width 의 절반으로 설정하였다.

* 코드 리팩토링하기
랜딩페이지 UI는 중복되는 컴포넌트가 많다. 그래서 아래와 같이 코드를 리팩토링하여 중복되는 UI를 새로운 컴포넌트로 빼서 재활용할 수 있도록 한다.
import landingImg1 from '../assets/imgs/landing-1.jpg'
import landingImg2 from '../assets/imgs/landing-2.jpg'
import landingImg3 from '../assets/imgs/landing-3.jpg'

export default landingData = [
    {
        title: '시간관리',
        description: '오늘 하루 시간이 너무 빨리 지나갔나요?',
        source: landingImg1
    },
    {
        title: '히스토리 관리',
        description: '과거에 무엇을 했는지 기억하시나요?',
        source: landingImg2
    },
    {
        title: 'SunTODO',
        description: '그럼 오늘부터 SunTODO 앱을 사용해보시는건 어떨까요?',
        source: landingImg3
    }
]
루트디렉토리에 data 폴더를 생성하고, 그안에 landingData.js 파일을 생성하고 위와 같이 작성한다. 랜딩페이지에 들어갈 문구와 이미지경로를 미리 배열 형태로 저장해둔다.
import React from 'react'
import { View, Text, ImageBackground, StyleSheet } from 'react-native'

function LandingPage({ width, height, title, description, source}){
    return (
        <View style={{ width, height }}>
            <ImageBackground source={source} style={{ width, height }}>
                <View style={[styles.textContent, { width, height }]}>
                    <Text style={styles.title}>{title}</Text>
                    <Text style={styles.description}>{description}</Text>
                </View>
            </ImageBackground >
        </View>
    )
}
export default LandingPage

const styles = StyleSheet.create({
    textContent: {
        justifyContent: 'flex-start',
        alignItems: 'center',
        padding: 85,
    },
    title: {
        fontSize: 35,
        fontWeight: 'bold',
        color: '#fff'
    },
    description: {
        fontSize: 20,
        fontWeight: 'bold',
        marginTop: 10,
        color: '#fff',
        textAlign: 'center'
    },
})
components > LandingPage.js 파일을 생성하고 위와 같이 작성한다. 중복되는 랜딩페이지 UI를 LandingPage 컴포넌트로 따서 빼내어 정의하였다. 그리고 랜딩페이지의 사이즈, 문구, 이미지 경로를 props 로 전달받아 설정해주었다.
import React, { useState } from 'react'
import { SafeAreaView, View, Text, StyleSheet, StatusBar, ScrollView, Dimensions, ImageBackground  } from 'react-native'
import LandingPage from '../components/LandingPage'
import landingData from '../data/landingData'

function LandingScreen({navigation}){
    const { width, height } = Dimensions.get('window')
    const [currentPageIndex, setCurrentPageIndex] = useState(0)
    console.log('페이지 번호: ', currentPageIndex)

    const setCurrentPage = (e) => {
        const { x } = e.nativeEvent.contentOffset // x : 스크롤 위치
        console.log("스크롤 위치: ", x, "화면너비: ", width)
        const nextPageIndex = Math.ceil(x / width) // x / width : 스크롤 위치 / 화면너비 -> 페이지번호
        console.log(nextPageIndex)
        if(nextPageIndex !== currentPageIndex){
            setCurrentPageIndex(nextPageIndex)
        }
    }
    return (
        <>
            <StatusBar hidden></StatusBar>
            <SafeAreaView style={styles.block}>
                <ScrollView
                    style={{ flex: 1 }}
                    horizontal={true} // 수평 스크롤링
                    scrollEventThrottle={16} // 스크롤 이벤트 감지하는 시간간격 (ms)
                    pagingEnabled={true} // 스크롤시 페이지네이션
                    showsHorizontalScrollIndicator={false} // 스크롤바 숨기기
                    onScroll={setCurrentPage}
                >
                    {landingData.map(page => (
                        <LandingPage
                            width={width}
                            height={height}
                            {...page}
                        />
                    ))}
                </ScrollView>

                <View style={styles.scrollIndicatorWrapper}>
                    {Array(3).fill(0).map((_, index) => (
                        <View key={index} style={[styles.scrollIndicator, { opacity: currentPageIndex === index ? 1: 0.3}]}></View>
                    ))}
                </View>
            </SafeAreaView>
        </>
    )
}

const styles = StyleSheet.create({
  block: {
    flex: 1
  },
  scrollIndicatorWrapper:{
    position: 'absolute',
    left: 0, right: 0,
    bottom: 50,
    flexDirection: 'row',
    justifyContent: 'center',
    alignItems: 'center'
  },
  scrollIndicator: {
    height: 10,
    width: 10,
    borderRadius: 10 / 2,
    backgroundColor: '#aaa',
    marginLeft: 10,
  }
})
export default LandingScreen
screens > LandingScreen.js 파일을 위와 같이 수정한다.
import LandingPage from '../components/LandingPage'
import landingData from '../data/landingData'
랜딩페이지에 들어갈 UI와 데이터를 임포트한다.
<View style={{ width, height }}>
                        <ImageBackground source={require('../assets/imgs/landing-1.jpg')} style={{ width, height }}>
                            <View style={[styles.textContent, { width, height }]}>
                                <Text style={styles.title}>시간관리</Text>
                                <Text style={styles.description}>오늘 하루 시간이 너무 빨리 지나갔나요?</Text>
                            </View>
                        </ImageBackground >
                    </View>
                    <View style={{ width, height }}>
                        <ImageBackground source={require('../assets/imgs/landing-2.jpg')} style={{ width, height }}>
                            <View style={[styles.textContent, { width, height }]}>
                                <Text style={styles.title}>히스토리 관리</Text>
                                <Text style={styles.description}>과거에 무엇을 했는지 기억하시나요?</Text>
                            </View>
                        </ImageBackground>
                    </View>
                    <View style={{ width, height }}>
                        <ImageBackground source={require('../assets/imgs/landing-3.jpg')} style={{ width, height }}>
                            <View style={[styles.textContent, { width, height }]}>
                                <Text style={styles.title}>SunTODO</Text>
                                <Text style={styles.description}>그럼 오늘부터 SunTODO 앱을 사용해보시는건 어떨까요?</Text>
                            </View>
                        </ImageBackground>
                    </View>
기존에는 중복되는 UI를 위와 같이 그대로 보여주었다. 위의 코드를 제거하고 아래와 같이 작성한다.
{landingData.map((page, index) => (
    <LandingPage
        width={width}
        height={height}
        {...page}
        key={index}
    />
))}
랜딩페이지에 들어갈 데이터를 담고 있는 landingData 배열을 map 으로 조회하고, 새로 생성한 LandingPage 컴포넌트를 재활용하여 랜딩페이지들을 보여주도록 한다. 이때 title, description, source 속성은 page 객체에 포함되어 있는 프로퍼티이므로 위와 같이 중괄호와 스프레드 연산자를 이용하여 곧바로 설정해줄 수 있다.
textContent: {
    justifyContent: 'flex-start',
    alignItems: 'center',
    padding: 85,
  },
  title: {
    fontSize: 35,
    fontWeight: 'bold',
    color: '#fff'
  },
  description: {
    fontSize: 20,
    fontWeight: 'bold',
    marginTop: 10,
    color: '#fff',
    textAlign: 'center'
  },
기존에 screens > LandingScreen.js 파일에 있던 위의 스타일코드는 제거하도록 한다. 기존과 동일하게 랜딩페이지가 보여지는지 테스트해보자!
'프로젝트 > 할일목록 앱 (RN)' 카테고리의 다른 글
| 15. LoginButton 컴포넌트에 소셜 로그인 기능 구현하기 (0) | 2023.10.26 |
|---|---|
| 13. 스택 네비게이터를 이용하여 네비게이션하기 (0) | 2023.10.26 |
| 11. 설정화면 - 구글 로그인 이후 사용자 프로필 보여주기 (0) | 2023.10.25 |
| 10. 소셜로그인 - 구글 로그인 (0) | 2023.10.24 |
| 9. 소셜로그인 기능 - 카카오 로그인 구현하기 (0) | 2023.10.19 |