
https://vercel.com/guides/using-express-with-vercel
How to Deploy an Express.js Application to Vercel
Learn how to deploy an Express.js application to Vercel using Serverless Functions.
vercel.com
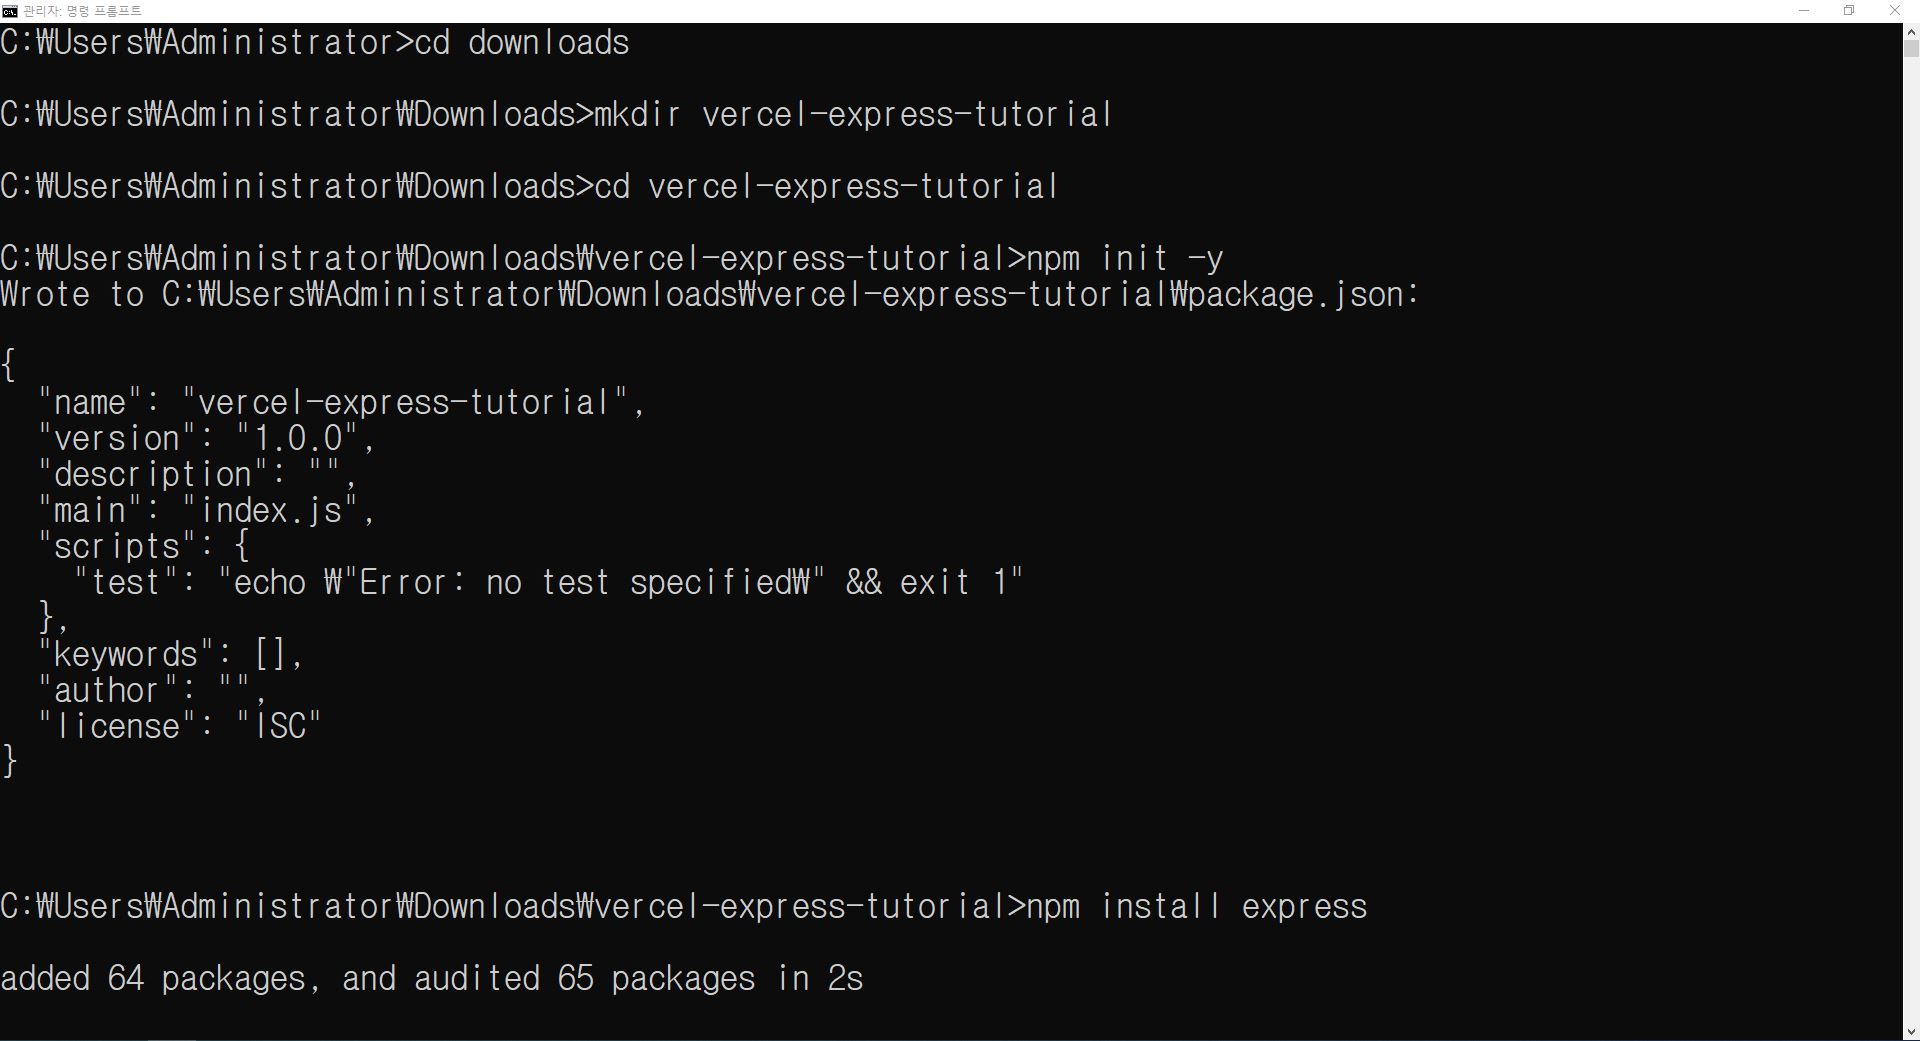
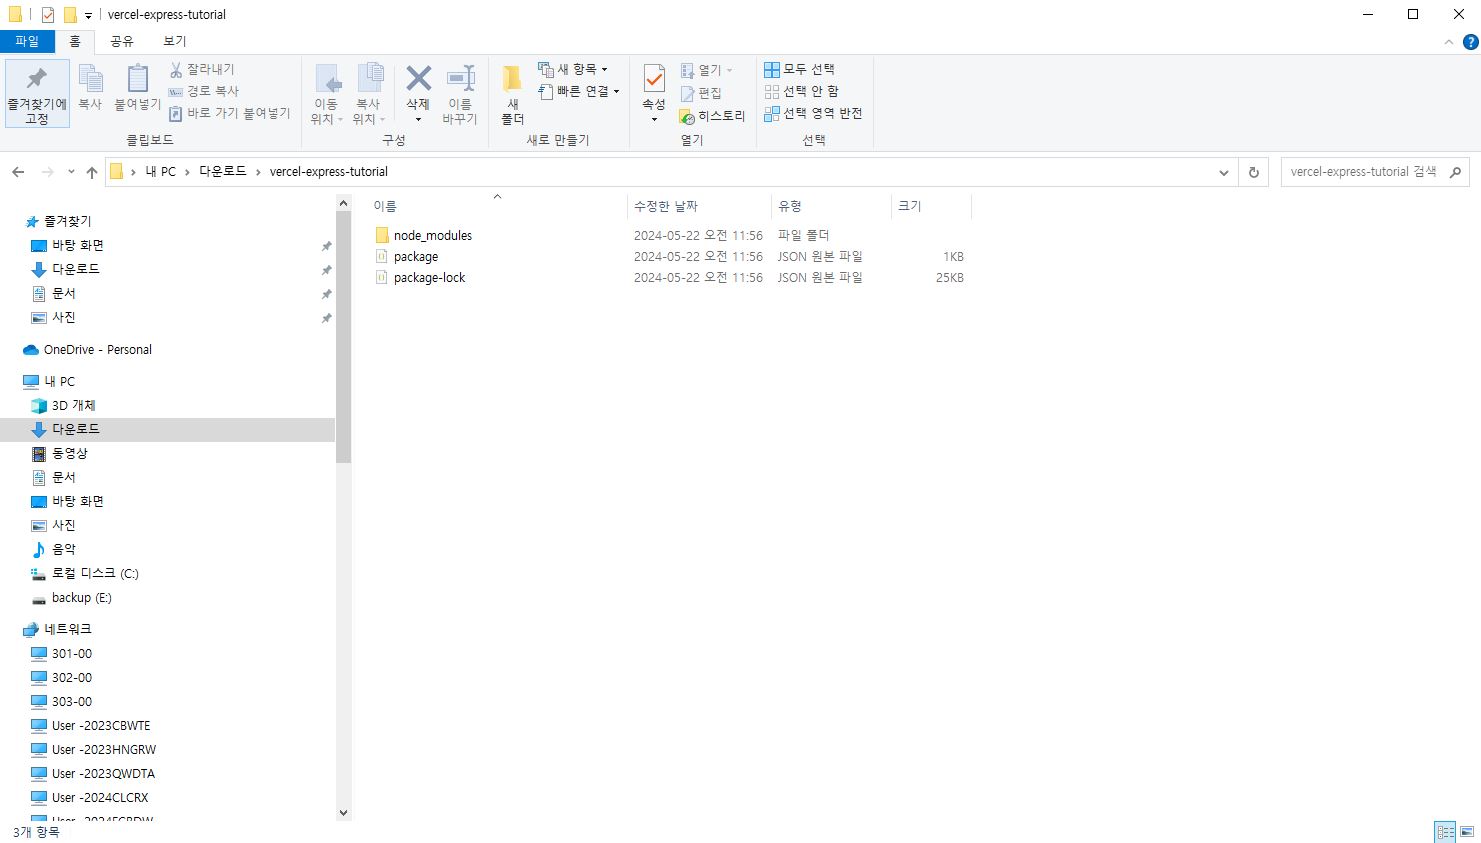
* 프로젝트 초기설정하기
const express = require("express");
const app = express();
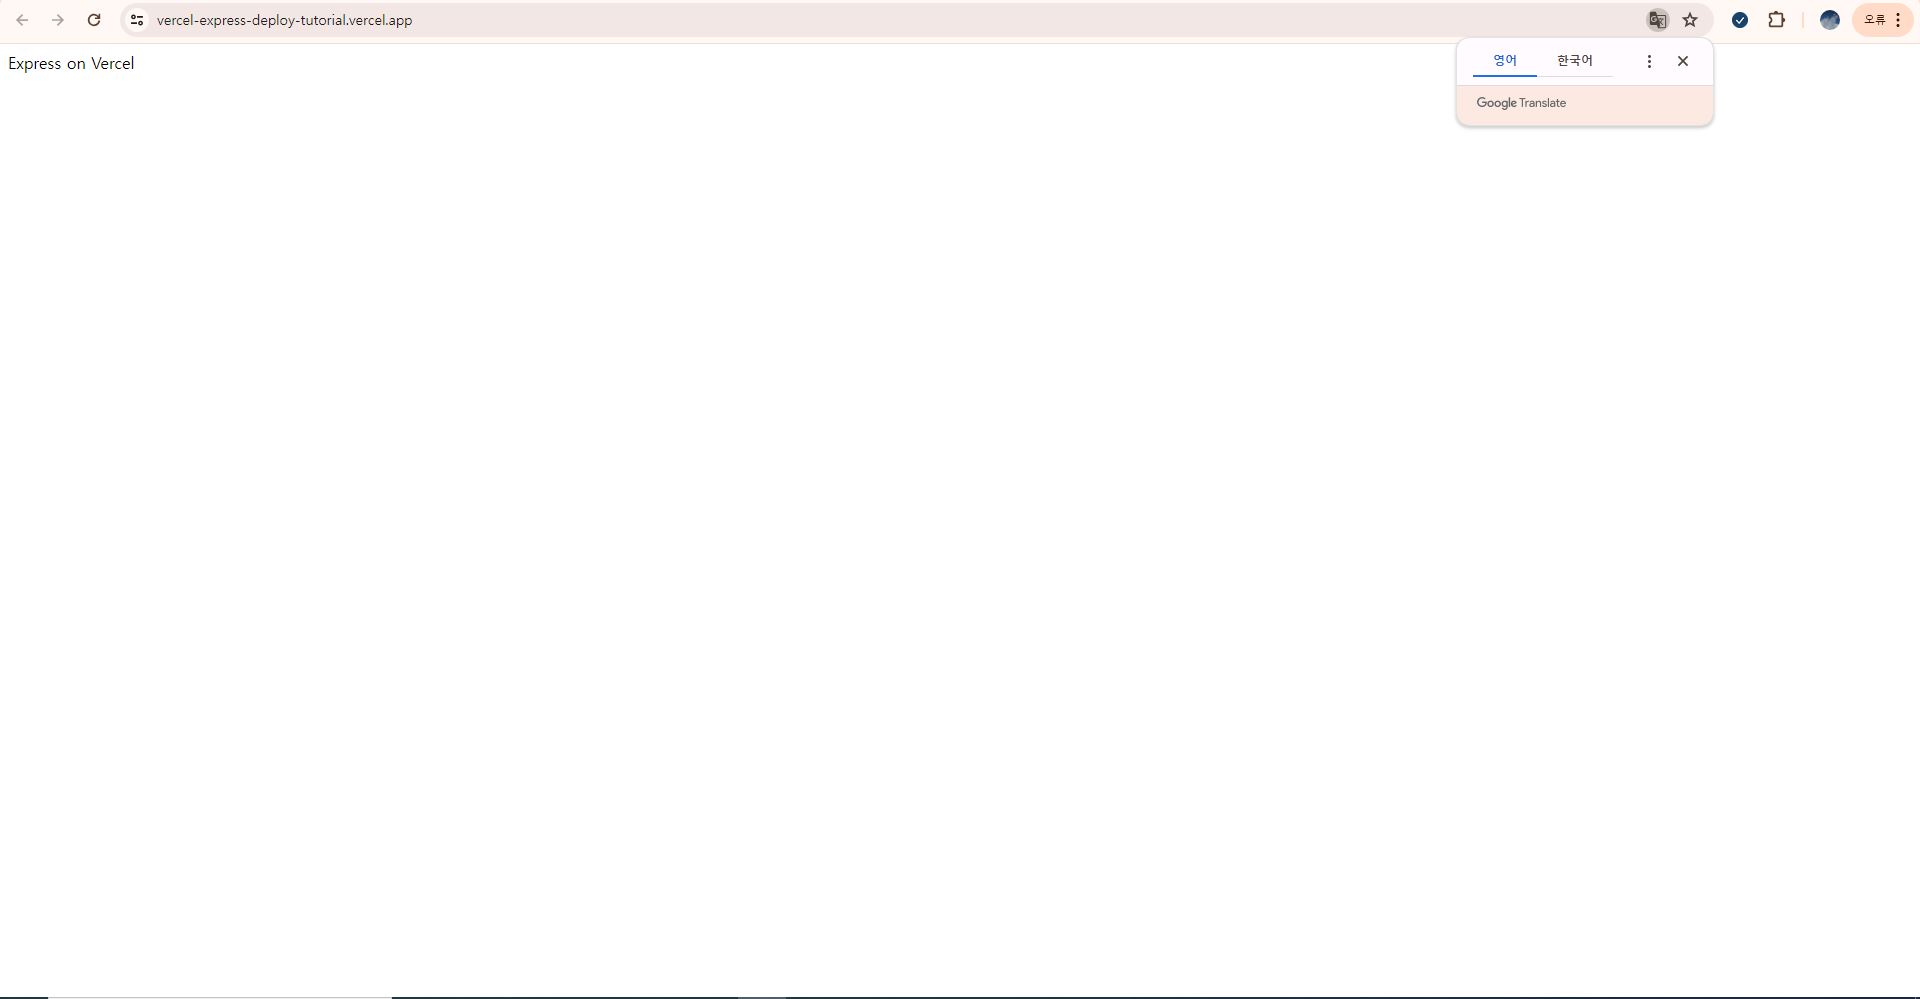
app.get("/", (req, res) => res.send("Express on Vercel"));
app.listen(3000, () => console.log("Server ready on port 3000."));
module.exports = app;
api 폴더에 index.js 파일을 작성한다. 현재 포트가 3000번인데 포트번호는 3000번이 아니라도 상관없다.
{ "version": 2, "rewrites": [{ "source": "/(.*)", "destination": "/api" }] }
vercel 배포시 설정을 위한 vercel.json 파일을 작성한다.
* 배포전 로컬환경에서 테스트하기
Vercel: Build and deploy the best Web experiences with The Frontend Cloud
Vercel's Frontend Cloud gives developers the frameworks, workflows, and infrastructure to build a faster, more personalized Web.
vercel.com
npm i -g vercel
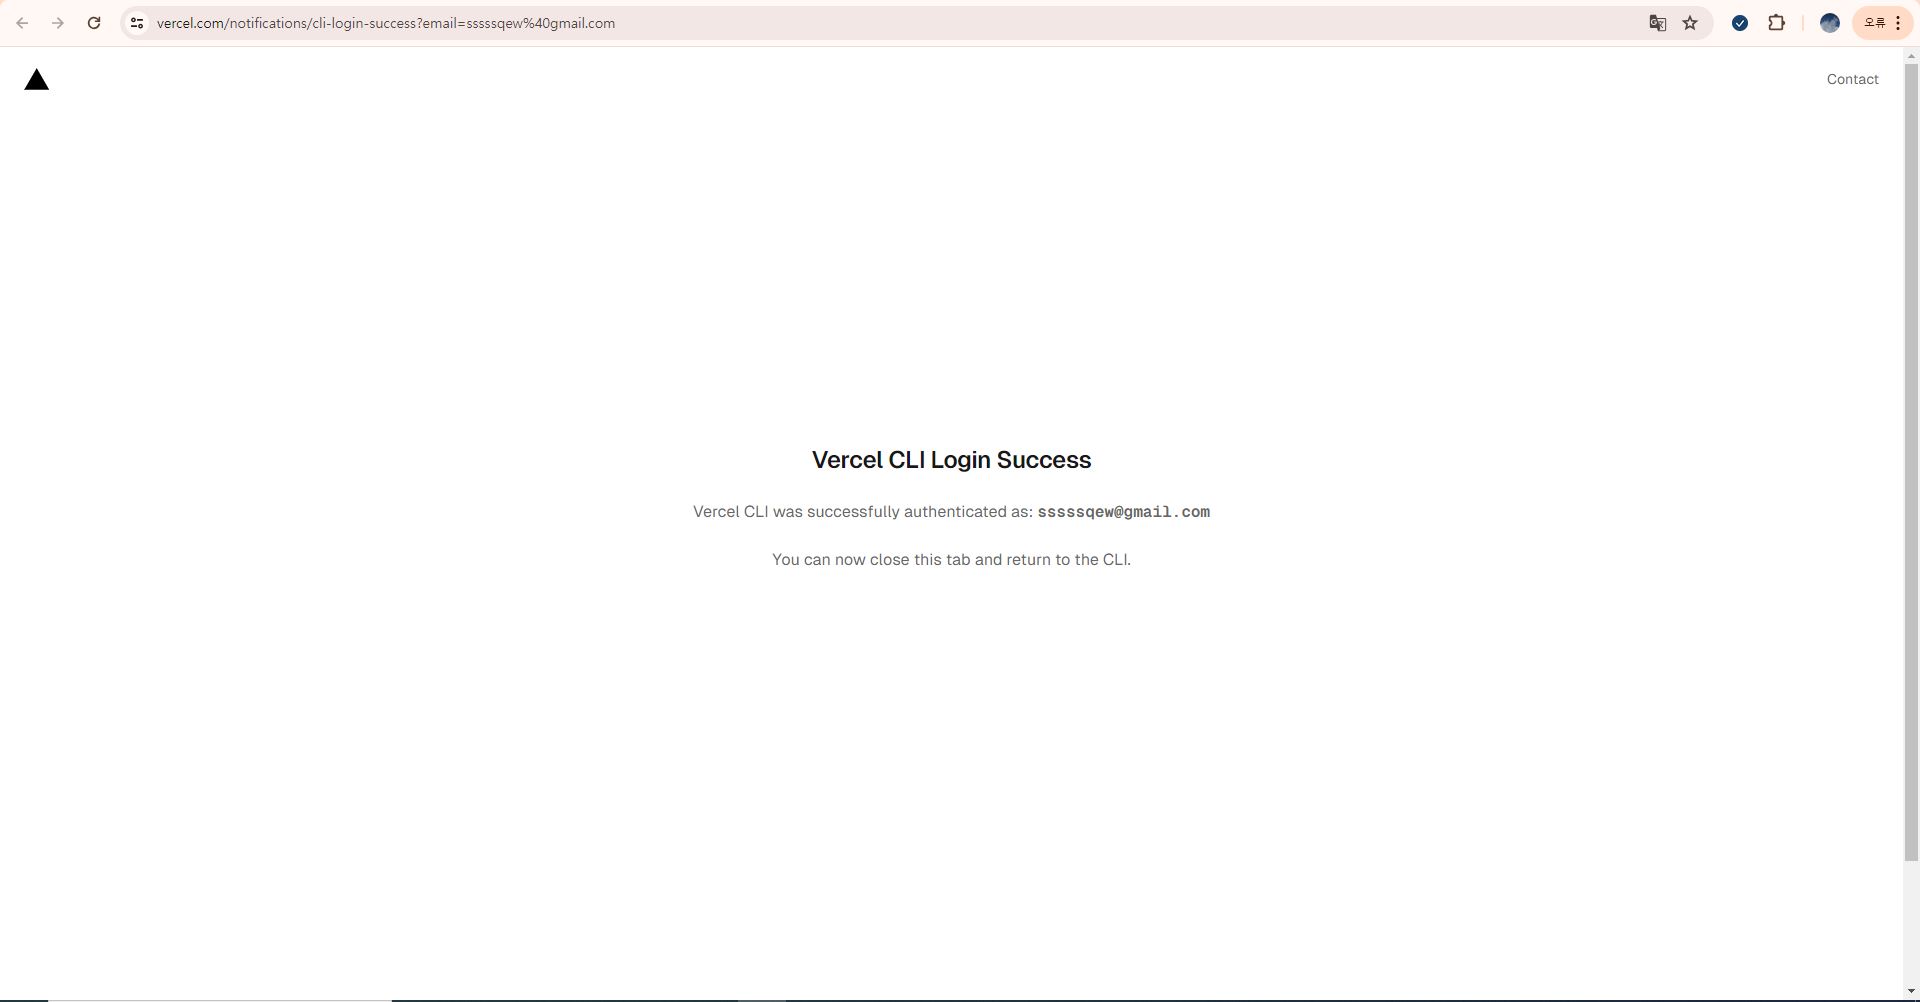
vercel login
vercel devvercel 사이트 회원가입후 해당 명령어를 실행한다.

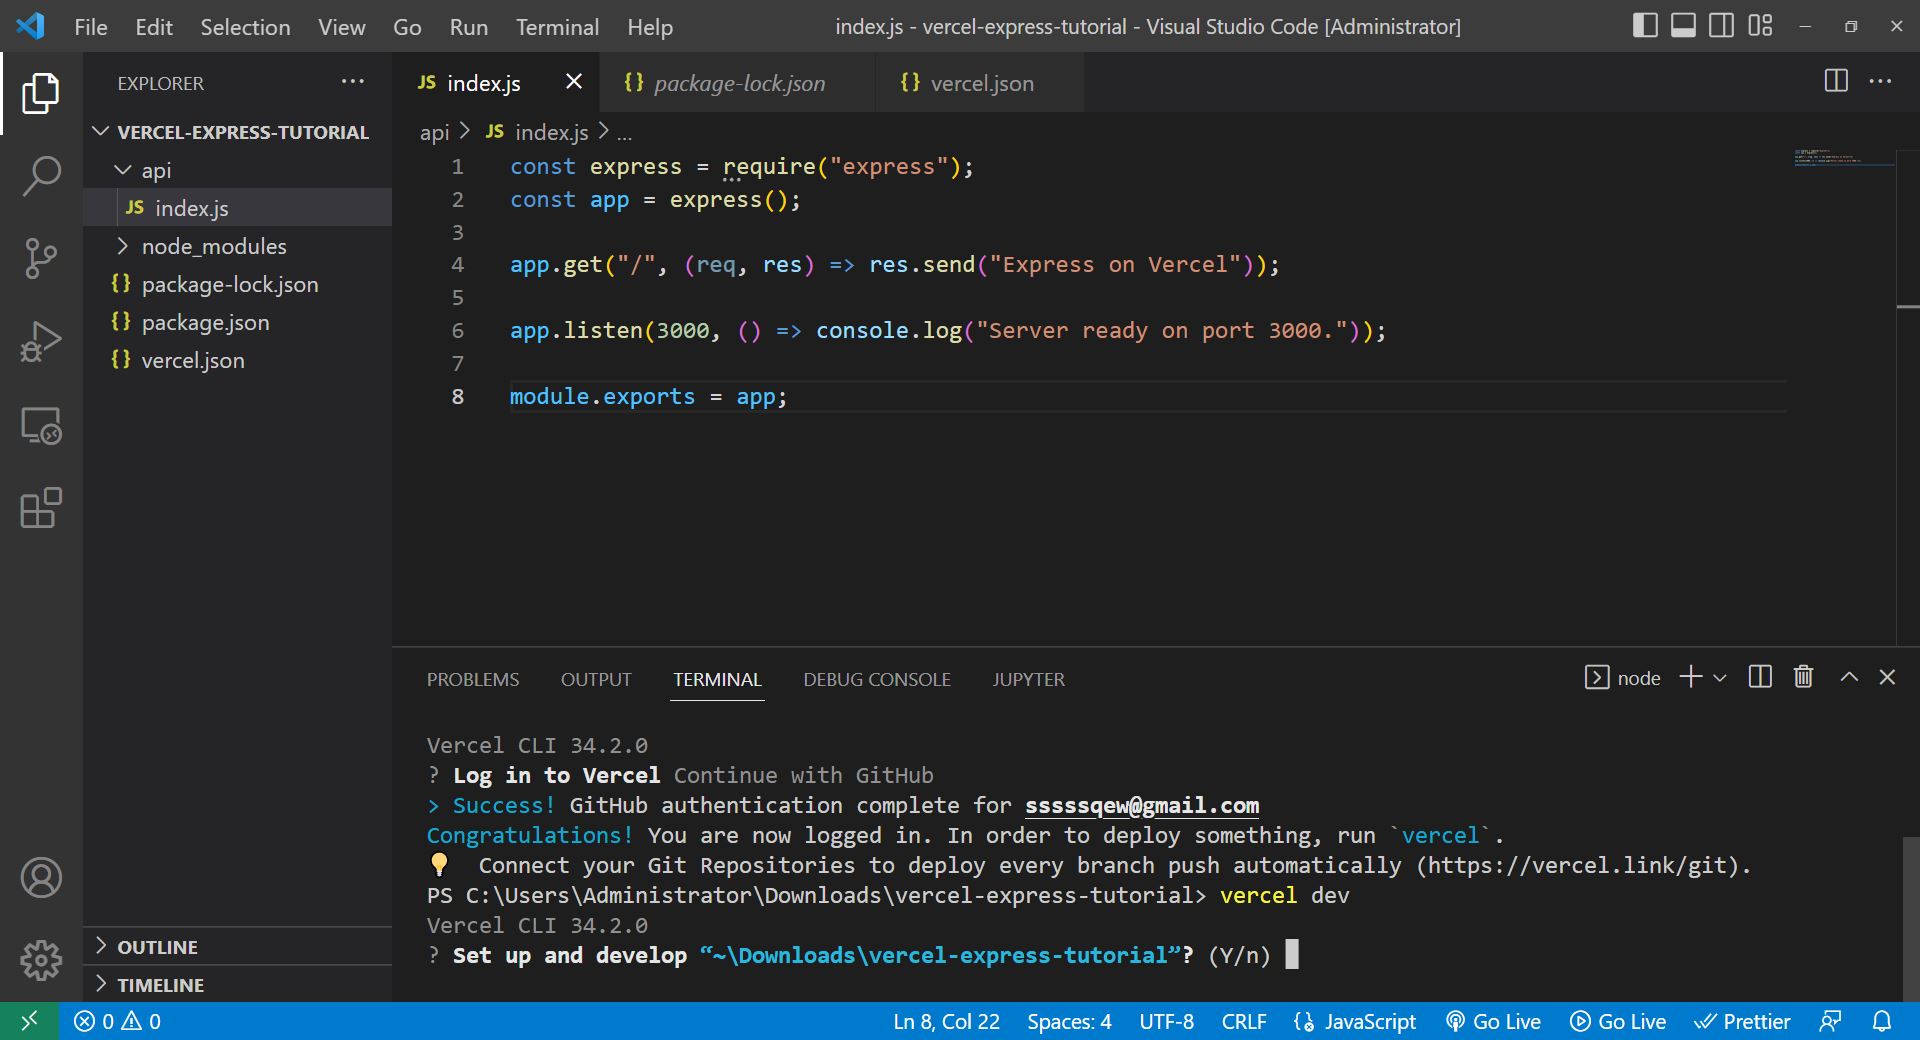
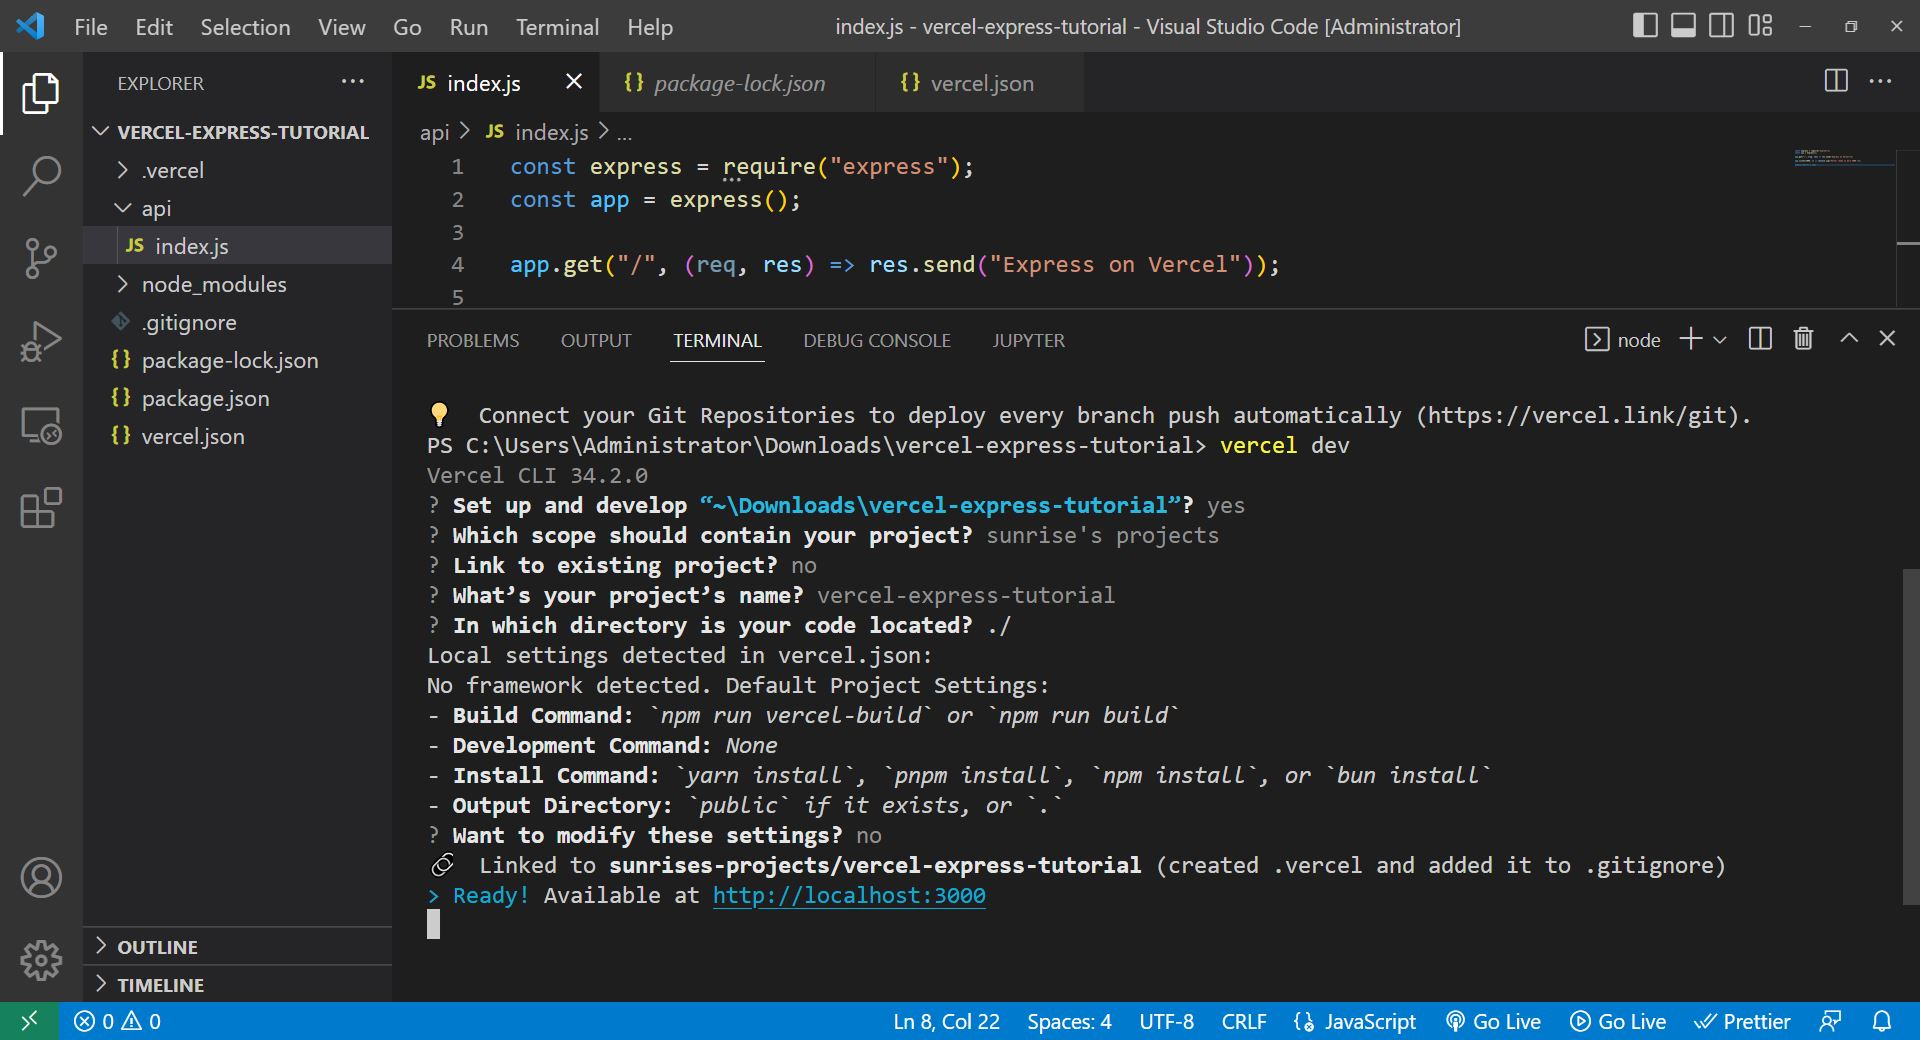
계속 엔터키 누르면 된다.
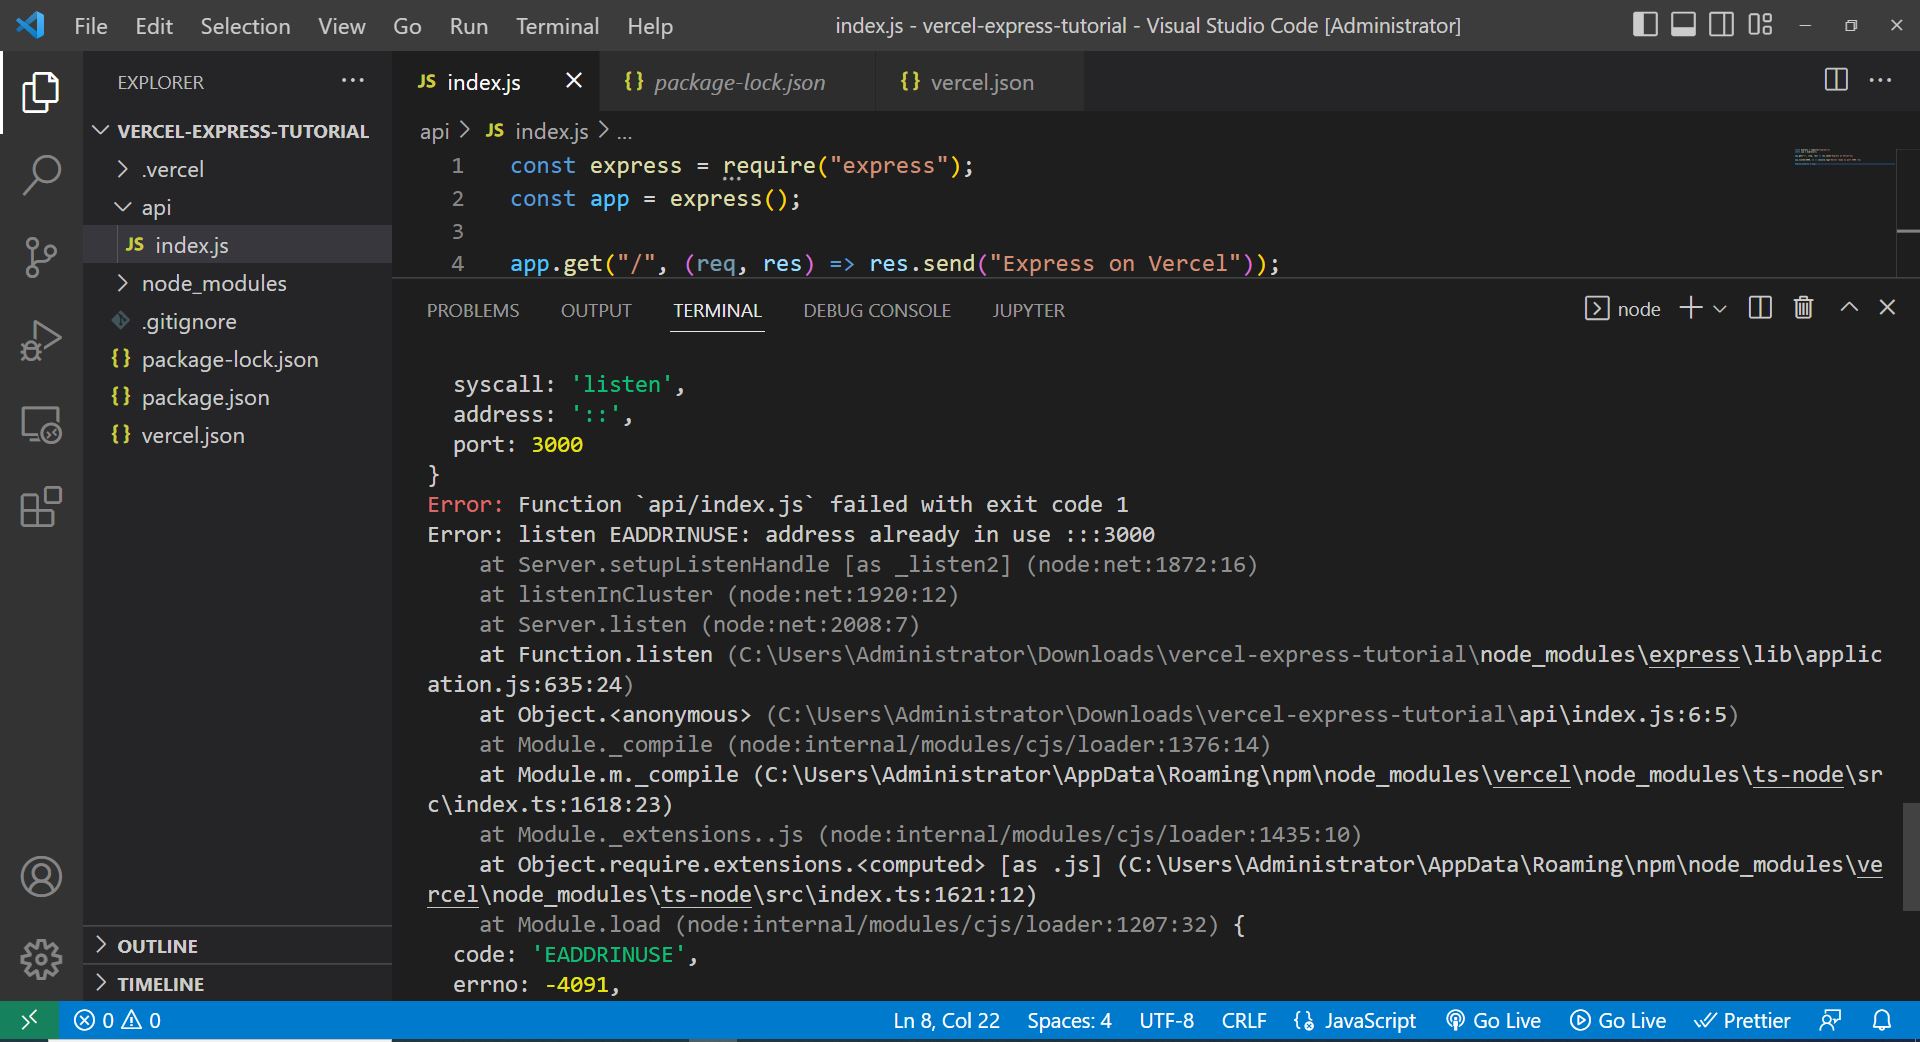
위와 같이 3000번 포트는 이미 사용중이라는 에러가 발생하면 아래와 같이 포트번호를 3000번 이외의 번호로 변경해준다.
const express = require("express");
const app = express();

app.get("/", (req, res) => res.send("Express on Vercel"));

app.listen(3001, () => console.log("Server ready on port 3000."));

module.exports = app;
만약 vercel dev 했을때 에러가 발생한다면 api 폴더를 생성하고, 그안에 index.js 파일을 넣어야 한다.
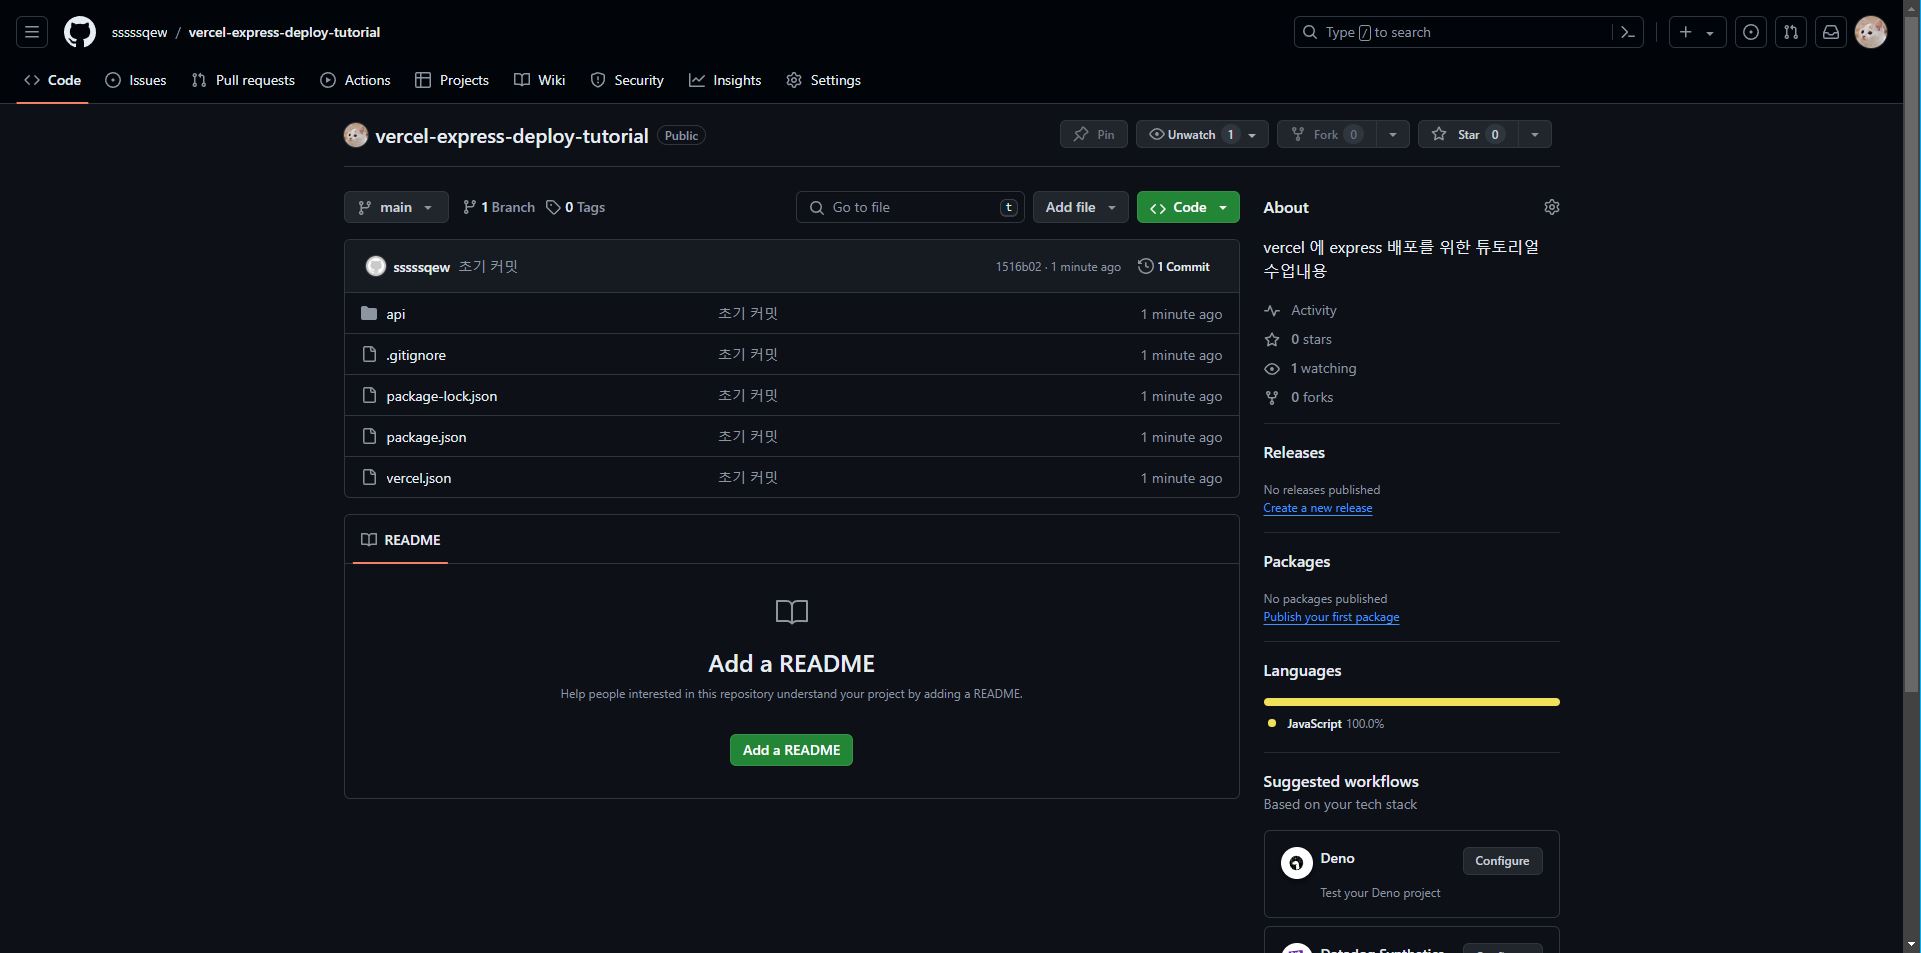
* 깃허브에 프로젝트 업로드하기
https://github.com/sssssqew/vercel-express-deploy-tutorial
GitHub - sssssqew/vercel-express-deploy-tutorial: vercel 에 express 배포를 위한 튜토리얼 수업내용
vercel 에 express 배포를 위한 튜토리얼 수업내용 . Contribute to sssssqew/vercel-express-deploy-tutorial development by creating an account on GitHub.
github.com
.vercel
.env
node_modules
.gitignore 에서 해당 폴더나 파일은 업로드에서 제외한다.
git init
git add README.md
git commit -m "first commit"
git branch -M main
git remote add origin https://github.com/sssssqew/vercel-express-deploy-tutorial.git
git push -u origin main
깃허브에 프로젝트를 업로드한다. 물론 저장소 이름은 다르므로 변경한다.
* vercel 호스팅 사이트에 배포하기
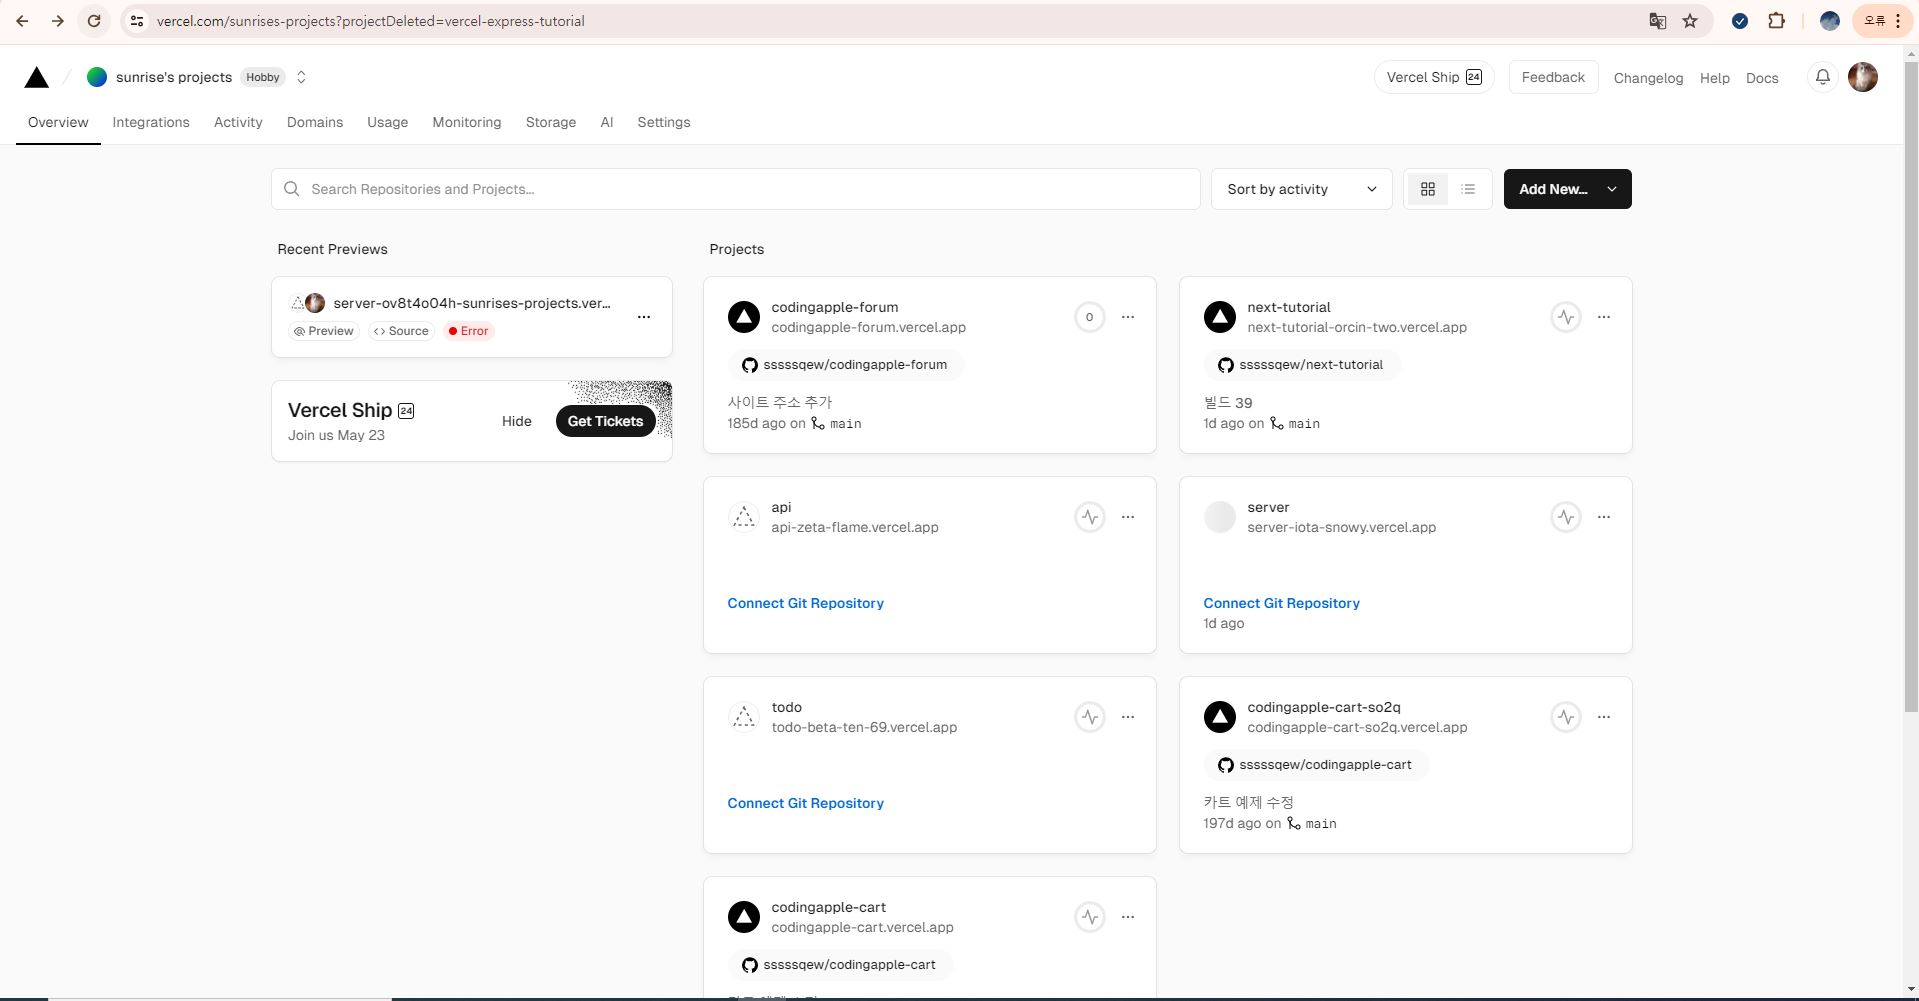
로그인후 초기화면에서 우측상단의 Add New 버튼을 클릭하고 Project 를 선택한다.
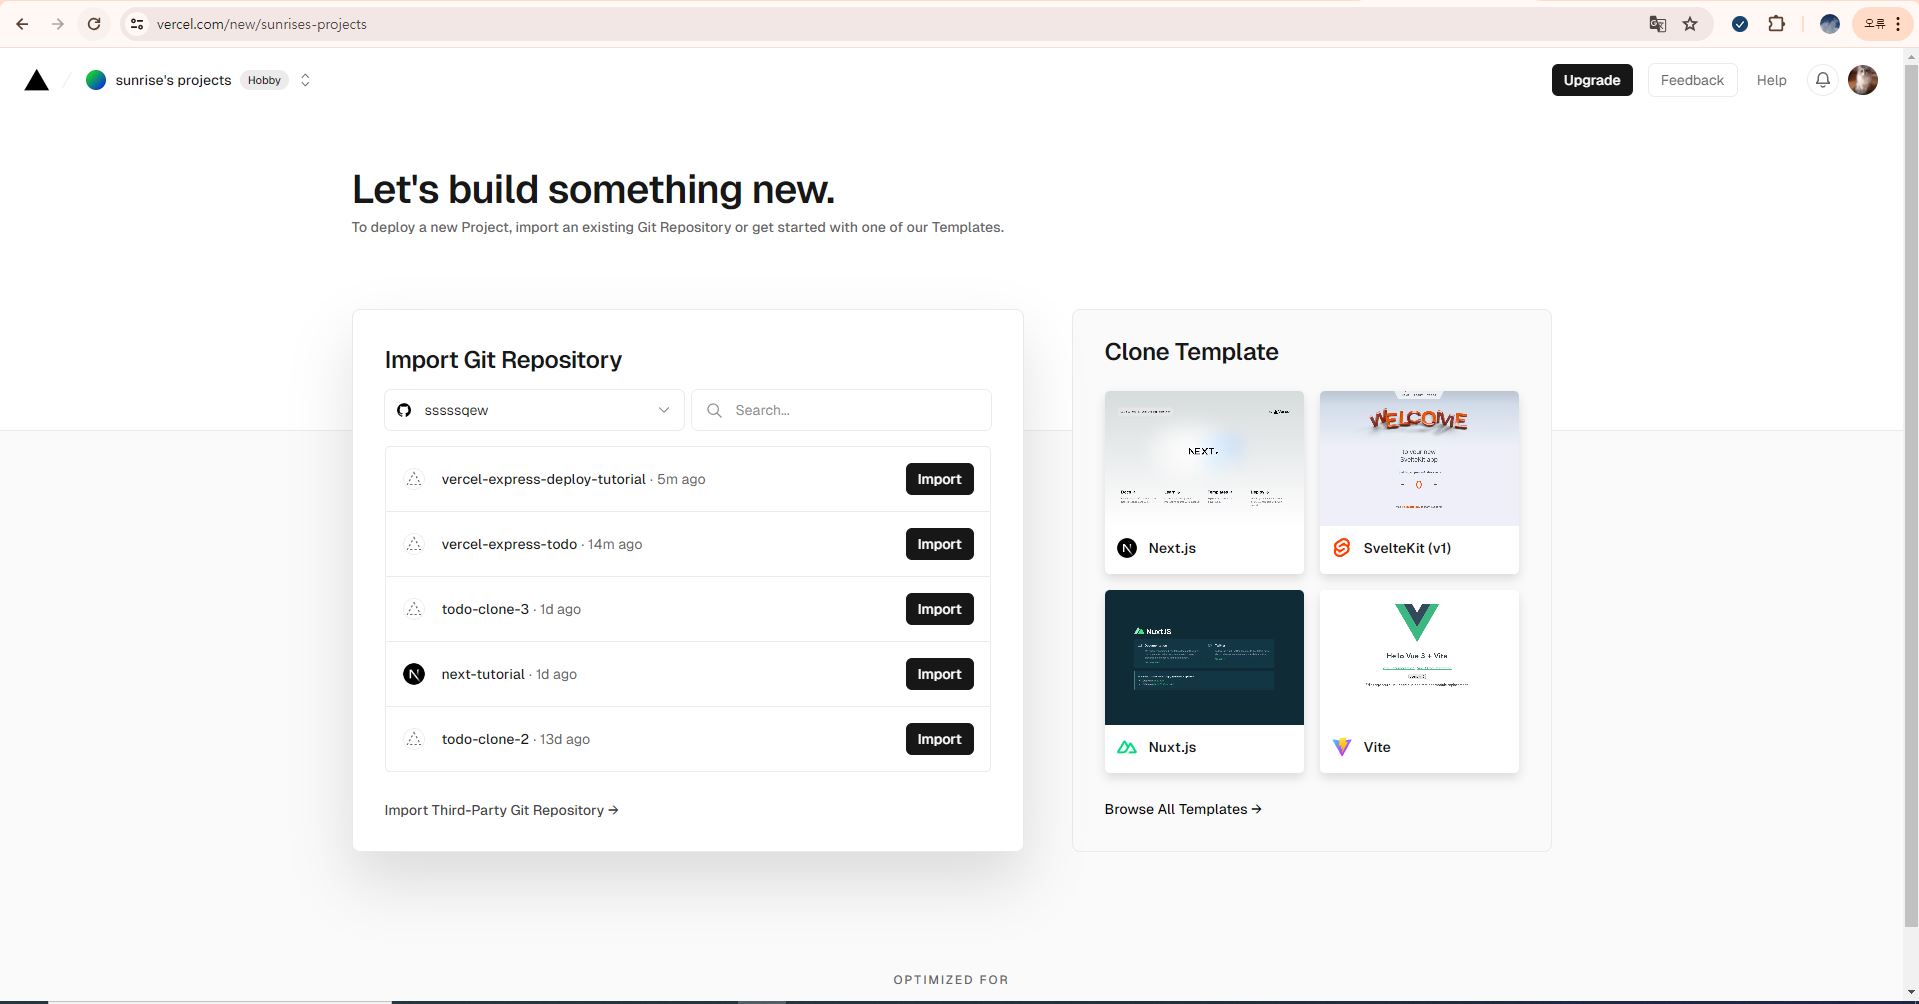
깃허브 저장소 목록에서 Vercel 에 호스팅할 저장소를 선택한다.

Deploy 버튼을 클릭한다.

Continue to Dashboard 버튼을 클릭한다.

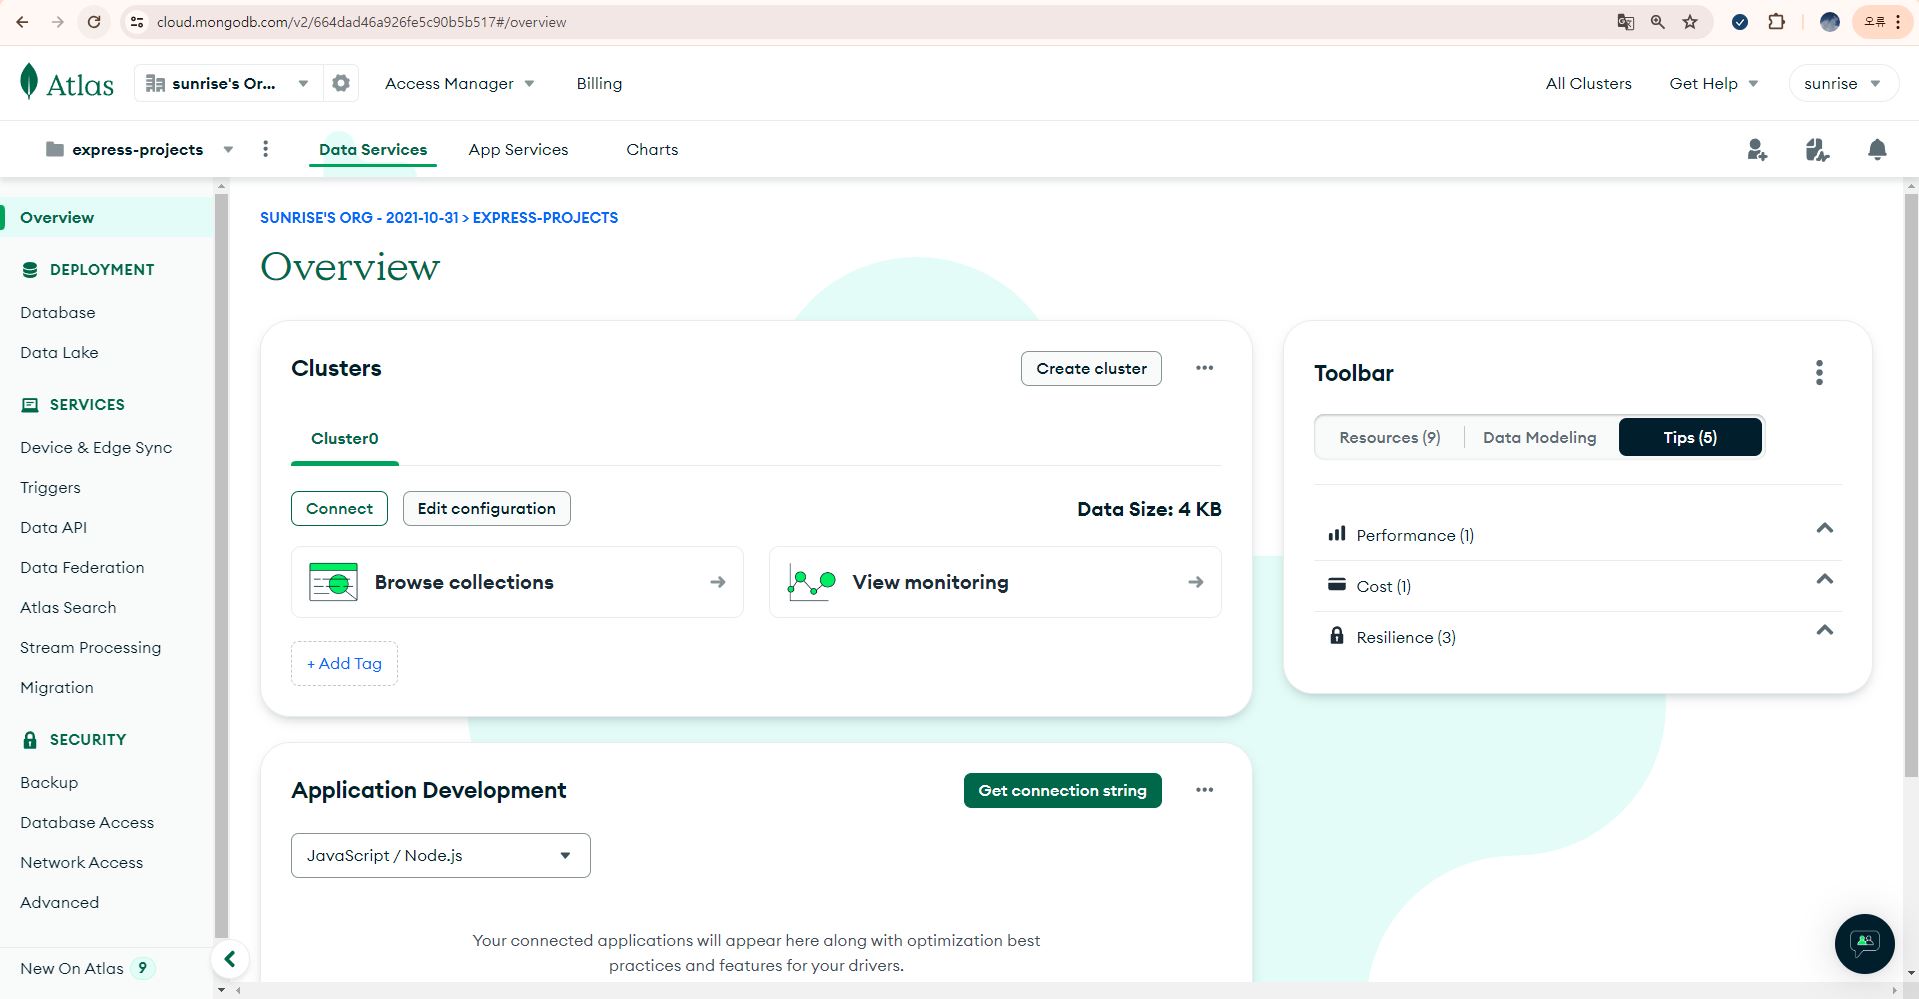
대쉬보드에서 웹사이트 링크를 클릭한다.

Logs 탭에서 사용자 접속 로그기록을 확인할 수 있다.
* MongoDB Atlas 초기설정하기
MongoDB Atlas
Get started free. No credit card required.
www.mongodb.com
MogoDB Atlas 에 회원가입이나 로그인한다.
https://www.codeit.kr/tutorials/70/mongodb-atlas
MongoDB Atlas 사용법 | 코드잇
MongoDB Atlas에 가입하고 데이터베이스 주소를 사용하는 방법에 대해 알아봅시다. | MongoDB Atlas를 사용하려면 가장 먼저 가입을 해야 합니다. [Atlas 회원 가입 페이지](https://www.mongodb.com/atlas/database)
www.codeit.kr
https://www.mongodb.com/docs/atlas/reference/partner-integrations/vercel/
MongoDB Atlas 에 대한 자세한 사용법은 위의 링크를 참조한다.
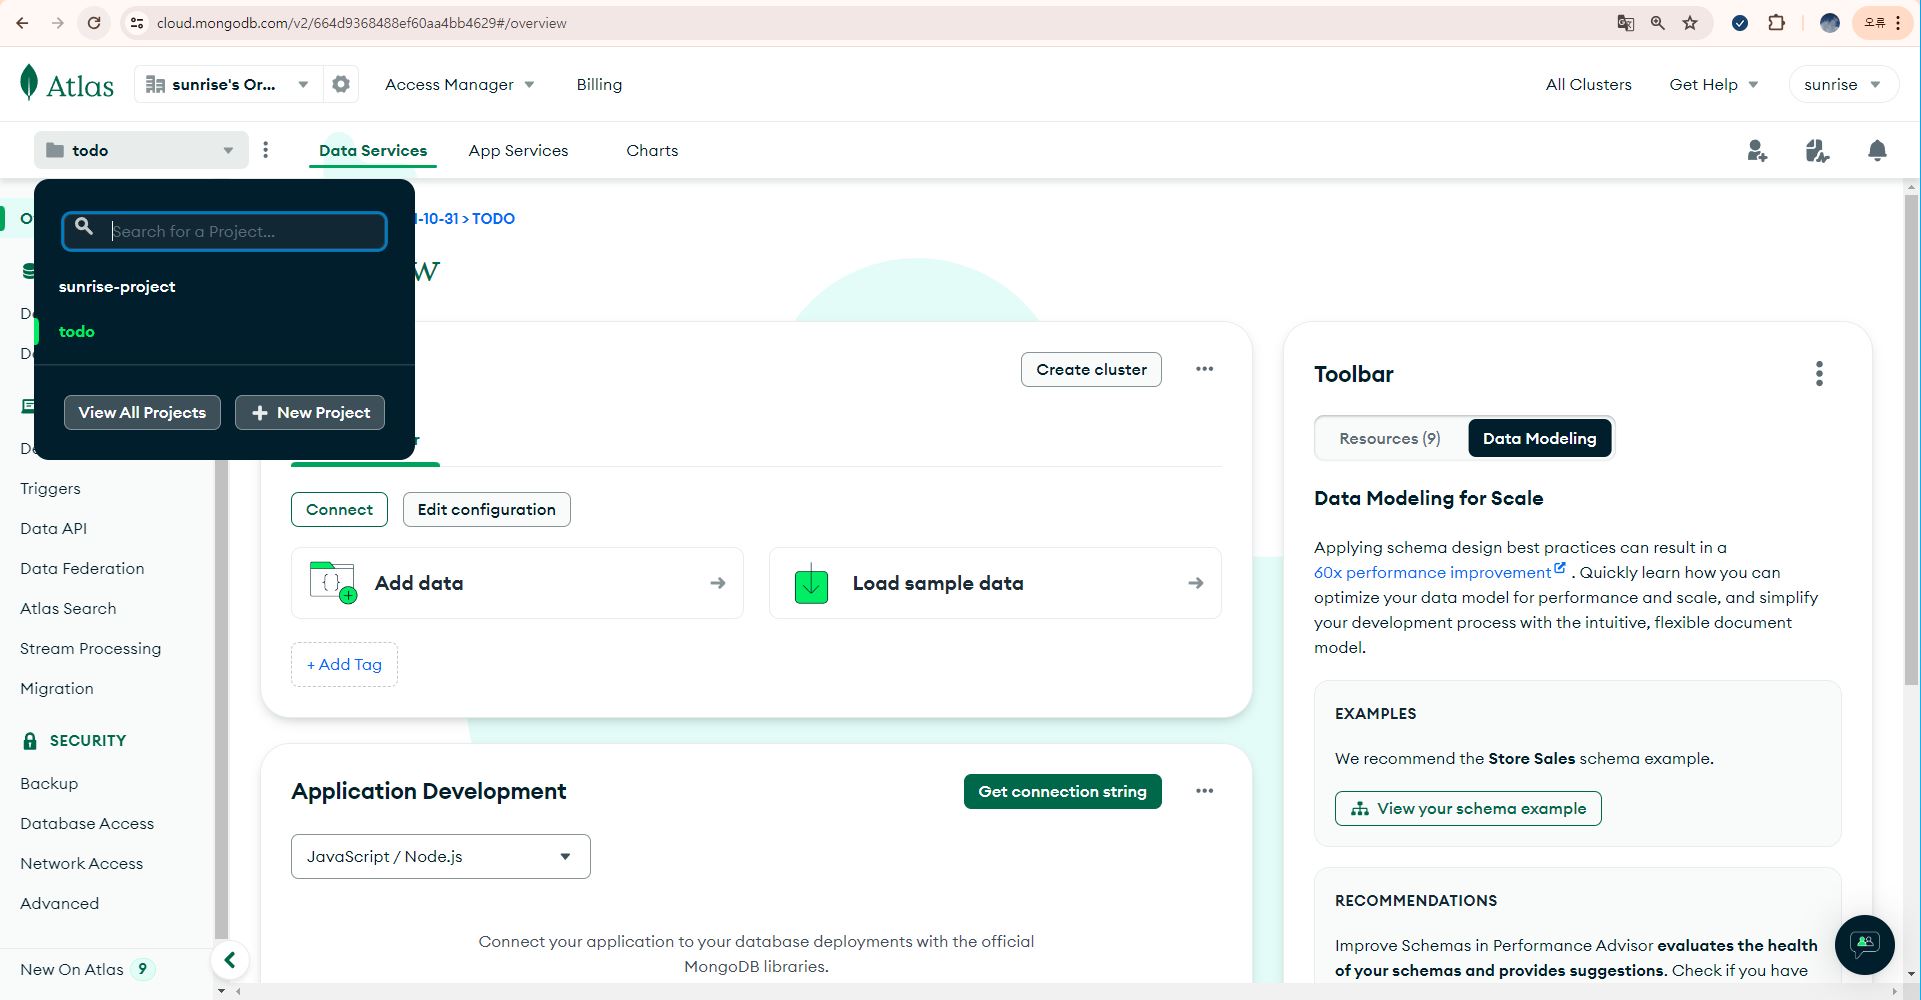
좌측상단 드롭다운을 클릭하고, New Project 버튼을 클릭한다.

Name Your Project 에서 프로젝트 이름을 작성한다.
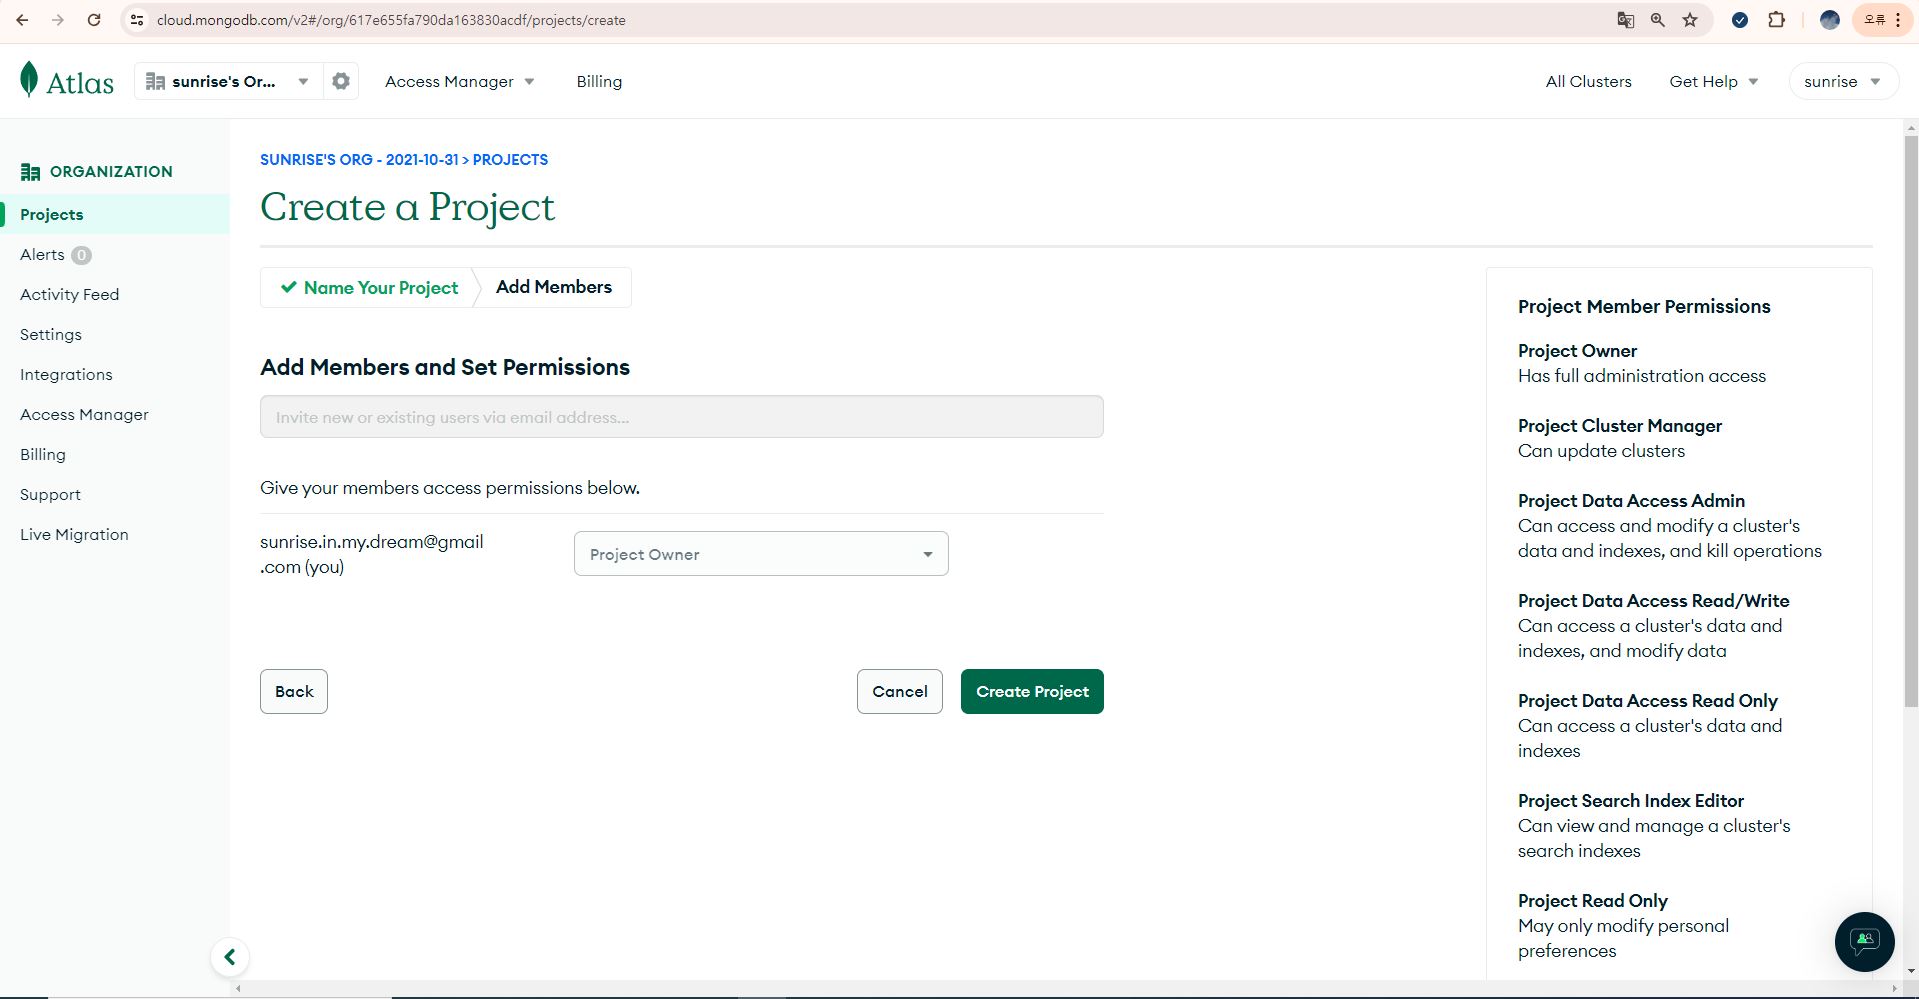
팀원이 있으면 팀원을 추가하고, Create Project 버튼을 클릭한다.
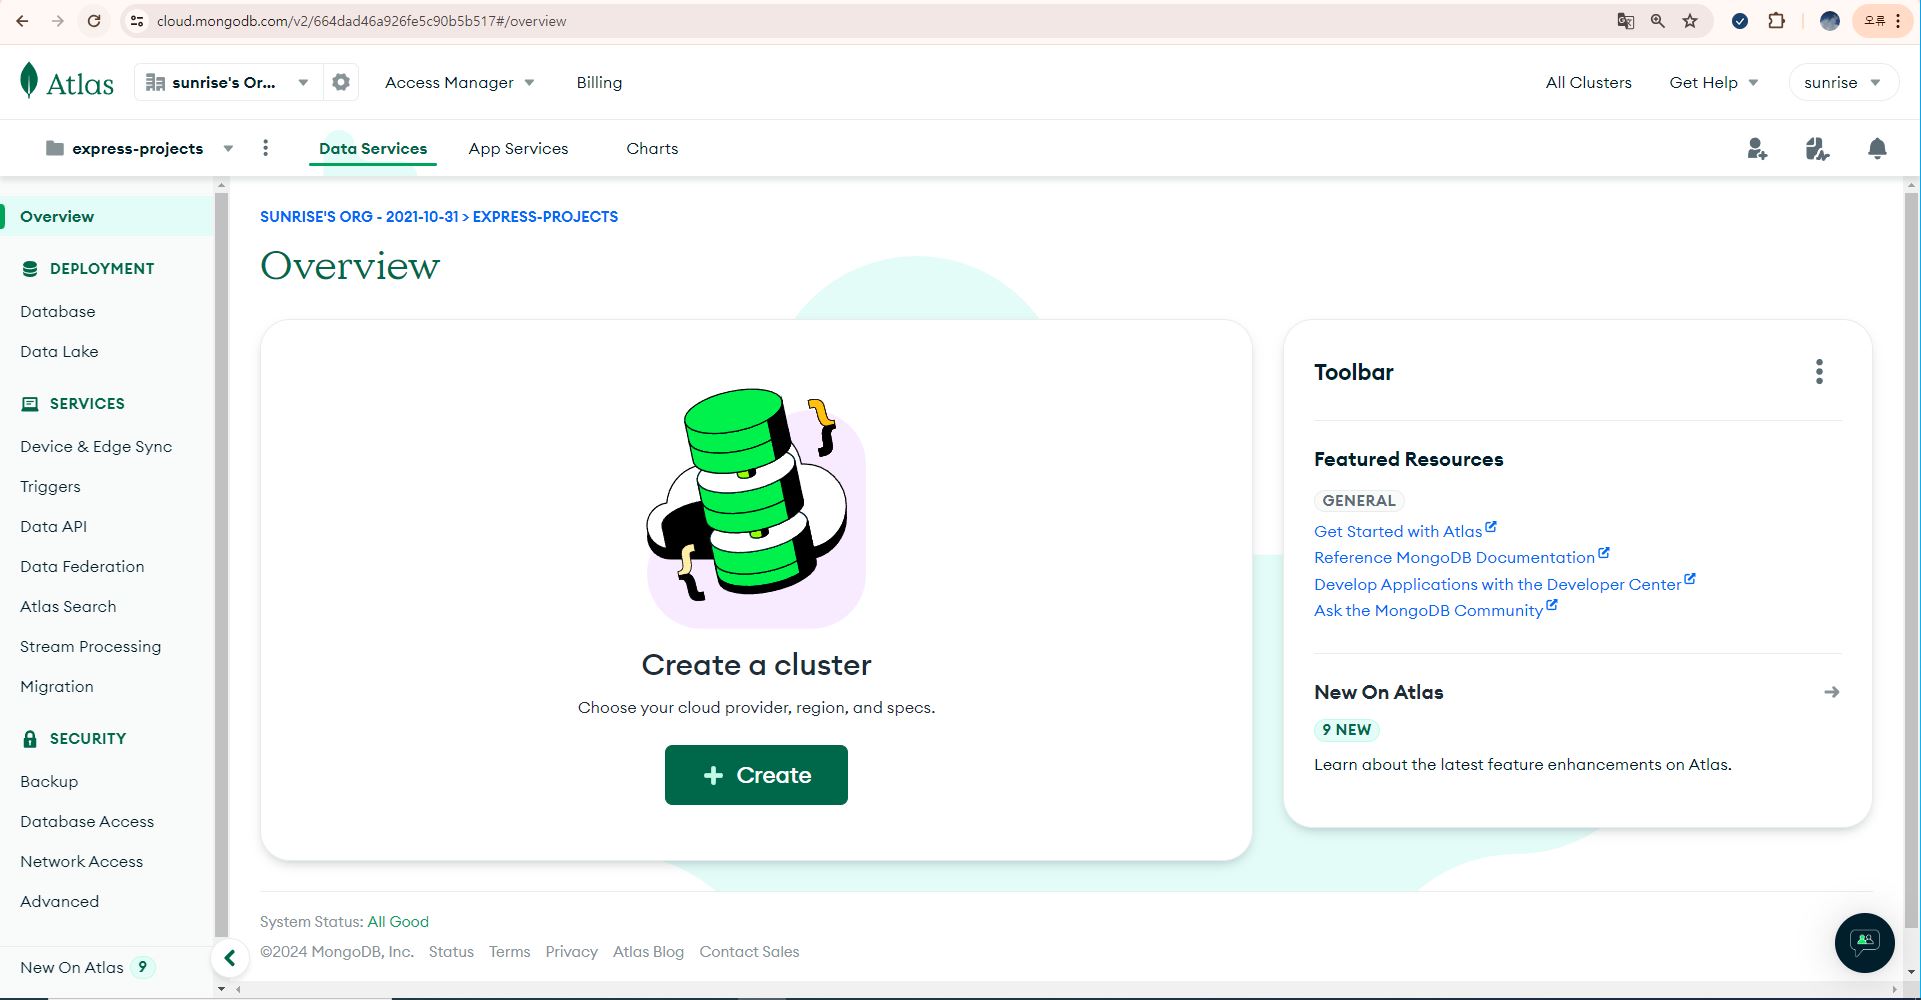
DEPLOYMENT 의 Database 메뉴를 선택한다.
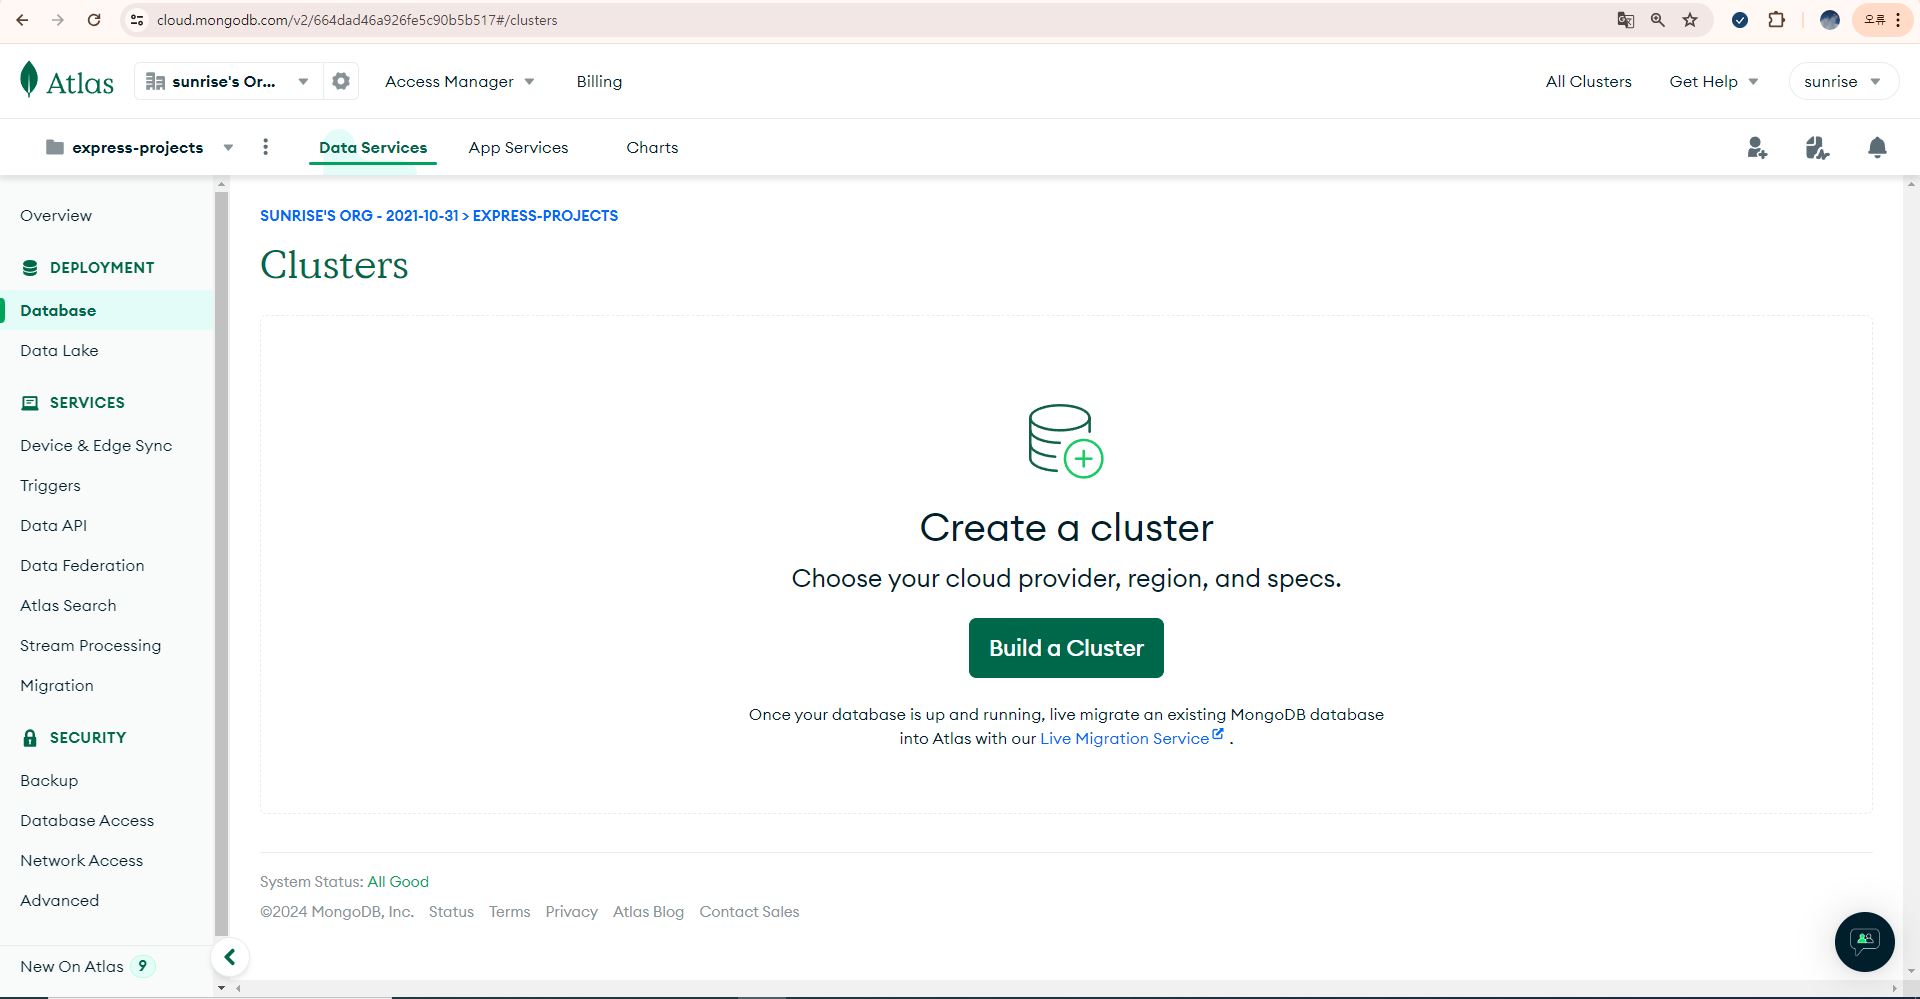
Build a Cluster 버튼을 클릭하여, 클러스터를 생성한다.

M0 FREE 옵션을 선택하고, Create 버튼을 클릭한다.
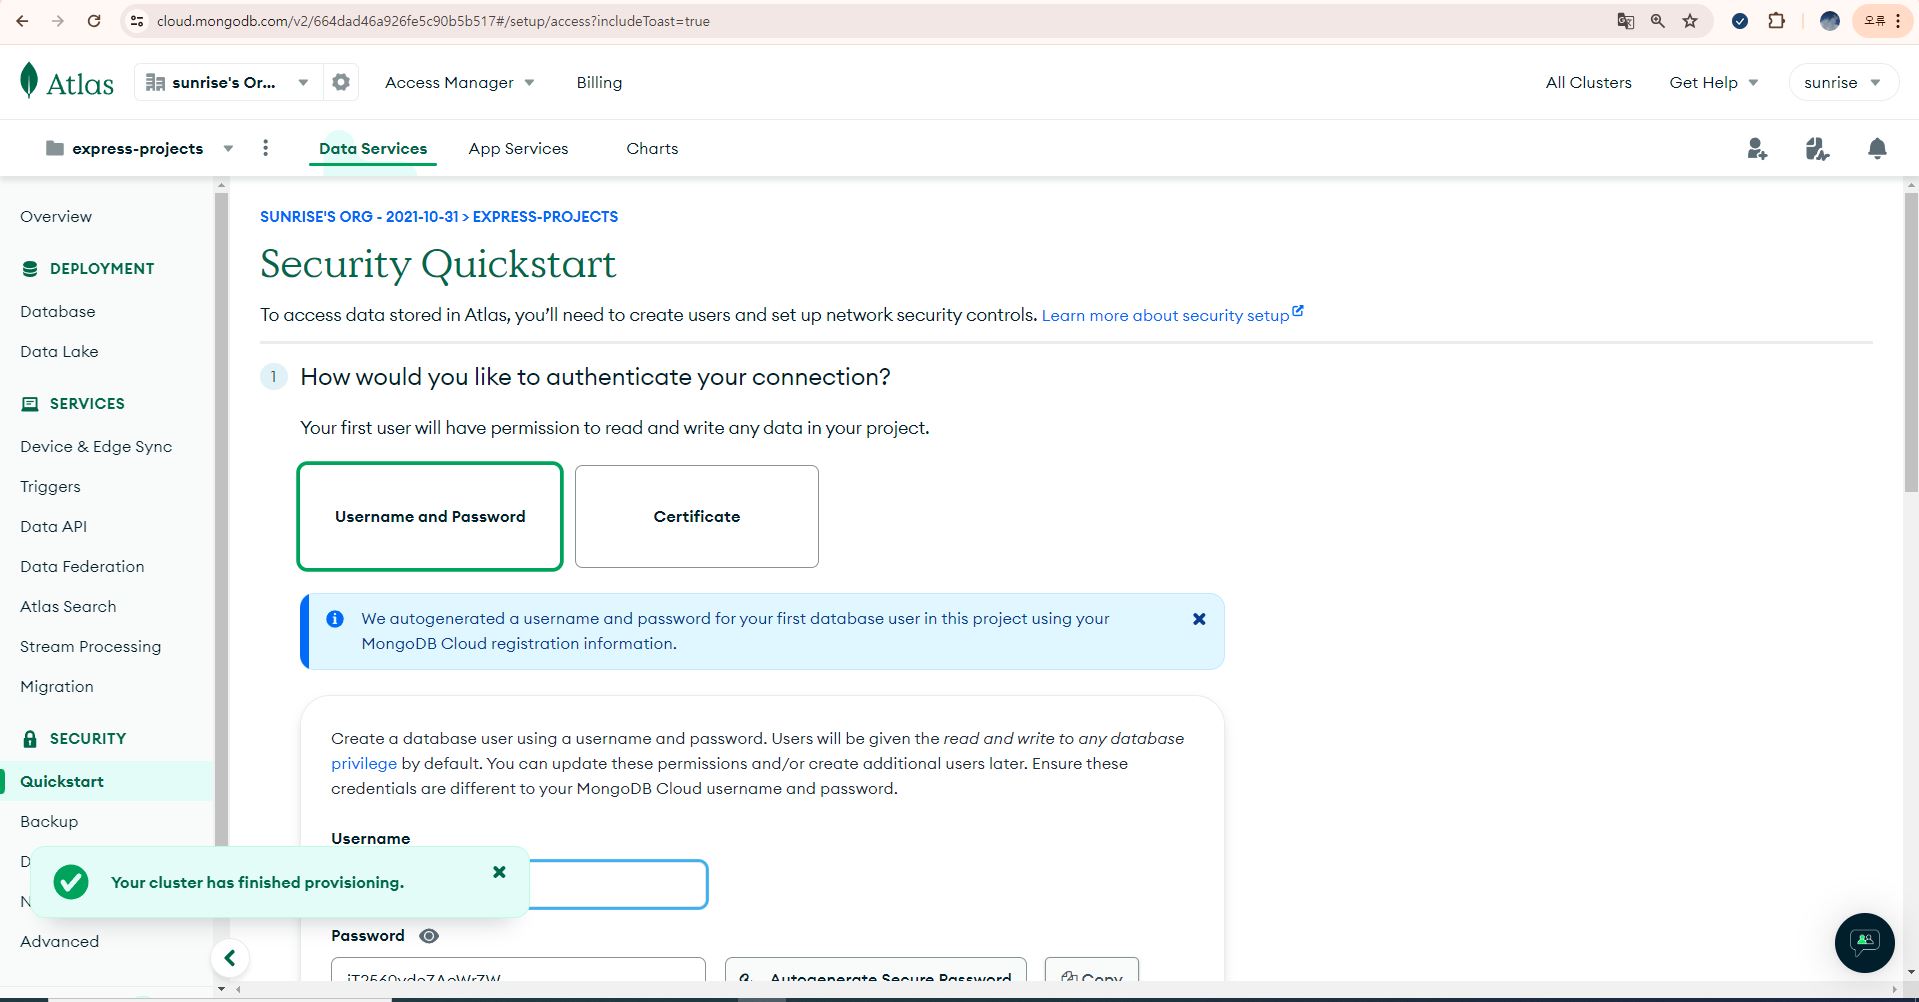

Username 과 Password 를 입력한다. 해당 정보는 MongoDB Atlas 에 접속할때 필요하므로, 메모장에 저장해둔다.

Vercel 은 클라우드 환경이므로 Cloud Environment 를 선택하고, IP Address 는 기존에 작성된 것을 삭제하고, 0.0.0.0/0 으로 설정한다.

Finish and Close 버튼을 선택한다.

Connect 버튼을 클릭한다.
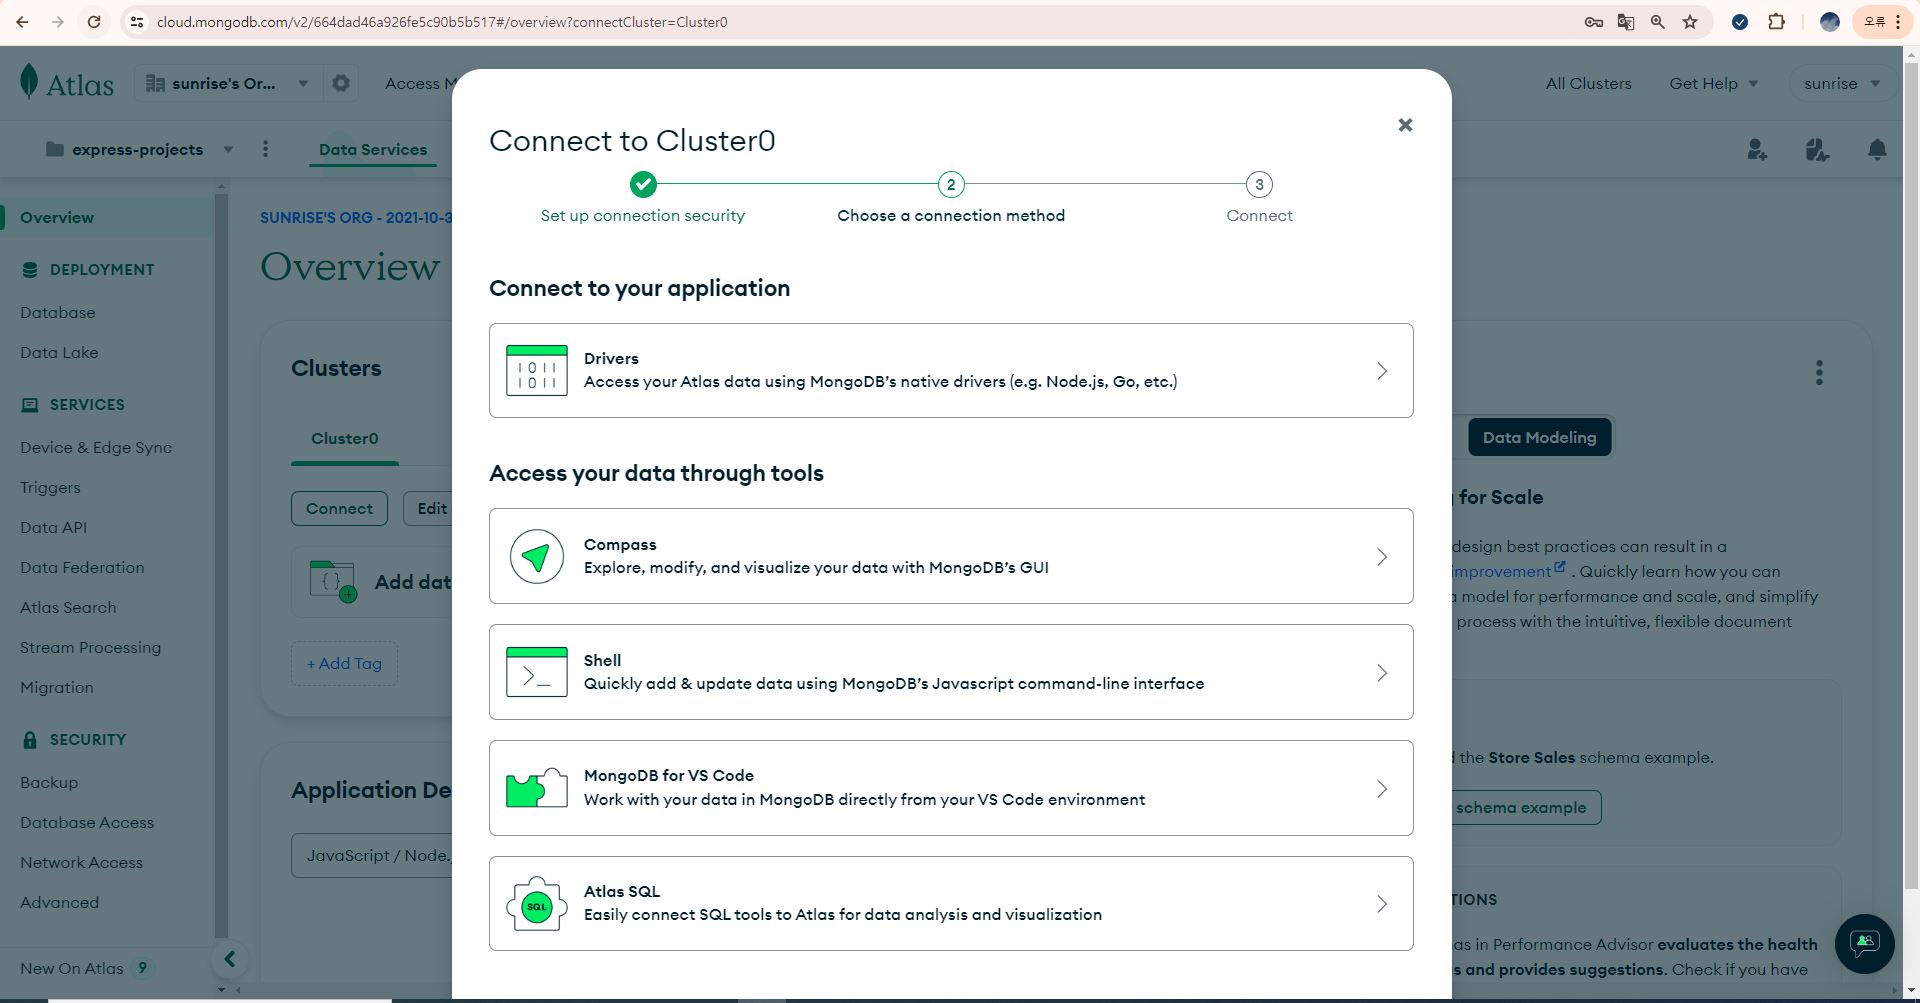
Drivers 옵션을 선택한다.
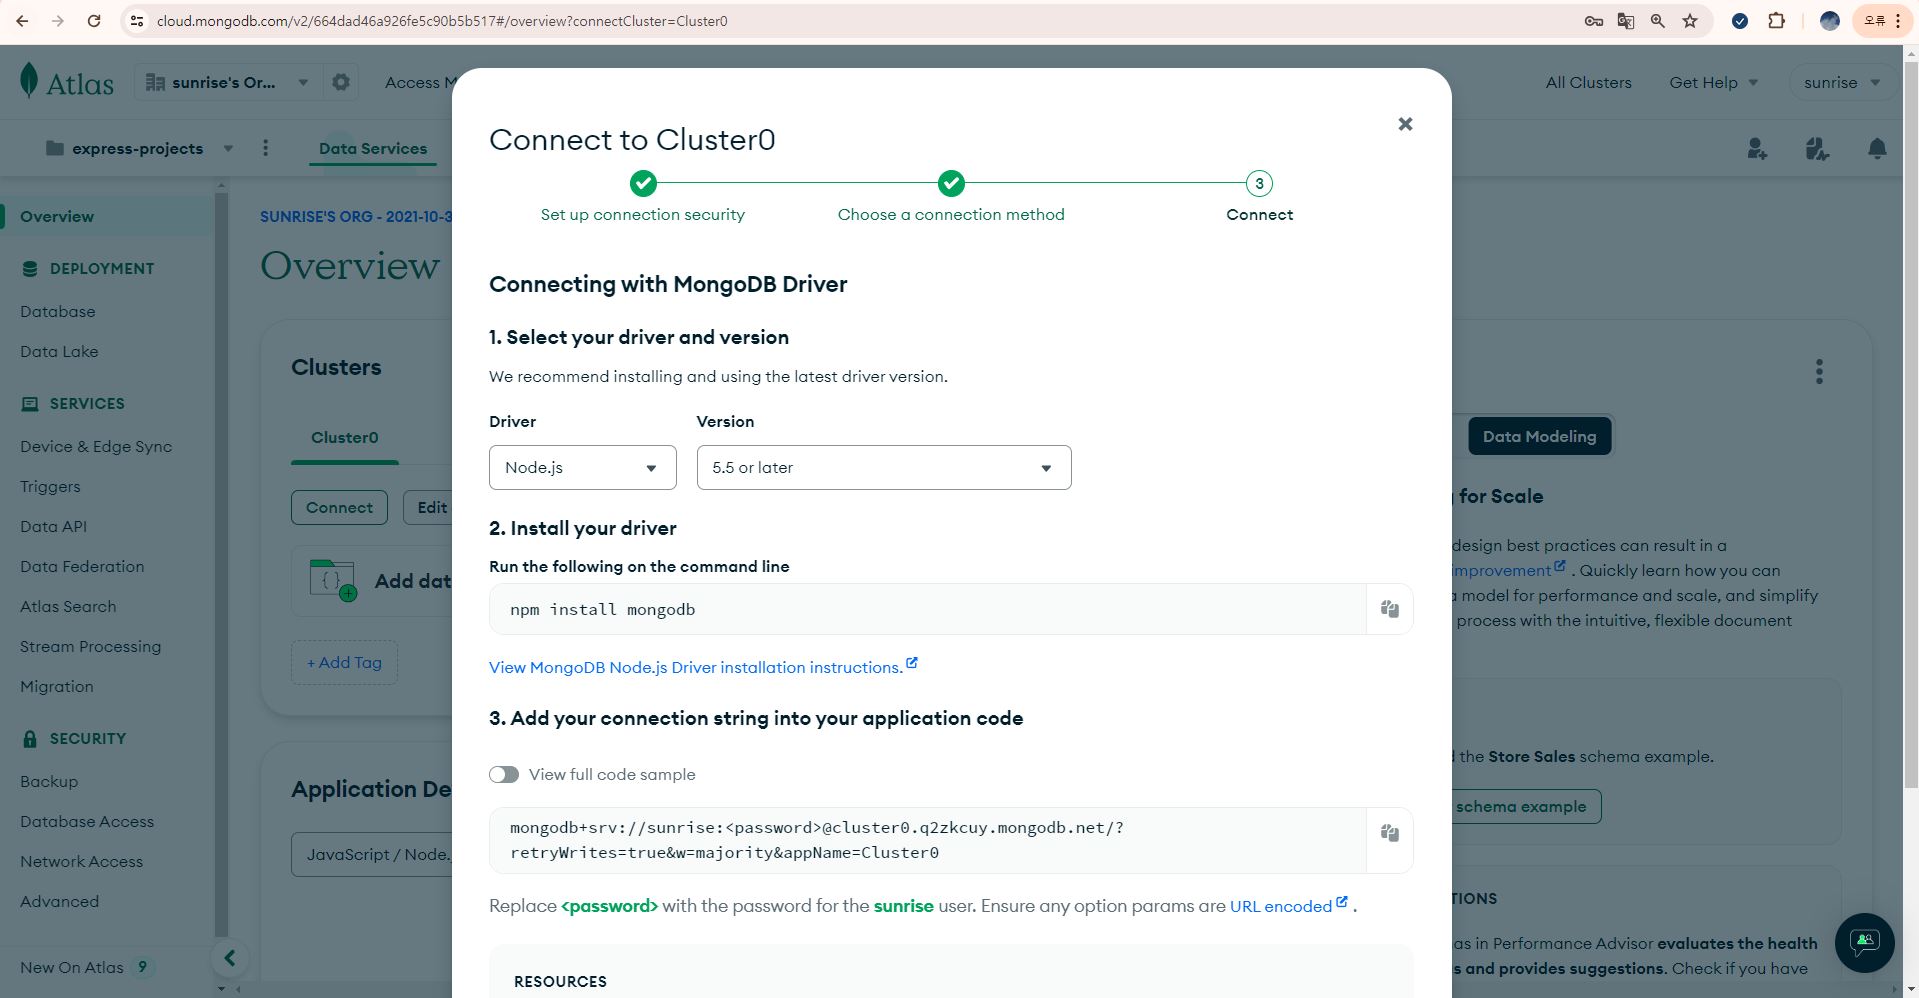
mongodb+srv://sunrise:<password>@cluster0.q2zkcuy.mongodb.net/?retryWrites=true&w=majority&appName=Cluster0sunrise 는 DB접속을 위한 username 이다. password 는 DB 접속을 위한 비밀번호이다. mongodb.net/ 과 ? 사이에 사용할 데이터베이스 이름을 추가해야 한다.
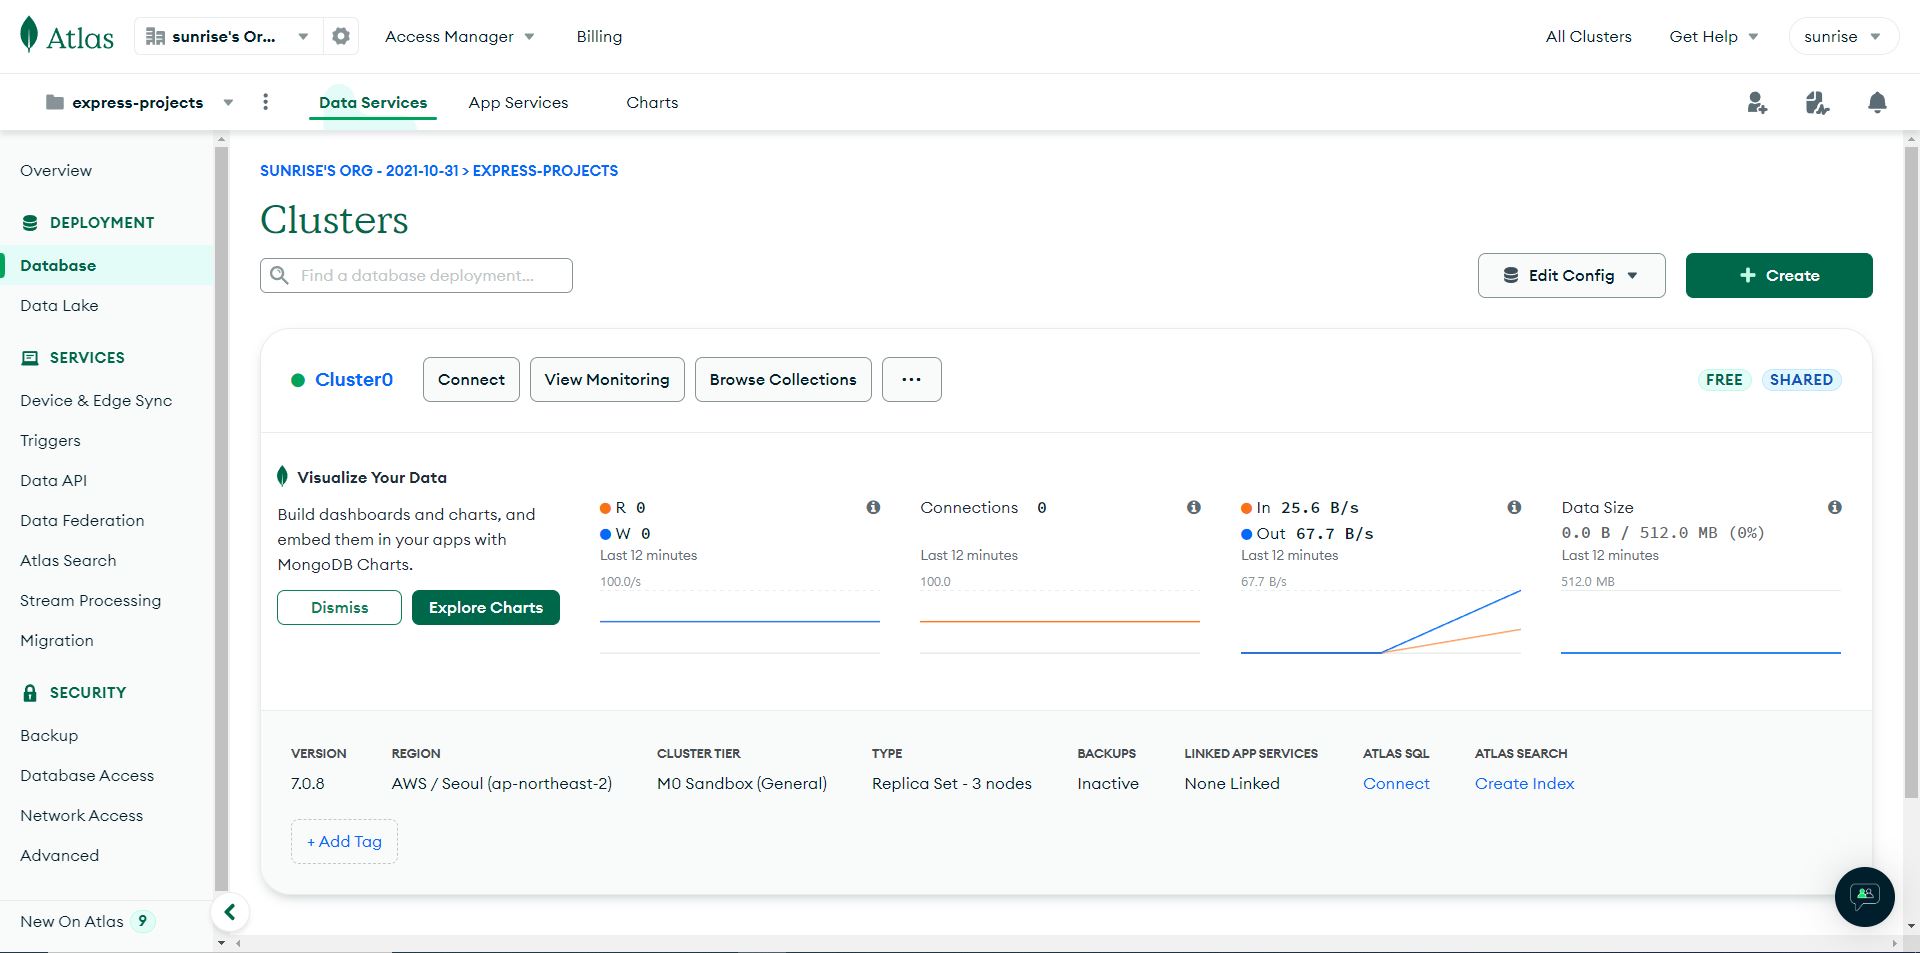
다시 DEPLOYMENT 의 Database 메뉴를 선택하고, Browse Collections 버튼을 클릭한다.
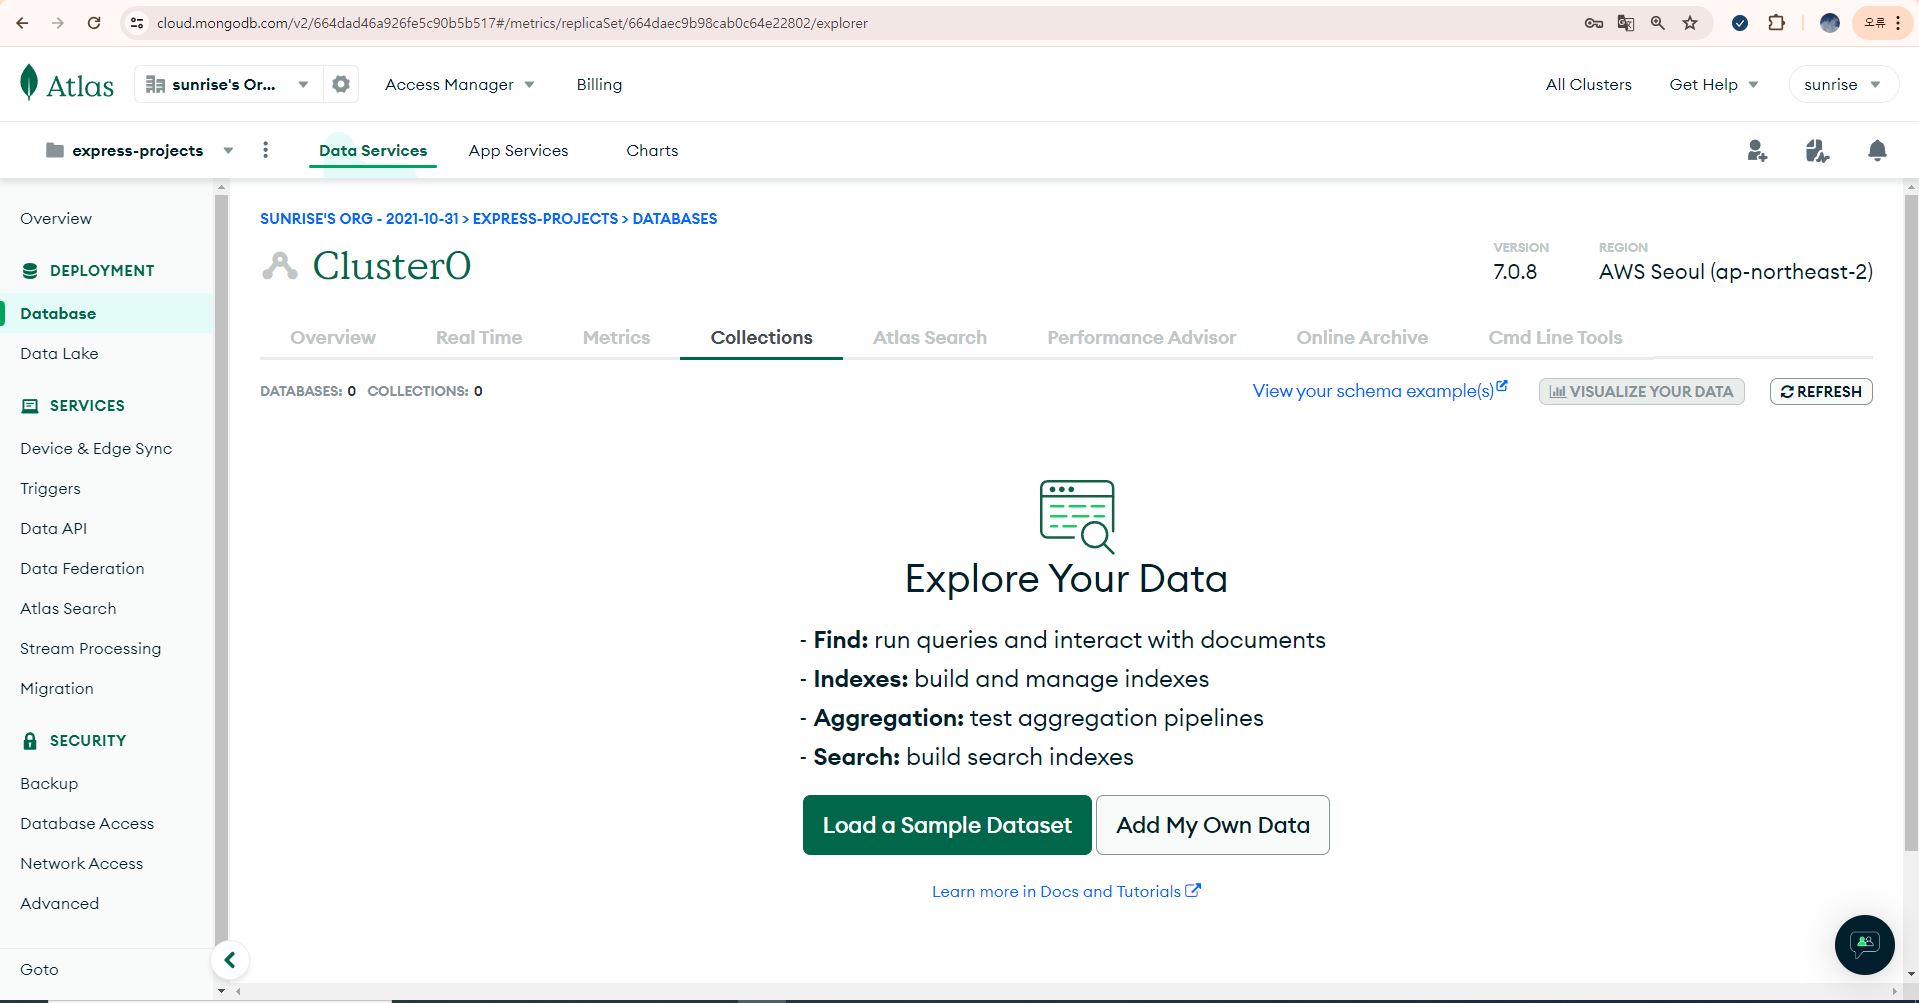
Add My Own Data 버튼을 클릭한다.
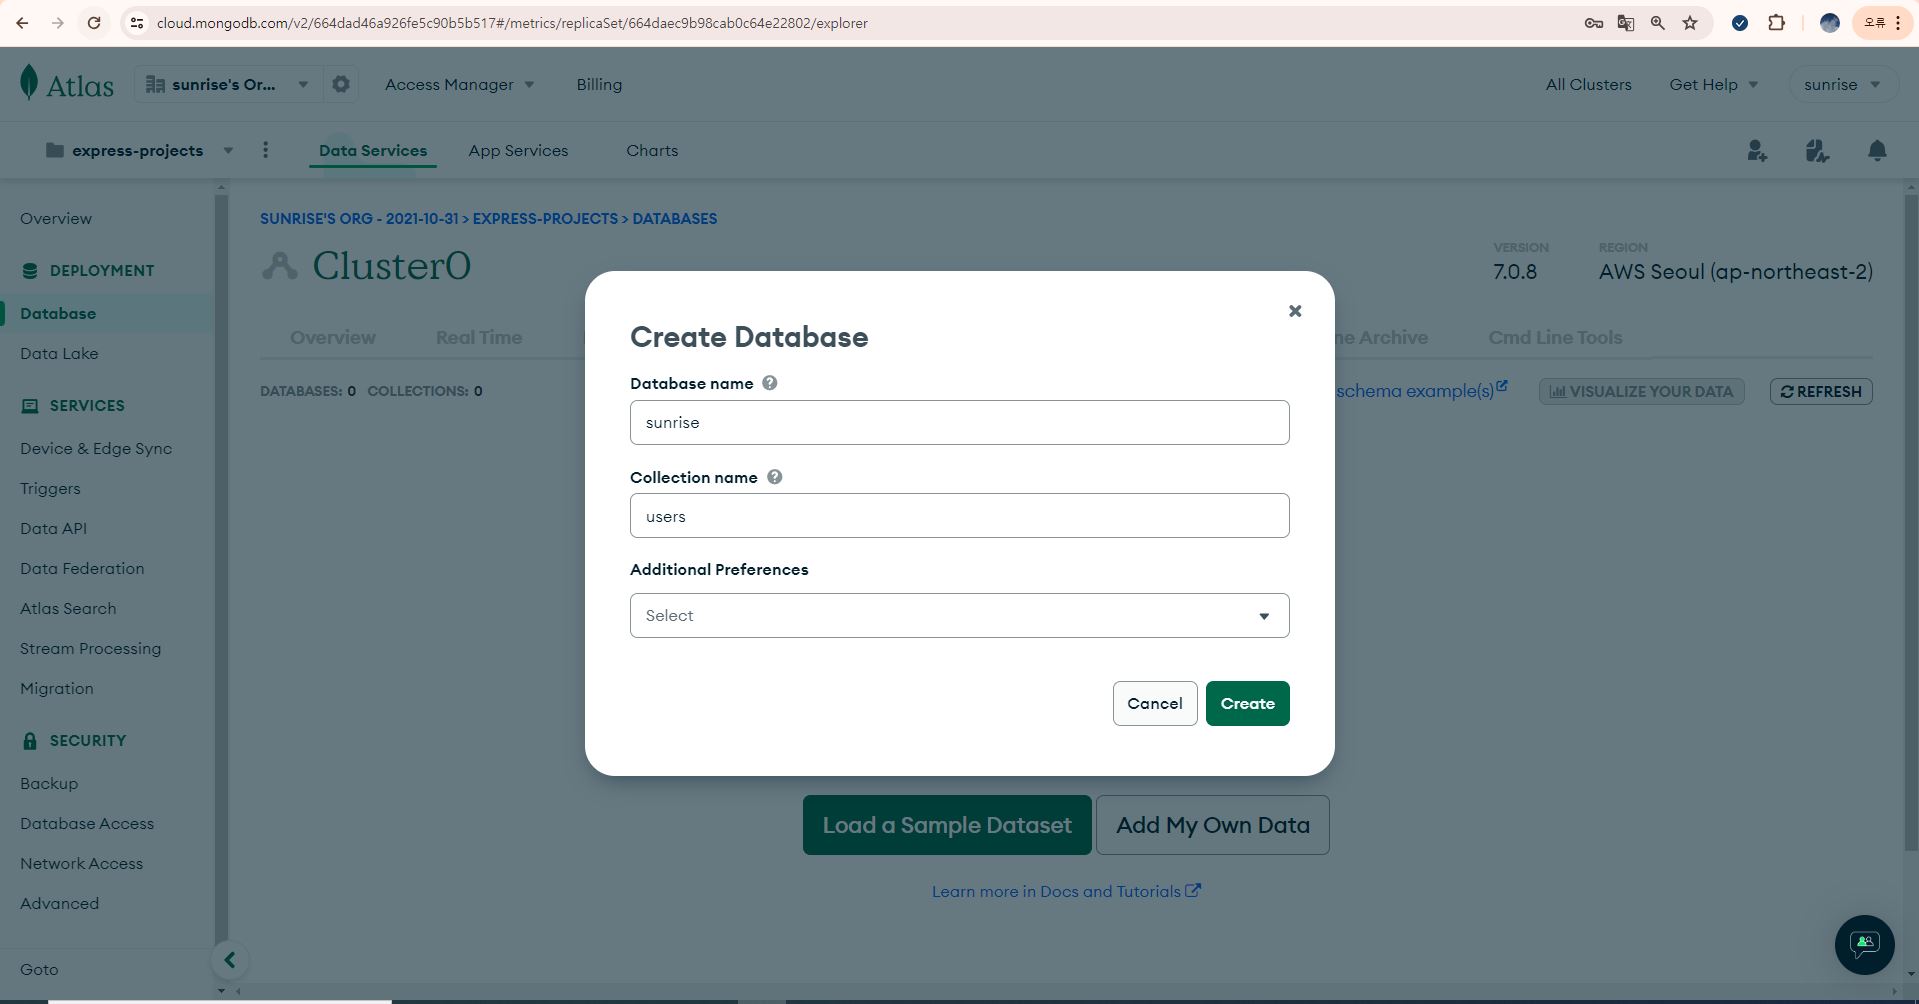
데이터베이스 이름과 컬렉션 이름을 작성하고 Create 버튼을 클릭한다.

데이터베이스와 컬렉션이 추가된 것을 확인할 수 있다. INSERT DOCUMENT 버튼을 클릭하여 실제 데이터도 추가할 수 있다.
* Vercel 에 MongoDB Atlas 연동하기
https://www.mongodb.com/docs/atlas/reference/partner-integrations/vercel/
Integrate with Vercel - MongoDB Atlas
You can connect your Atlas clusters to applications that you deploy using Vercel.Use this page to complete the following tasks:Connect Vercel users and teams to organizations in Atlas.Create links from Vercel projects for these users and teams to Atlas clu
www.mongodb.com
vercel 에서 mongodb 를 연동하기 위해서는 프로젝트 설정이 필요하다.

대쉬보드에서 Settings -> Integrations 로 이동한다.

Settings -> Integrations 에서 연동하려는 서비스를 검색한다. 현재는 mongo 로 검색하면 된다.


MongoDB 연동이 필요한 전체 프로젝트를 선택하고, Install 버튼을 클릭하면 위와 같은 화면이 보인다.

All Projects 를 선택한다. 그리고 Install 버튼을 클릭한다.

구글이나 깃허브로 로그인한다.
Continue 버튼을 클릭한다.

I Acknowledge 버튼을 클릭한다.

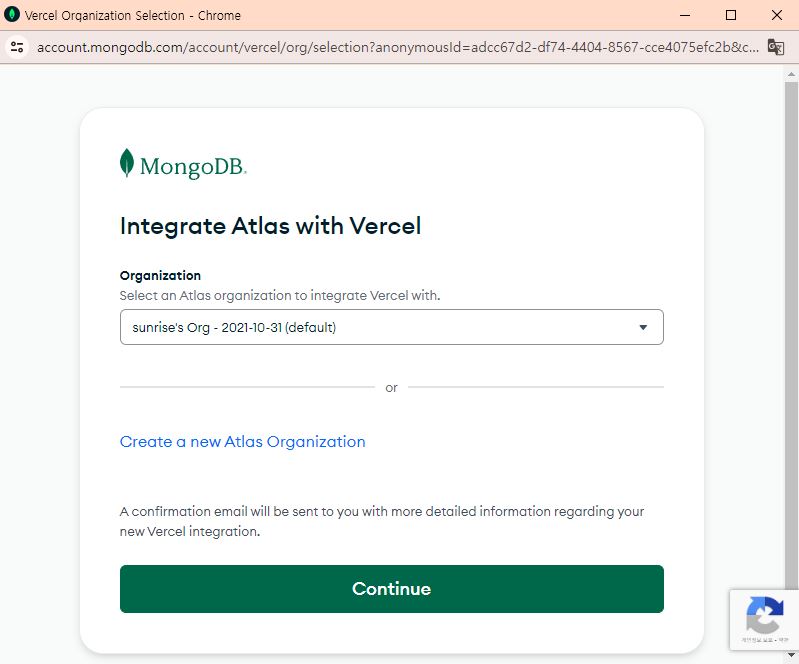
MongoDB Atlas 에서 Vercel 과 연동하려는 Project (express-projects)를 선택한다.

Vercel 에서 MongoDB Atlas 와 연동하려는 프로젝트 (vercel-express-deploy-tutorial)를 선택한다.

우측 상단의 Configure 버튼을 클릭한다.
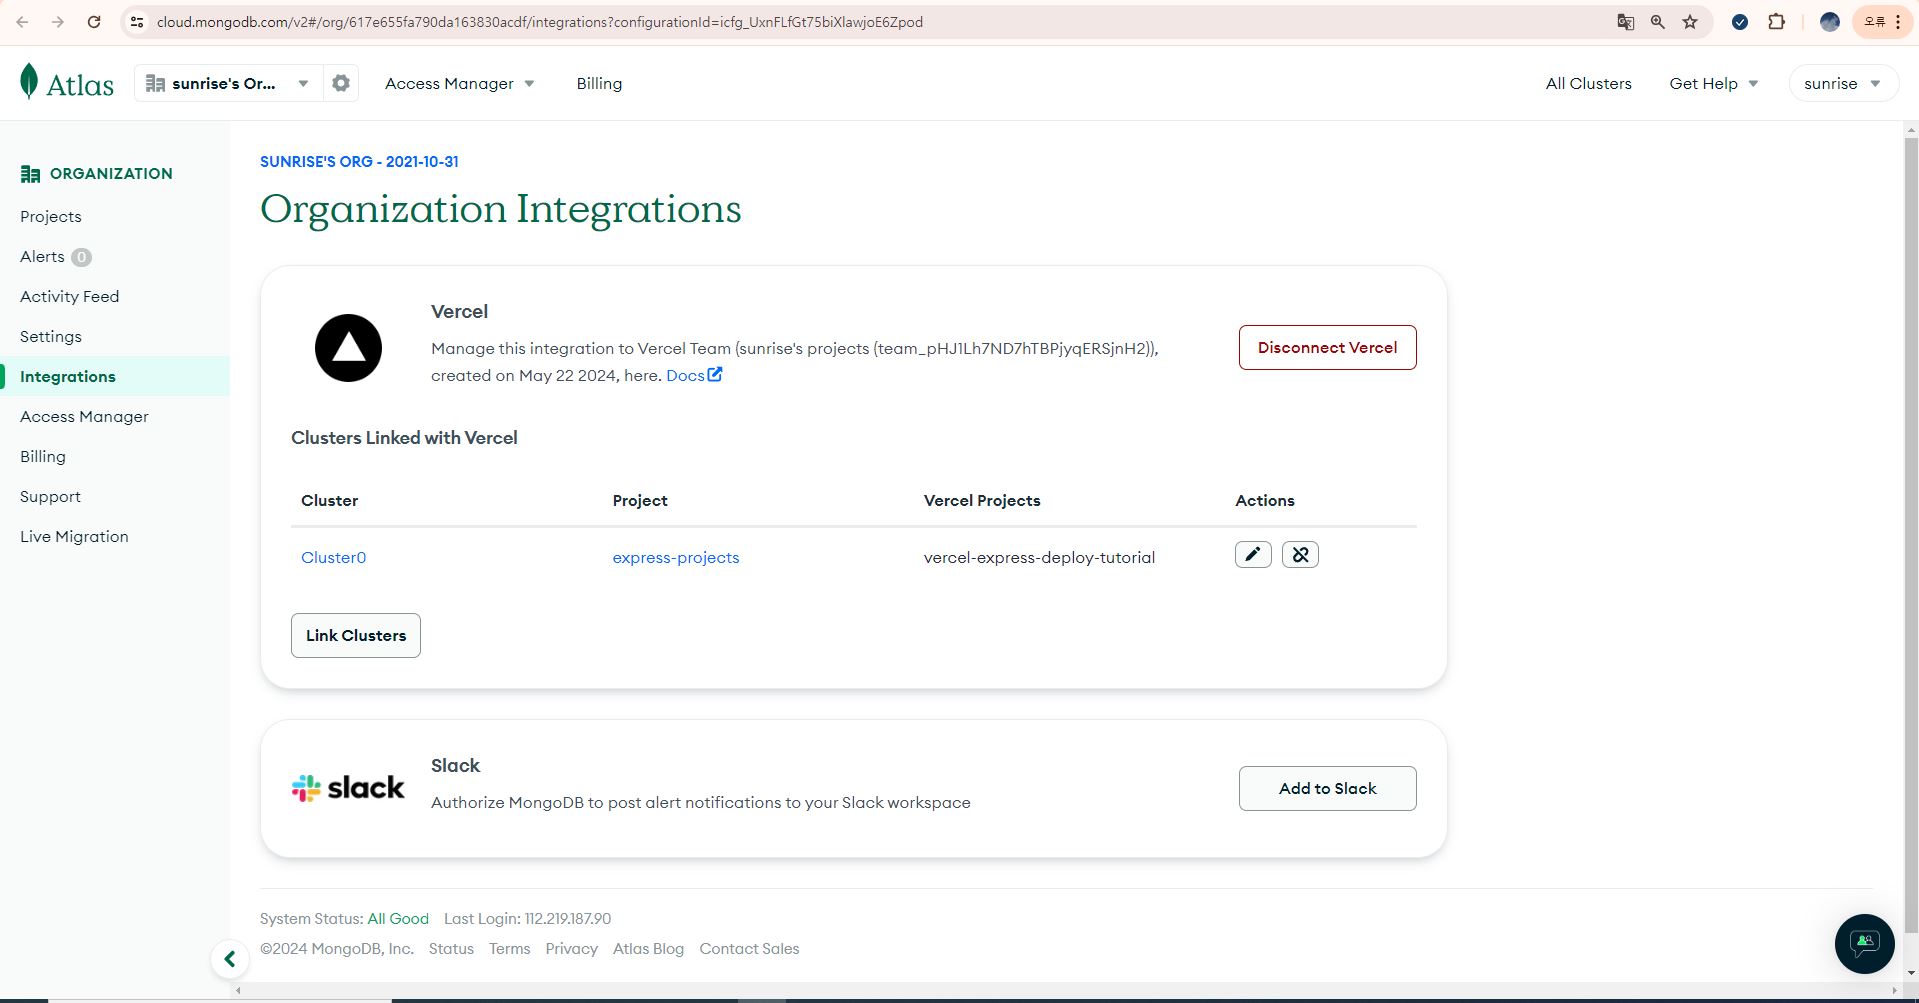
MongoDB Atlas 에서도 통합이 잘 된것을 확인할 수 있다.
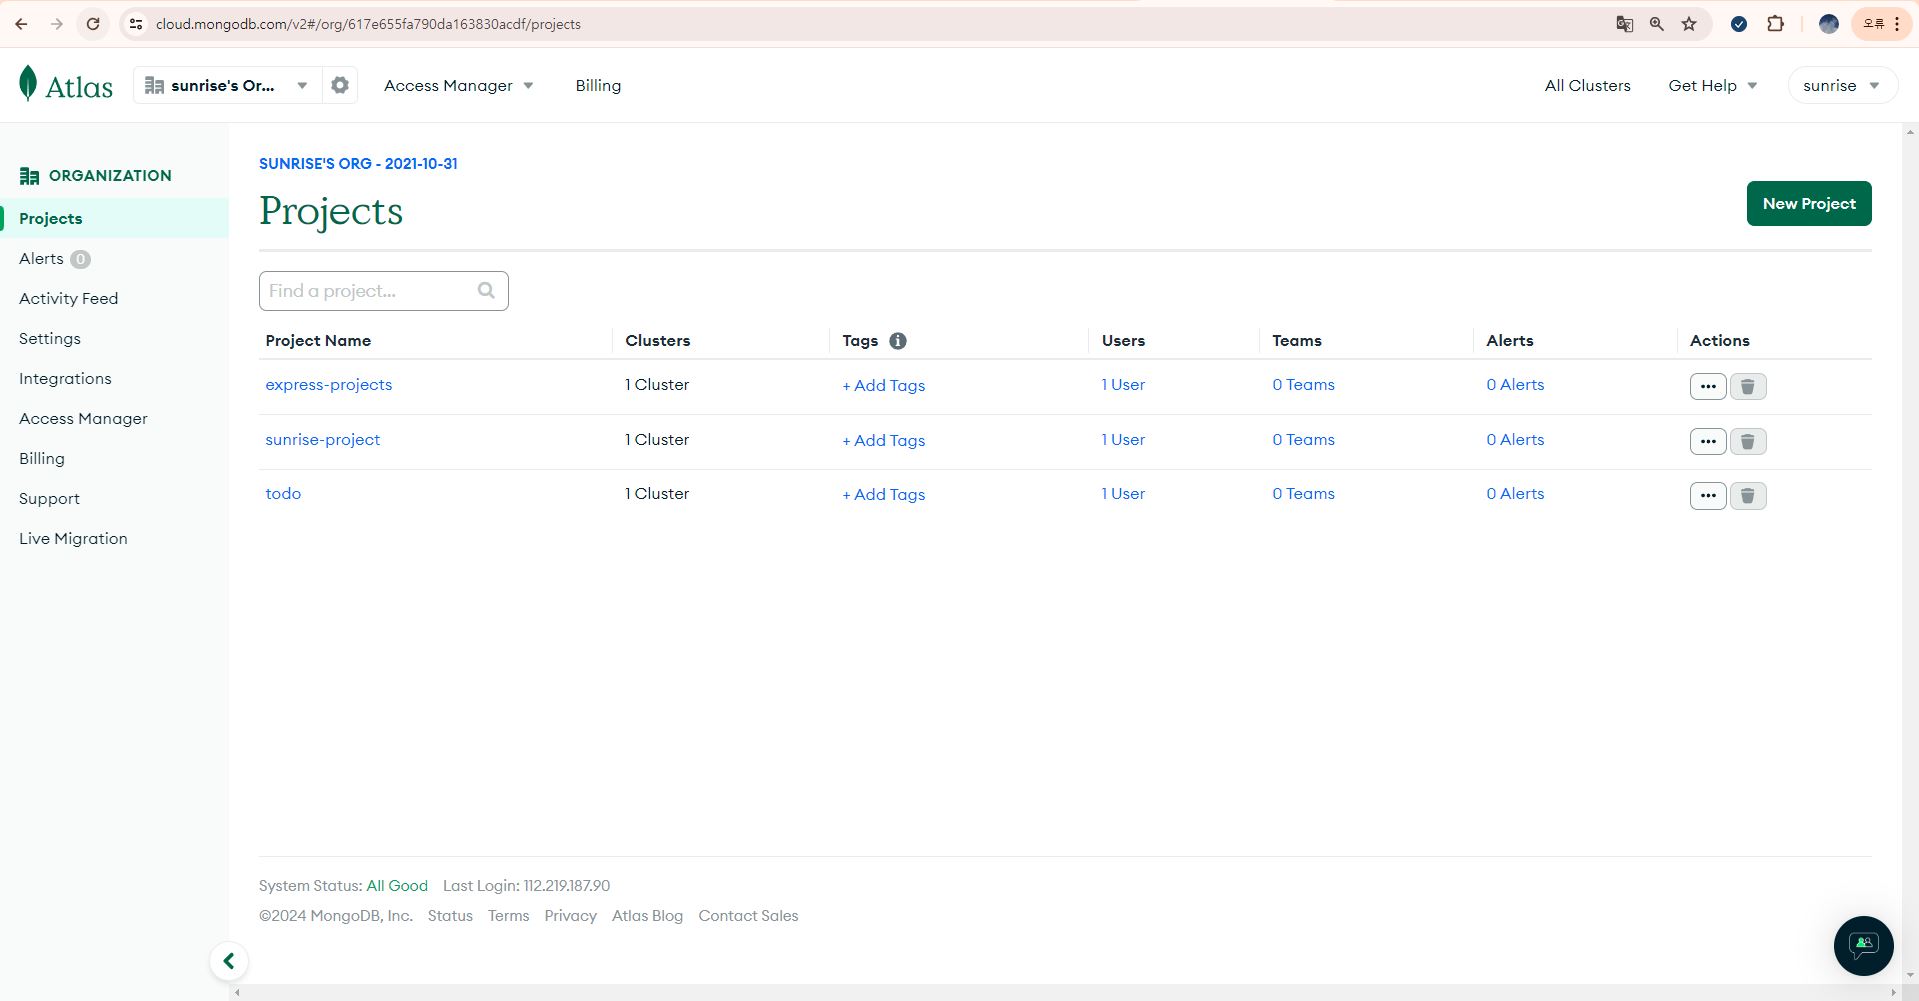
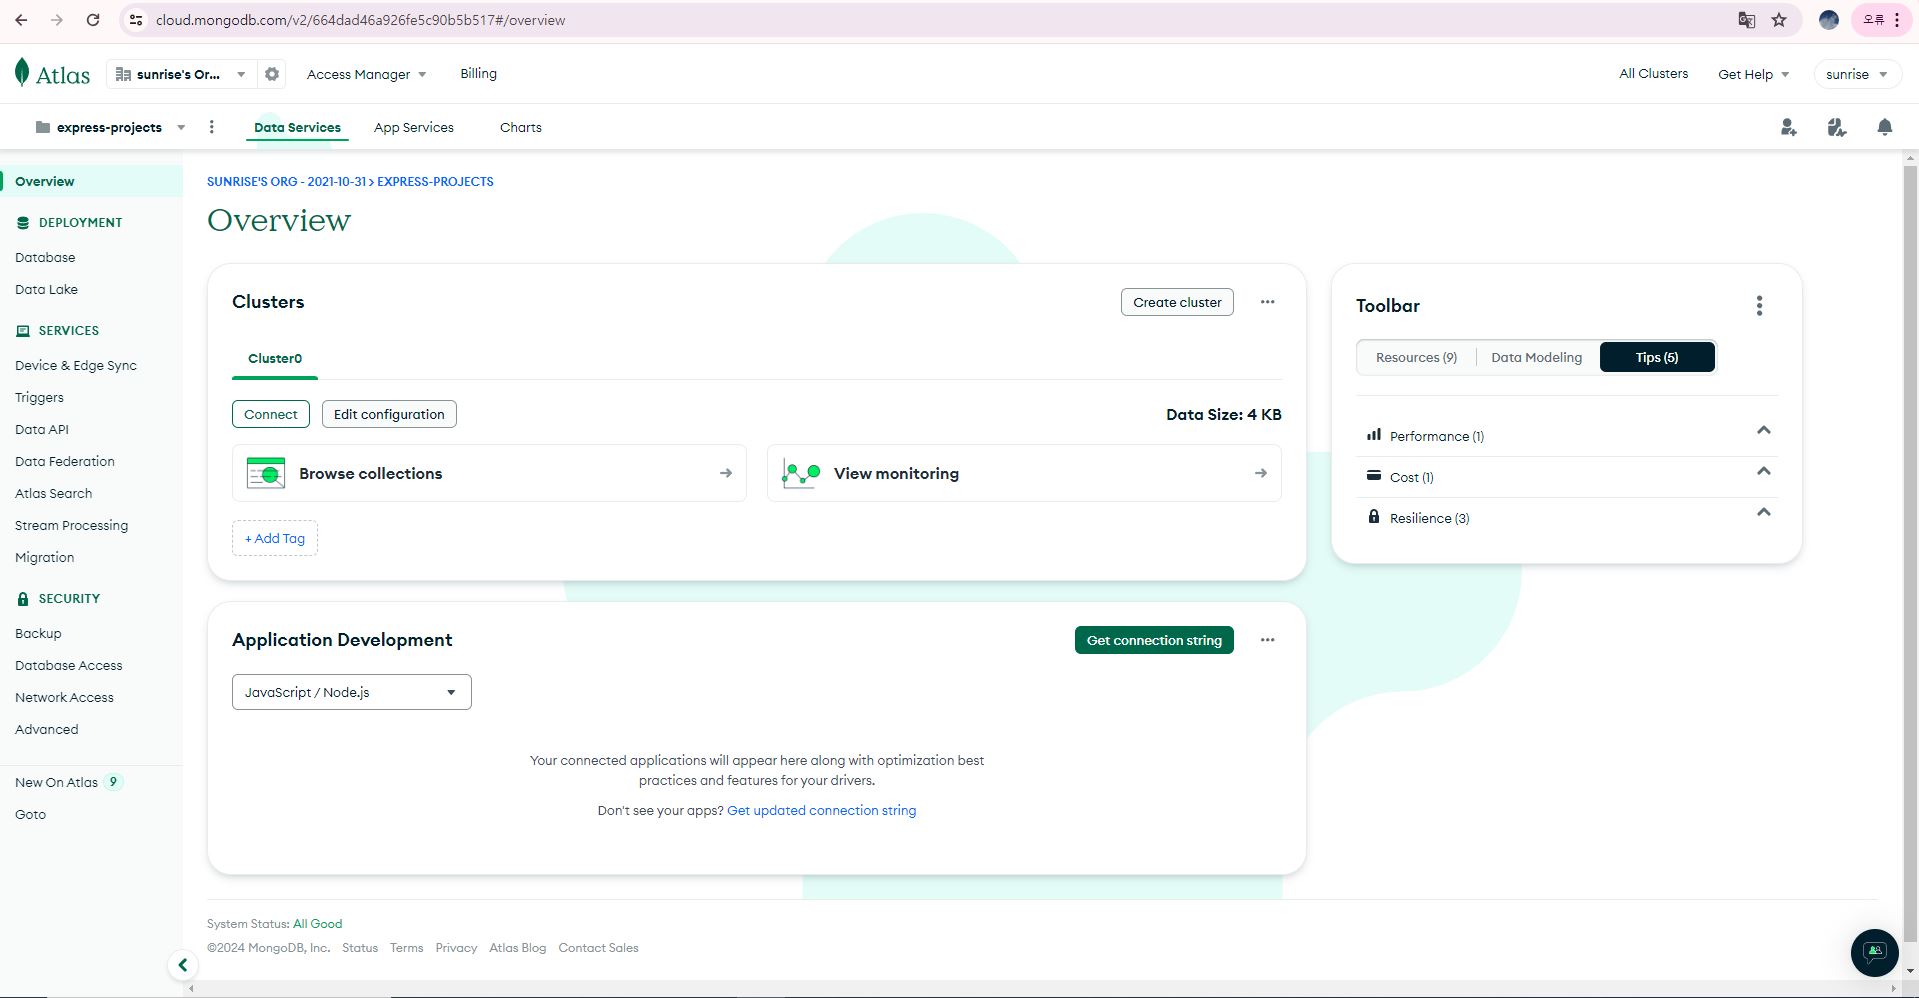
사이드바에서 Projects 메뉴를 선택하고, Vercel 과 연결된 MonoDB Atlas 프로젝트(express-project) 를 클릭한다.
해당 프로젝트(express-project) 의 대쉬보드에서 Database Access 메뉴를 클릭한다.
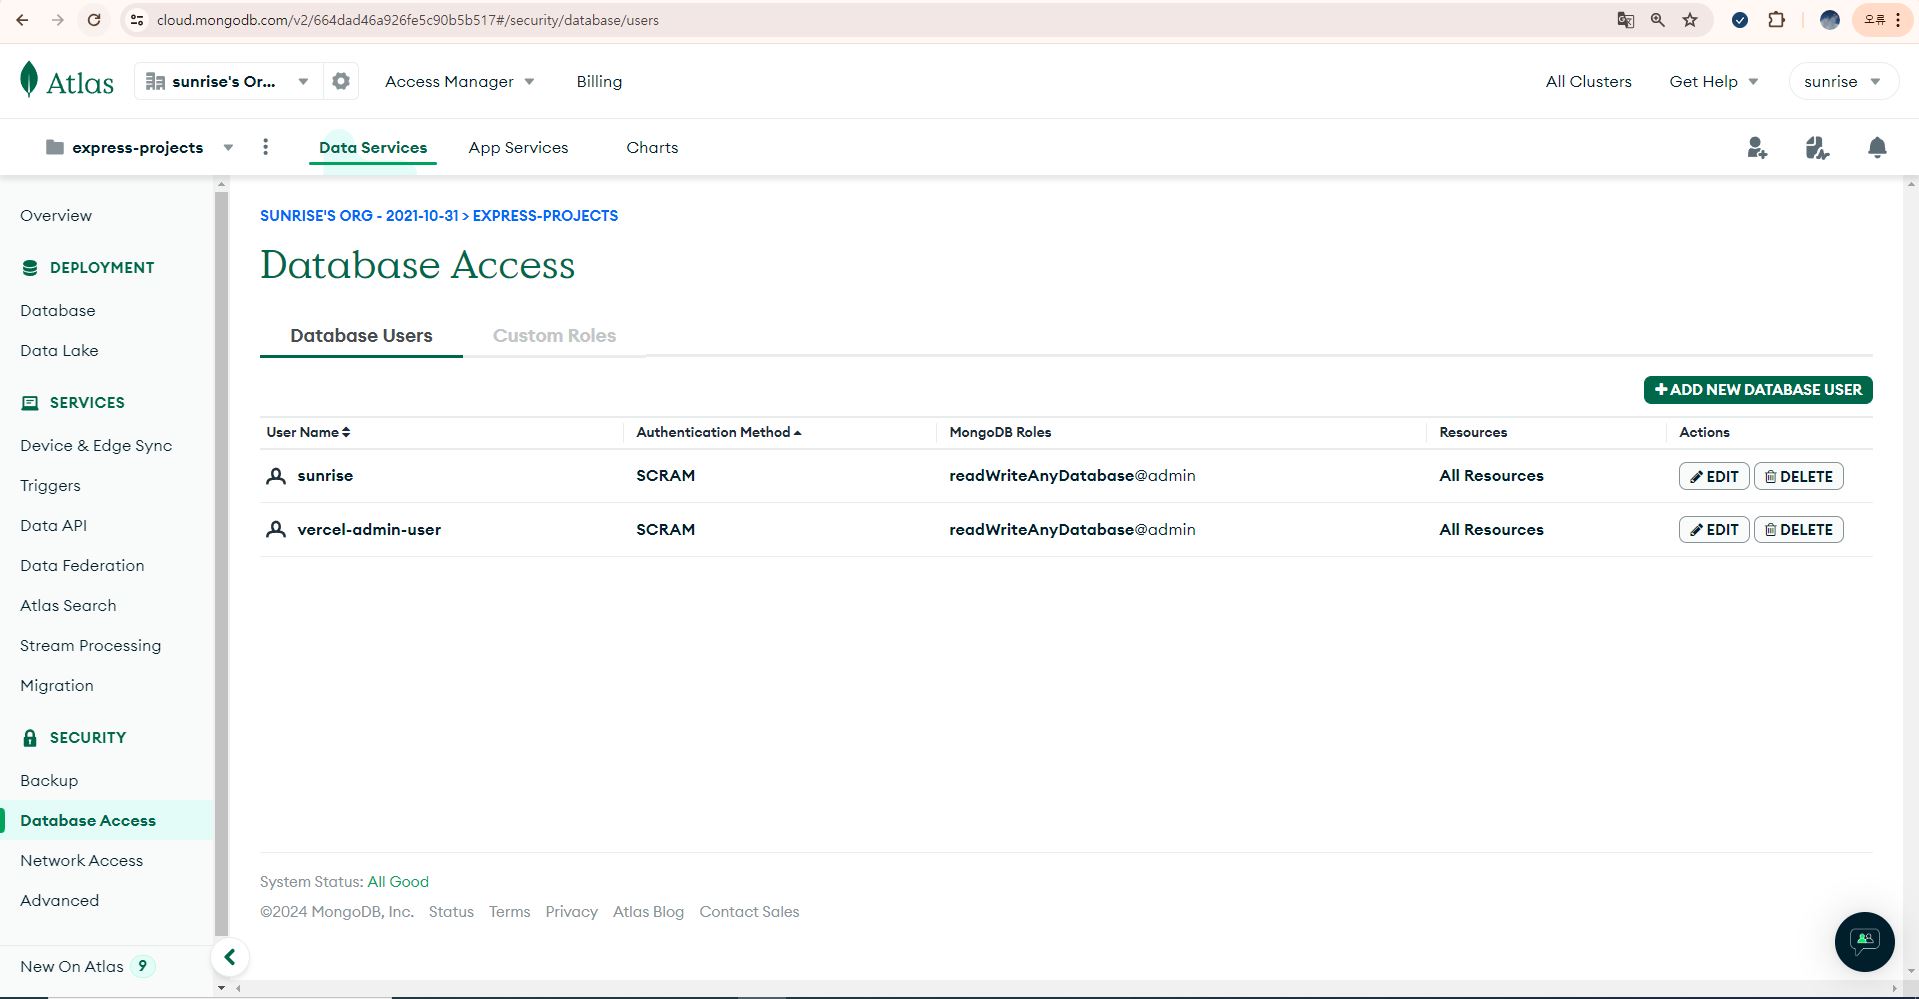
vercel-admin-user 가 추가된 것을 확인할 수 있다.

Network Access 메뉴를 선택하고, IP Address 가 0.0.0.0/0 으로 설정되어 있는지 확인한다. 그렇지 않으면 Vercel 에서 MongoDB Atlas 에 접근하지 못한다.
다시 vercel 의 해당 프로젝트로 돌아온다.
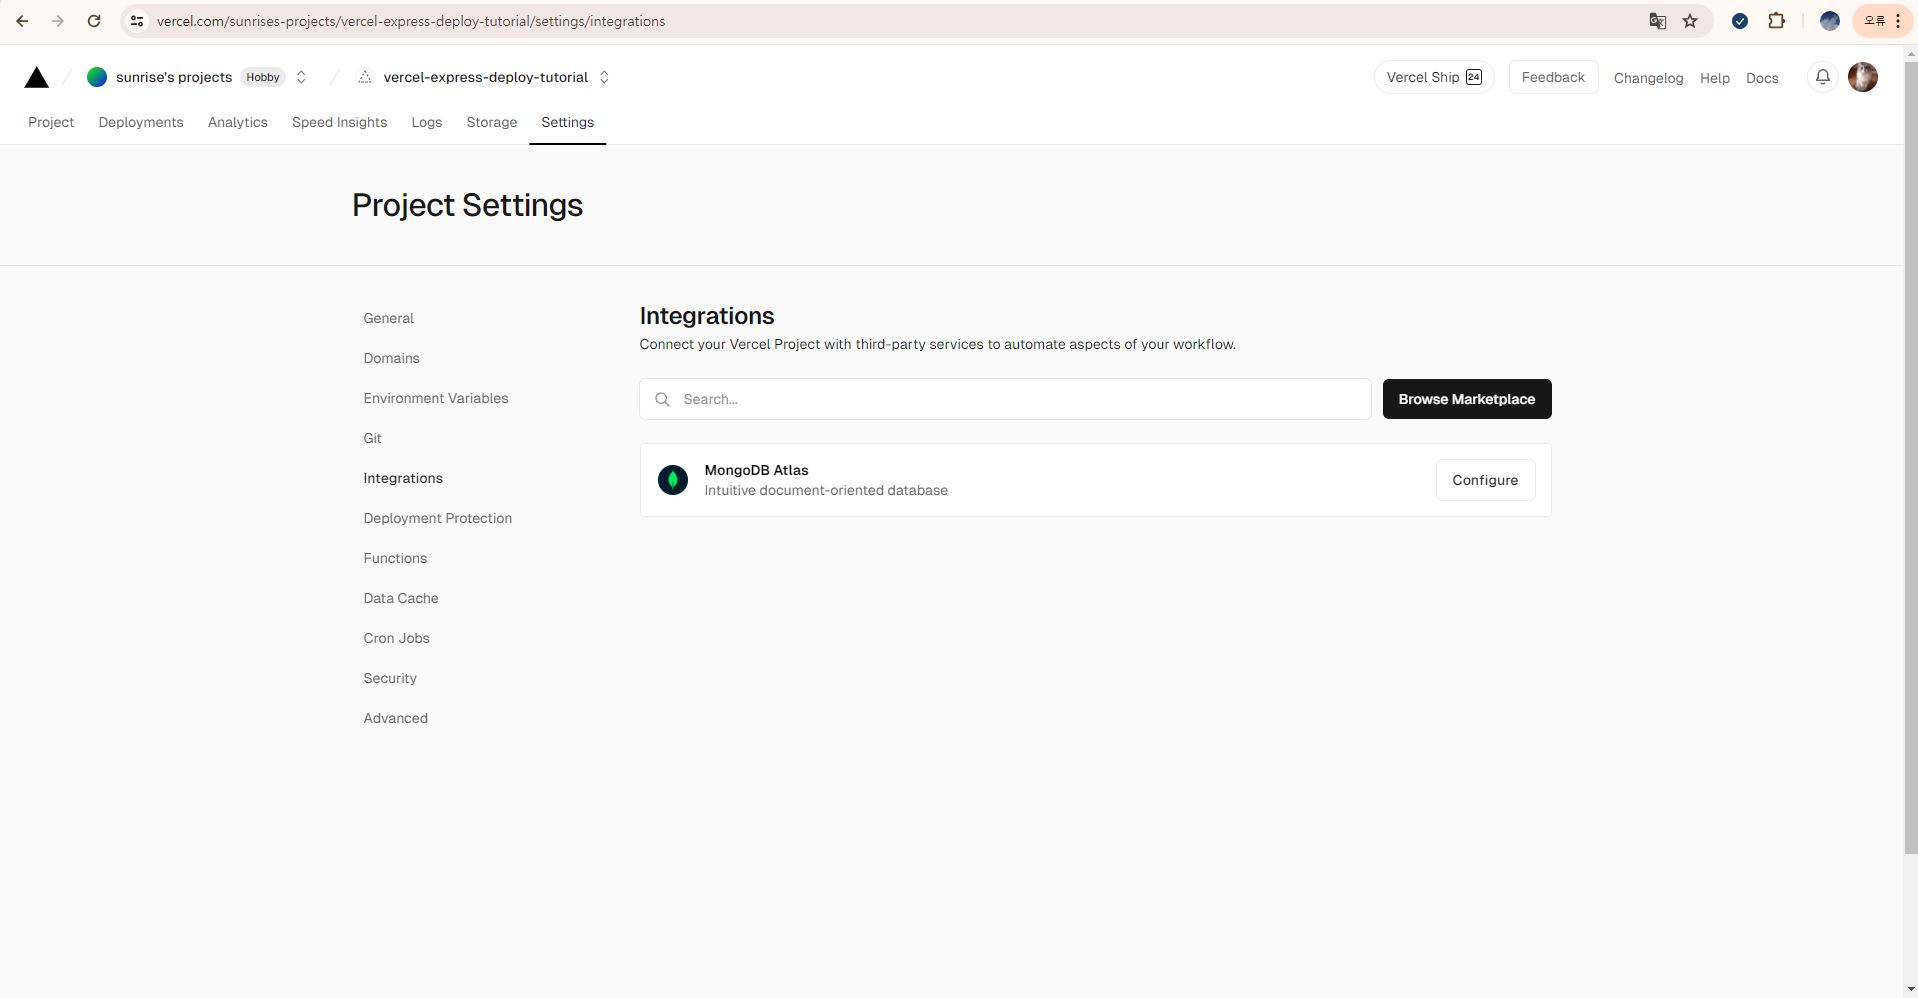
추후 MongoDB Atlas 의 설정은 해당 화면(Settings -> Integrations)에서 변경이 가능하다.

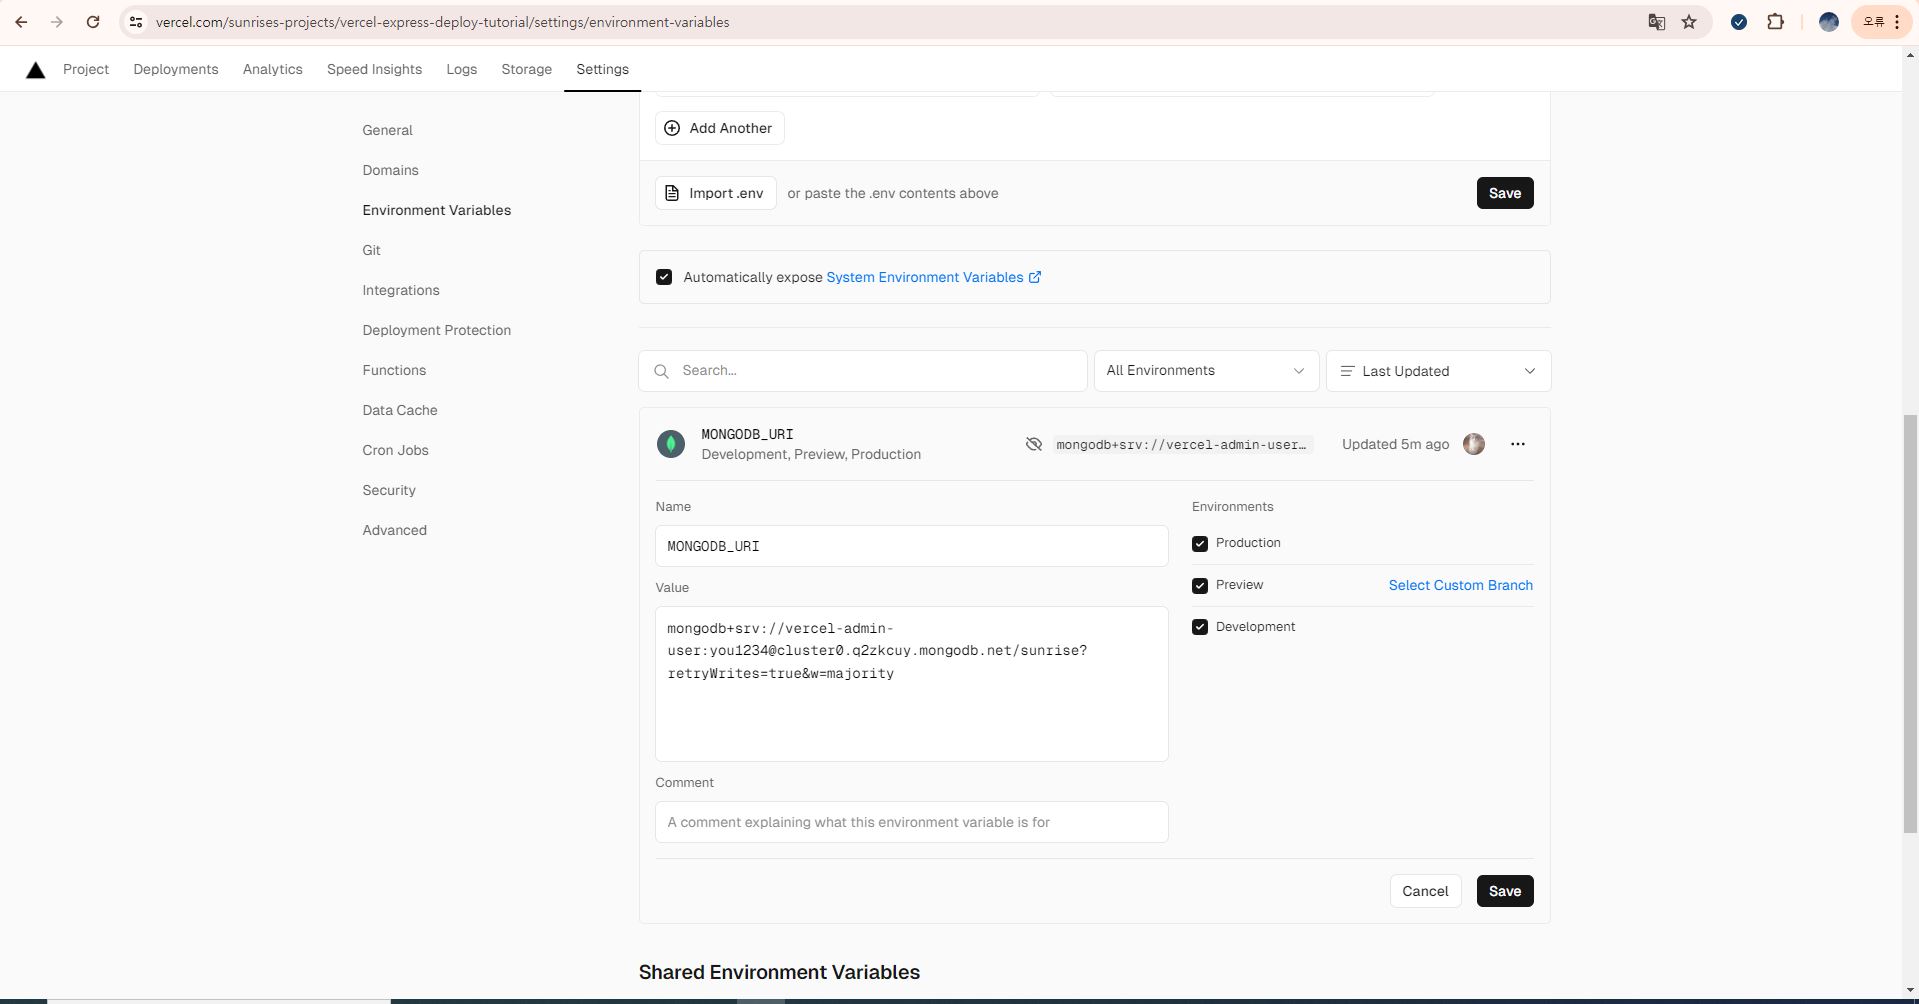
DB 연동에 성공하면 해당 프로젝트의 Settings -> Environment Variables 메뉴를 선택하고, 스크롤을 내려보면 MongoDB_URI 라는 환경변수가 자동으로 추가되어 있음을 확인할 수 있다.
mongodb+srv://vercel-admin-user:you1234@cluster0.38tto.mongodb.net/sunrise?retryWrites=true&w=majorityMongoDB_URI 는 위와 같은 형태이다. vercel-admin-user 는 Database Access 메뉴에서 확인한 사용자 이름(Username)이다. you1234 는 DB 접속을 위한 비밀번호(password)이다. sunrise 는 데이터베이스 이름이다.

우측의 Edit 버튼을 클릭하면 수정이 가능하다.
주의할점은 반드시 MongoDB Atlas 에 연결한 클러스터의 Username, Password, Database name 과 일치해야 한다.

MONGODB_URI 환경변수 수정화면에서 주소를 복사하고 브라우저에서 해당주소로 접속한다.

MongoDB Atlas 화면이 잘나오면 해당 DB주소는 유효하다.
다시 MongoDB Atlas 화면으로 돌아온다.
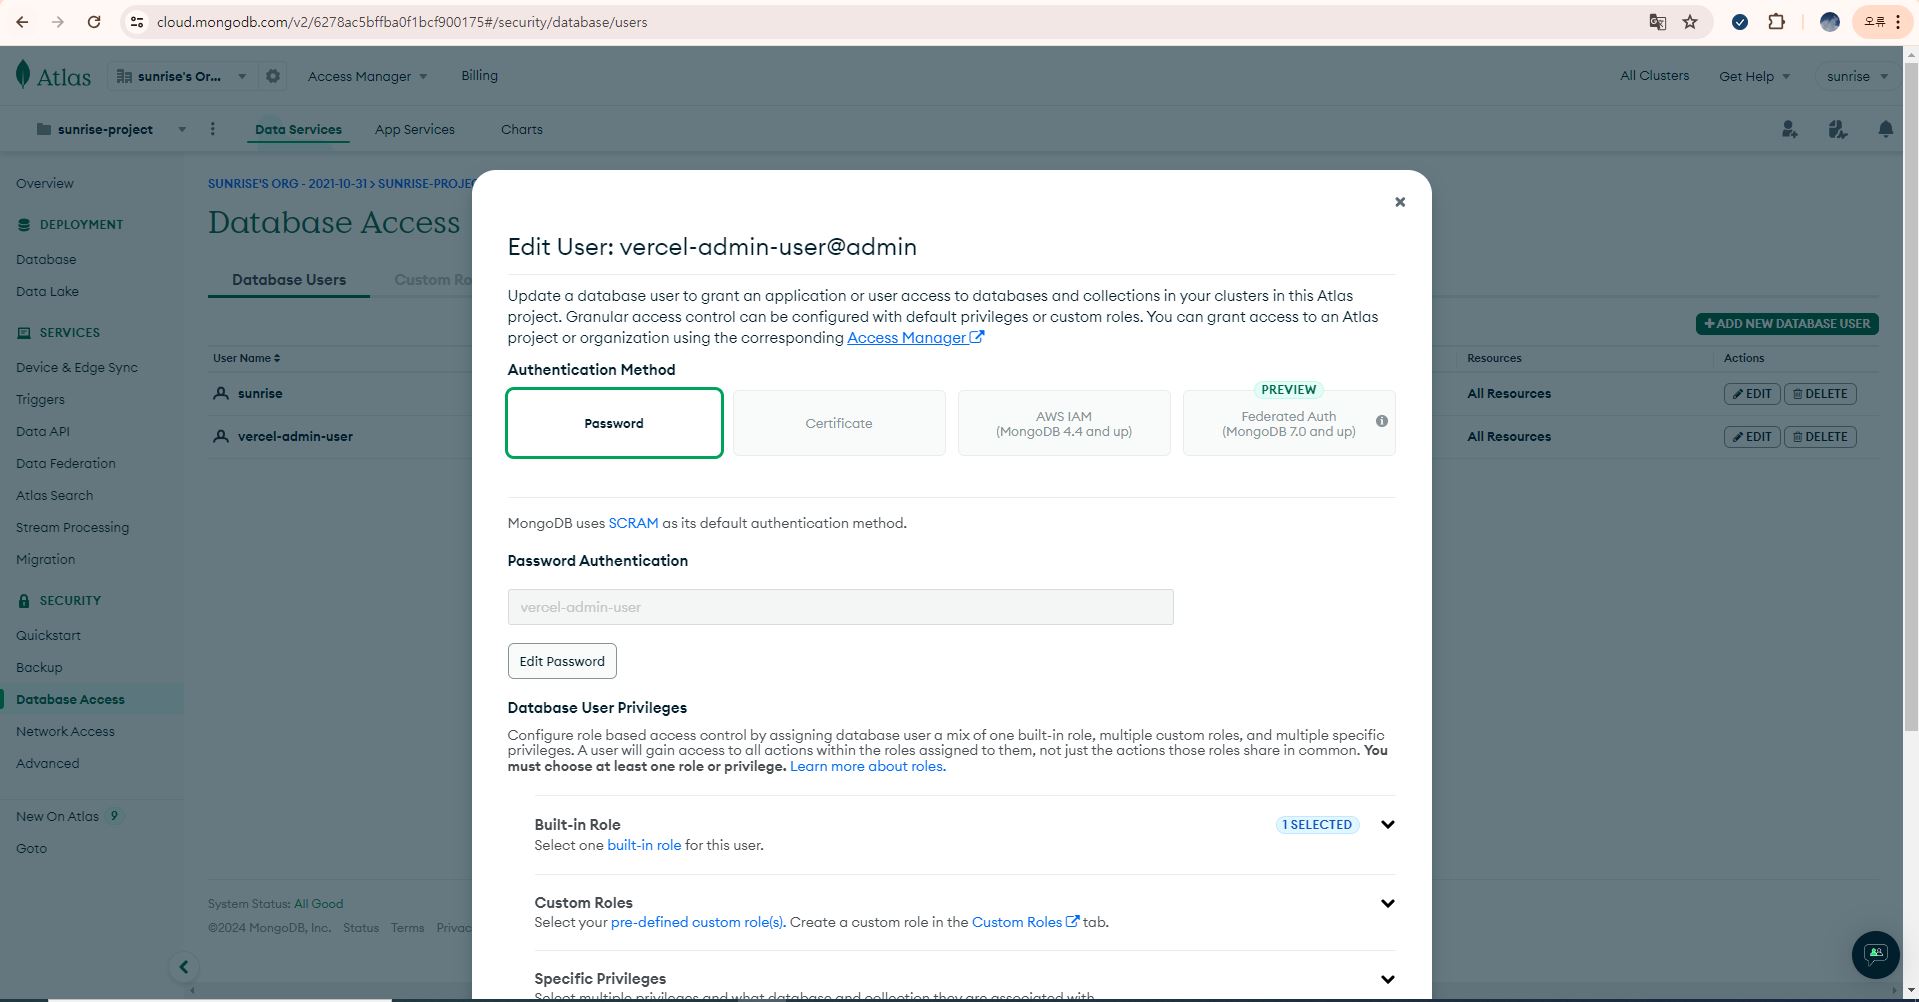
비밀번호는 Database Access 메뉴에서 vercel-admin-user 우측에 Edit 버튼을 클릭해서 수정할 수 있다. 주의할점은 반드시 Vercel 에 자동으로 설정된 MONGODB_URI 의 Username, Password, Database name 과 일치해야 한다.

Database 메뉴에서 Browse Collections 버튼을 클릭한다.

해당 클러스터에 MongoDB_URI 에 설정한 데이터베이스(sunrise) 가 존재하는지 확인한다. 만약 존재하지 않으면, 해당 이름의 데이터베이스를 생성한다.
* 프로젝트 코드에서 MongoDB Atlas 연동하기
npm install mongooseMongoDB와 연동하기 위한 mongoose 패키지를 설치한다.
const express = require("express");
const mongoose = require("mongoose")
const app = express();

console.log("몽고아틀라스 주소: ", process.env.MONGODB_URI)
mongoose.connect(process.env.MONGODB_URI)
.then(() => console.log("데이터베이스 연결 성공 !!"))
.catch(e => console.log(`데이터베이스 연결 실패 ${e}`))

app.get("/", (req, res) => res.send("Express on Vercel"));

app.listen(3001, () => console.log("Server ready on port 3000."));

module.exports = app;
api > index.js 파일을 위와 같이 수정한다.
const mongoose = require("mongoose")mongoose 패키지를 사용하기 위하여 임포트한다.
console.log("몽고아틀라스 주소: ", process.env.MONGODB_URI)
mongoose.connect(process.env.MONGODB_URI)
.then(() => console.log("데이터베이스 연결 성공 !!"))
.catch(e => console.log(`데이터베이스 연결 실패 ${e}`))
MongoDB Atlas 와 연동한다.
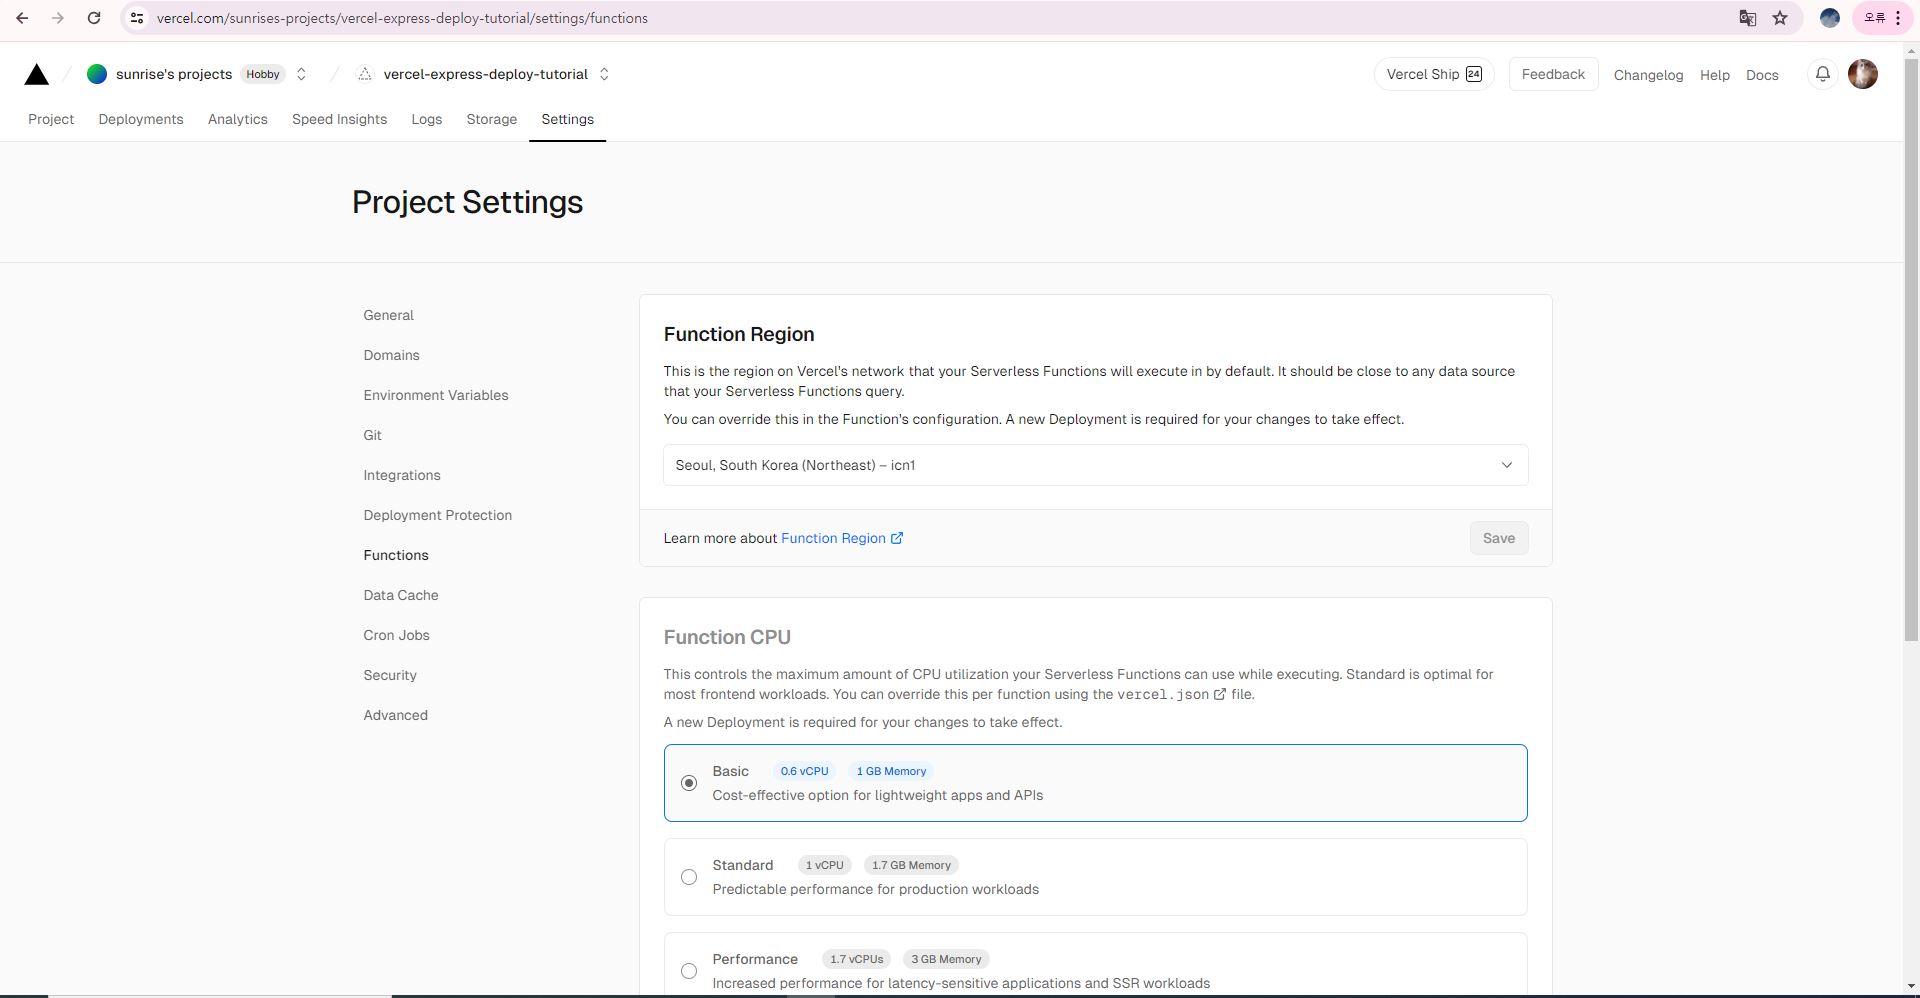
기본적으로 vercel 은 미국에서 서버를 호스팅한다. 호스팅 지역을 서울로 변경한다.
MongoDB Atlas 에서 특정 프로젝트(express-project)를 선택하고 Edit configuration 버튼을 클릭한다.

Cloude Provider & Region 파트를 보면 DB 서버도 서울에 있다는 것을 확인할 수 있다. 그래서 vercel 에서 서버의 호스팅 지역을 서울로 변경하는 것이다. 그렇지 않으면 DB 접속할때 시간이 너무 오래 걸려서 TIMEOUT 에러가 발생할 수 있다.
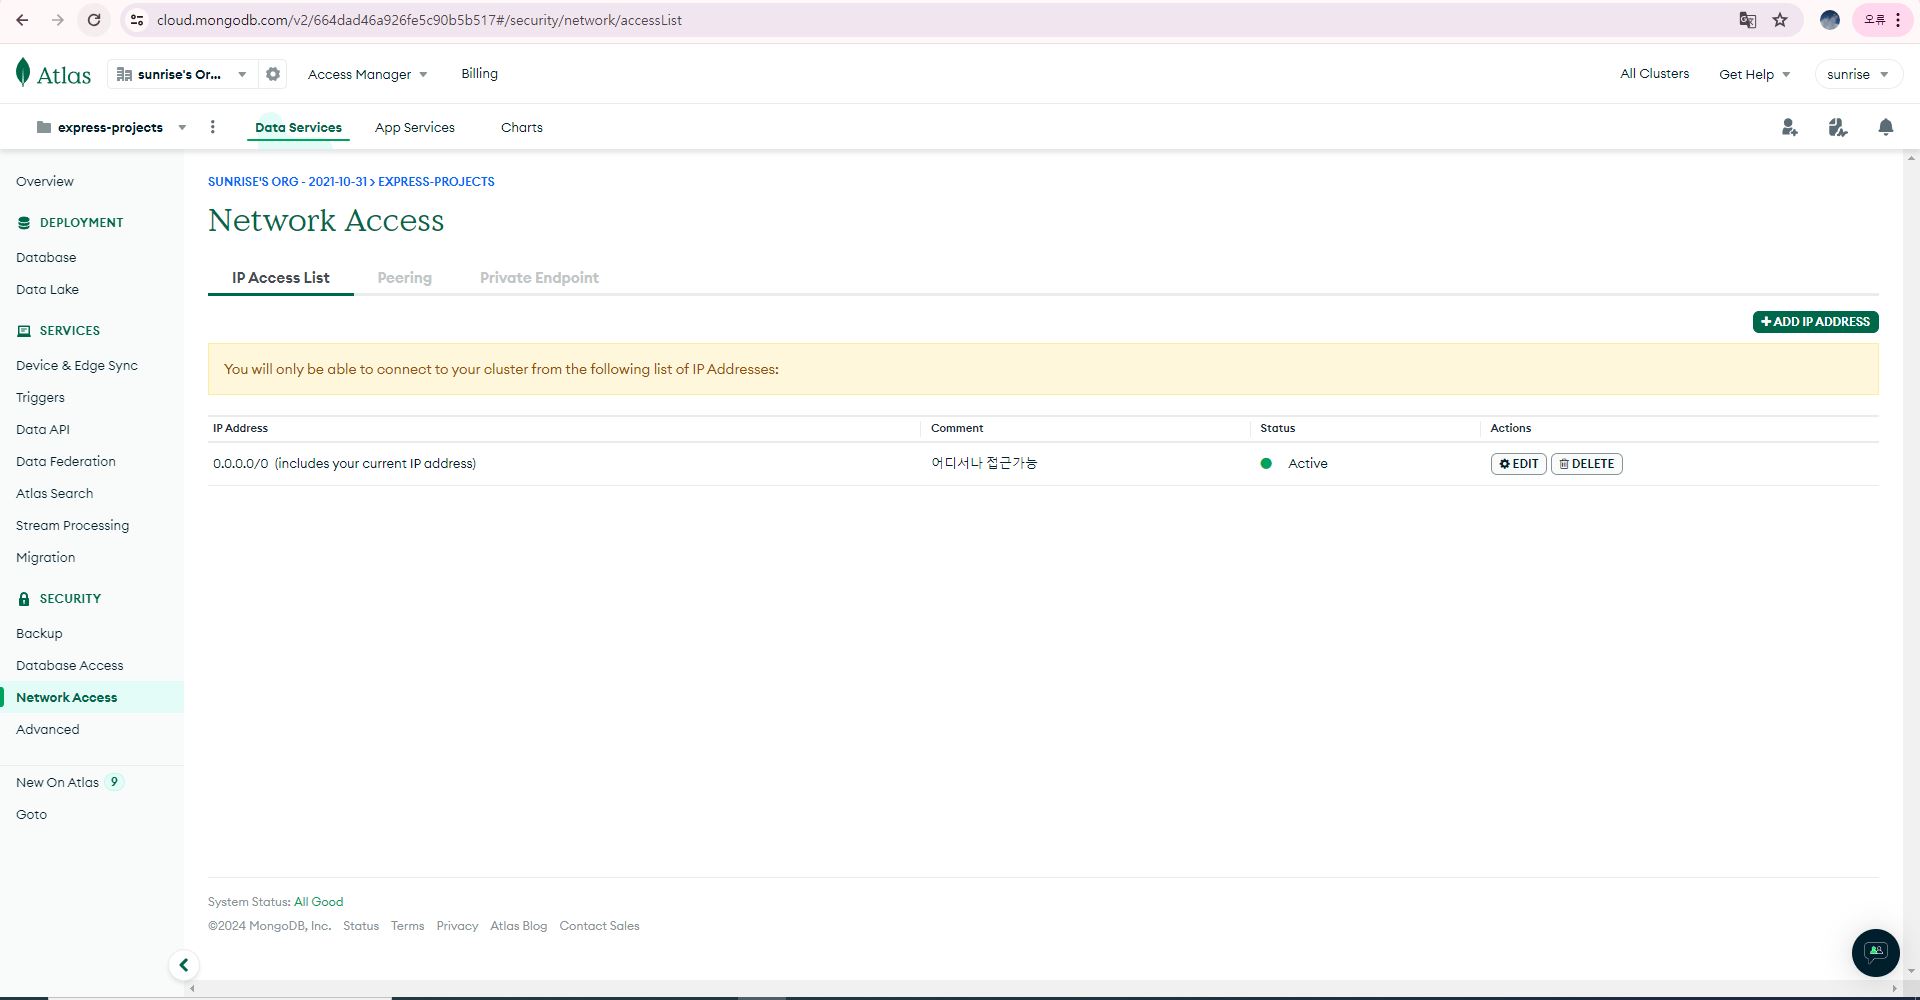
VERCEL 뿐만 아니라 어디에서도 MongoDB Atlas 에 접근할 수 있도록 IP Adress 가 0.0.0.0/0 으로 설정되어 있는지도 다시 한번 확인한다.
git status
git add .
git commit -am"몽고 아틀라스 연동"
git push origin main
깃허브에 푸쉬한다.

깃허브에 푸쉬하면 vecel 에서 자동으로 빌드를 하고 배포를 한다. 이때 settings 에서 설정을 변경한 것이 있으면 서버를 재시작하면서 적용되고, 빌드가 완료될때만 MongoDB Atlas 에 접속을 시도한다.

빌드가 완료되고, Logs 탭을 확인해보면 데이터베이스가 성공적으로 연동된 것을 확인할 수 있다.
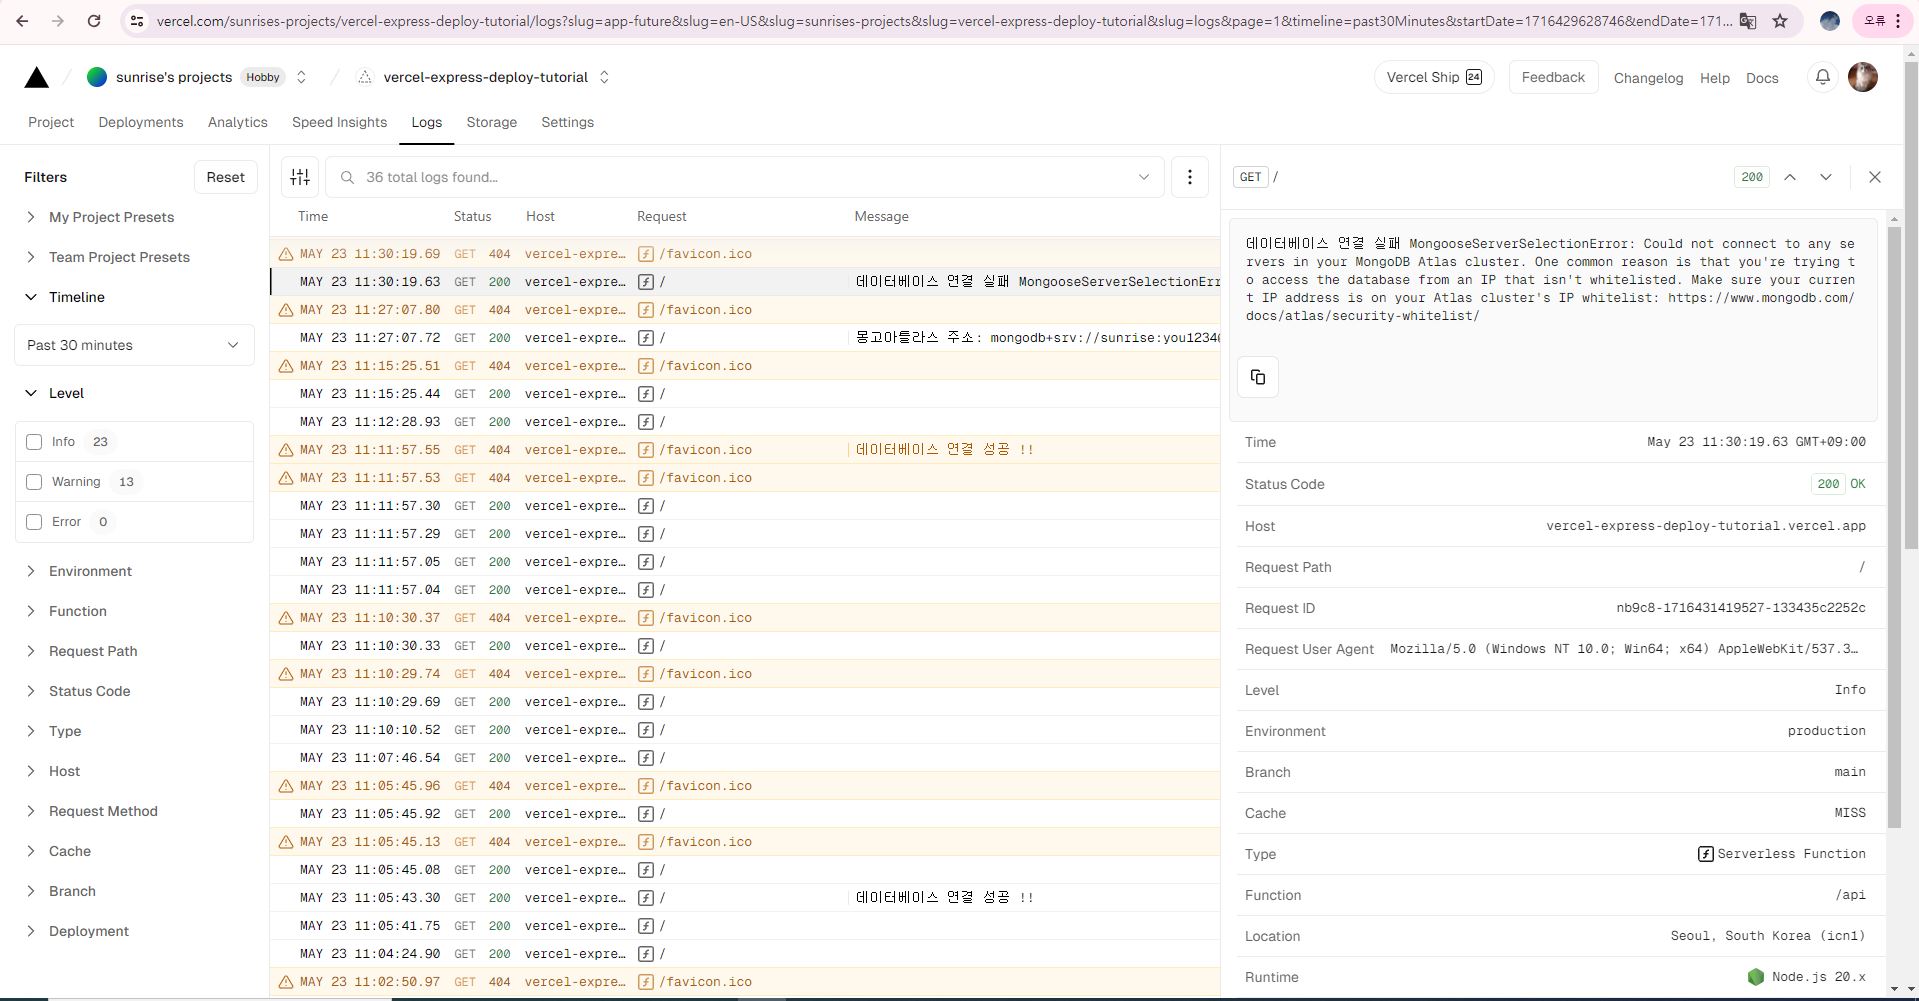
동일한 코드이고 설정도 동일한데도 이렇게 데이터베이스 연결이 잘 되다가 안되는 경우도 있다.
주의할점은 settings 에서 환경변수나 설정을 변경하고, 반드시 푸쉬해야 적용이 된다. MONGODB_URI 의 주소를 변경하고, 반드시 푸쉬해야 적용된다. MongoDB 도 푸쉬할때만 연결을 시도한다.
* Mongo Atlas 에 데이터 저장하기
const mongoose = require('mongoose')
const { Schema } = mongoose

const userSchema = new Schema({
    name: {
        type: String,
        required: true
    },
    email: {
        type: String,
        required: true,
        unique: true, // unique: 색인(primary key) email 중복불가
    },
    userId: {
        type: String,
        required: true
    },
    password: {
        type: String,
        required: true
    },
    isAdmin: {
        type: Boolean,
        default: false
    },
    createdAt: {
        type: Date,
        default: Date.now
    },
    lastModifiedAt: {
        type: Date,
        default: Date.now
    }
})
const User = mongoose.model('User', userSchema)
module.exports = User
api > User.js 파일에 사용자 모델에 대한 스키마를 작성한다.
const express = require("express");
const mongoose = require("mongoose")
const app = express();
const User = require('./User')

console.log("몽고아틀라스 주소: ", process.env.MONGODB_URI)
mongoose.connect(process.env.MONGODB_URI)
.then(() => console.log("데이터베이스 연결 성공 !!"))
.catch(e => console.log(`데이터베이스 연결 실패 ${e}`))

app.get("/", (req, res) => res.send("Express on Vercel"));

app.post("/user", (req, res) => {
    // user 데이터 생성 테스트
    const user = new User({
        name: '사용자',
        email: 'user123@gmail.com',
        userId: 'user',
        password: 'abcde123@'
    })
    user.save()
    .then(() => {
        console.log('회원가입 성공!')
        res.json({ newUser: user })
    })
    .catch(e => {
        console.log(e)
        res.status(400).json({ code: 400, message: 'Invalid User Data'})
    })
})

app.listen(3001, () => console.log("Server ready on port 3000."));

module.exports = app;
api > index.js 파일을 위와 같이 수정한다.
const User = require('./User.js')사용자 모델을 임포트한다.
app.post("/user", (req, res) => {
    // user 데이터 생성 테스트
    const user = new User({
        name: '사용자',
        email: 'user123@gmail.com',
        userId: 'user',
        password: 'abcde123@'
    })
    user.save()
    .then(() => {
        console.log('회원가입 성공!')
        res.json({ newUser: user })
    })
    .catch(e => {
        console.log(e)
        res.status(400).json({ code: 400, message: 'Invalid User Data'})
    })
})
회원가입 로직을 작성한다.
git status
git add .
git commit -am"회원가입 로직 추가"
git push origin main
깃허브에 다시 푸쉬한다.


API 테스트 도구로 현재 서버 호스팅 주소 (https://vercel-express-deploy-tutorial.vercel.app/)로 POST 요청을 보내면 정상적으로 회원가입에 성공한다. 물론 호스팅 주소는 자신의 호스팅 주소를 사용하자!
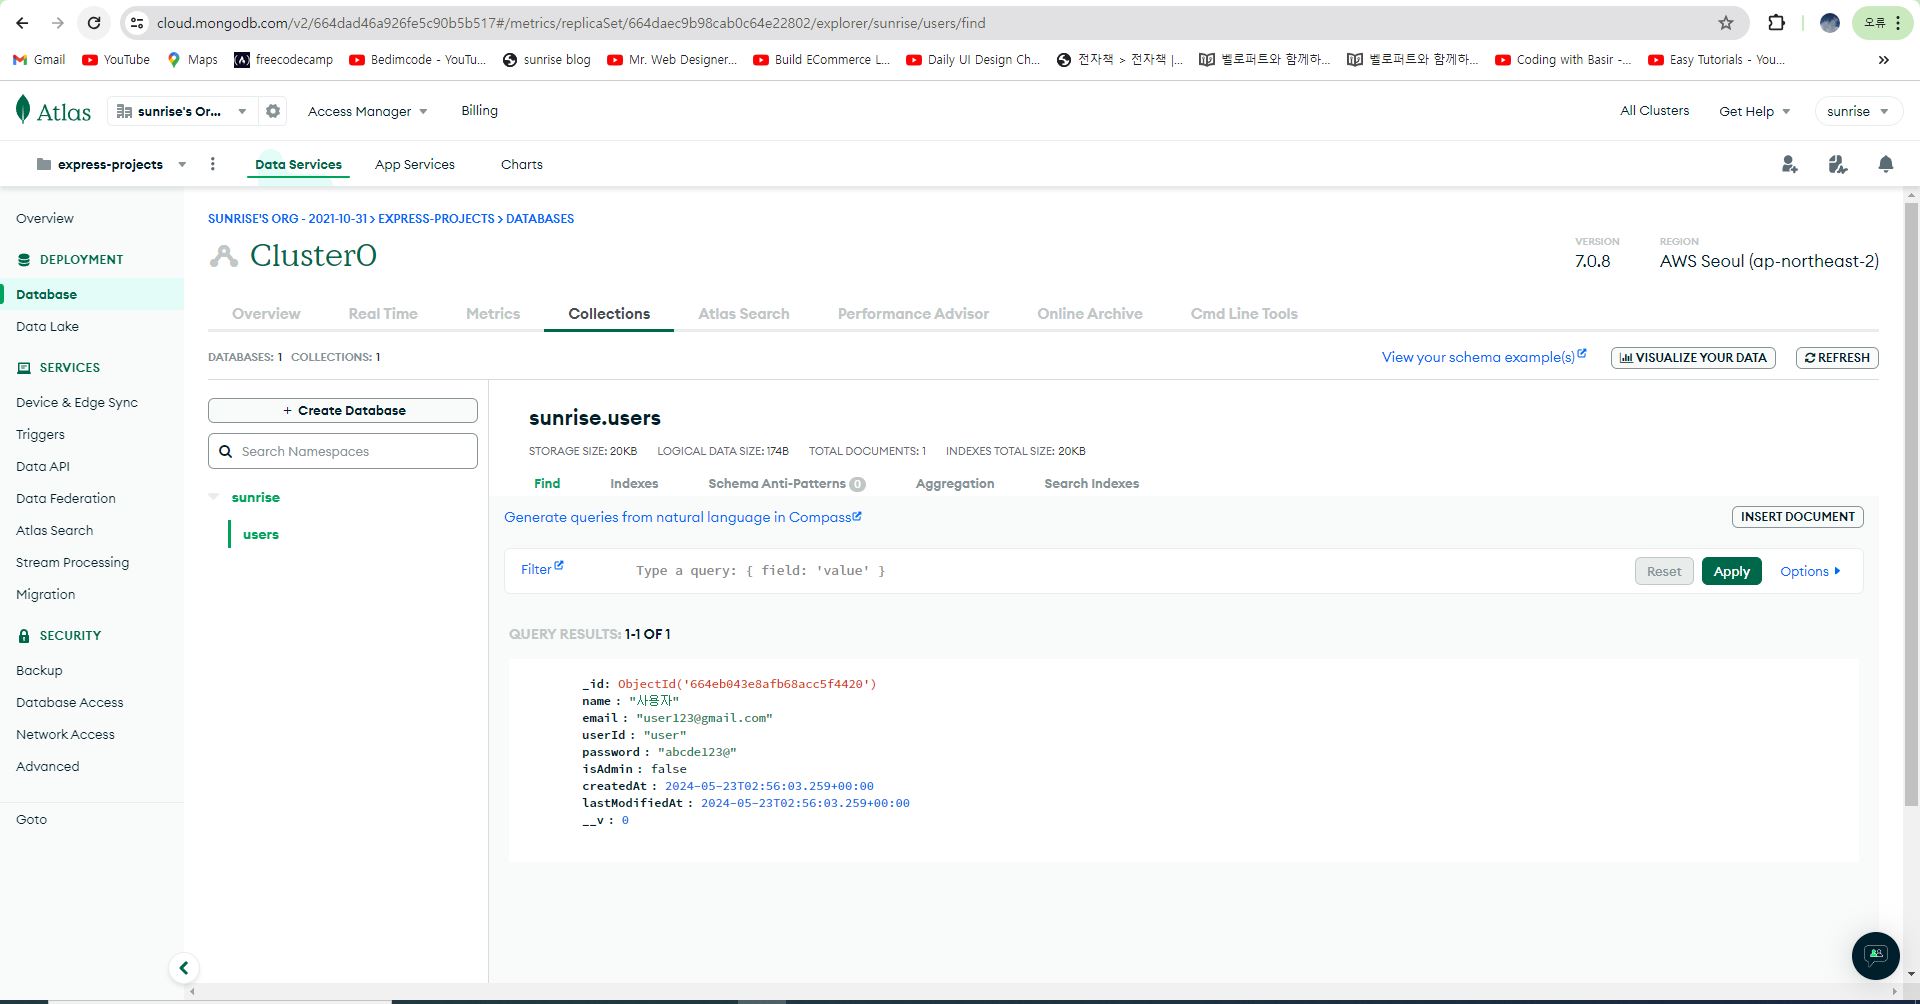
MongoDB Atlas 에서 Apply 버튼을 클릭하면 정상적으로 사용자가 추가된 것을 확인할 수 있다.
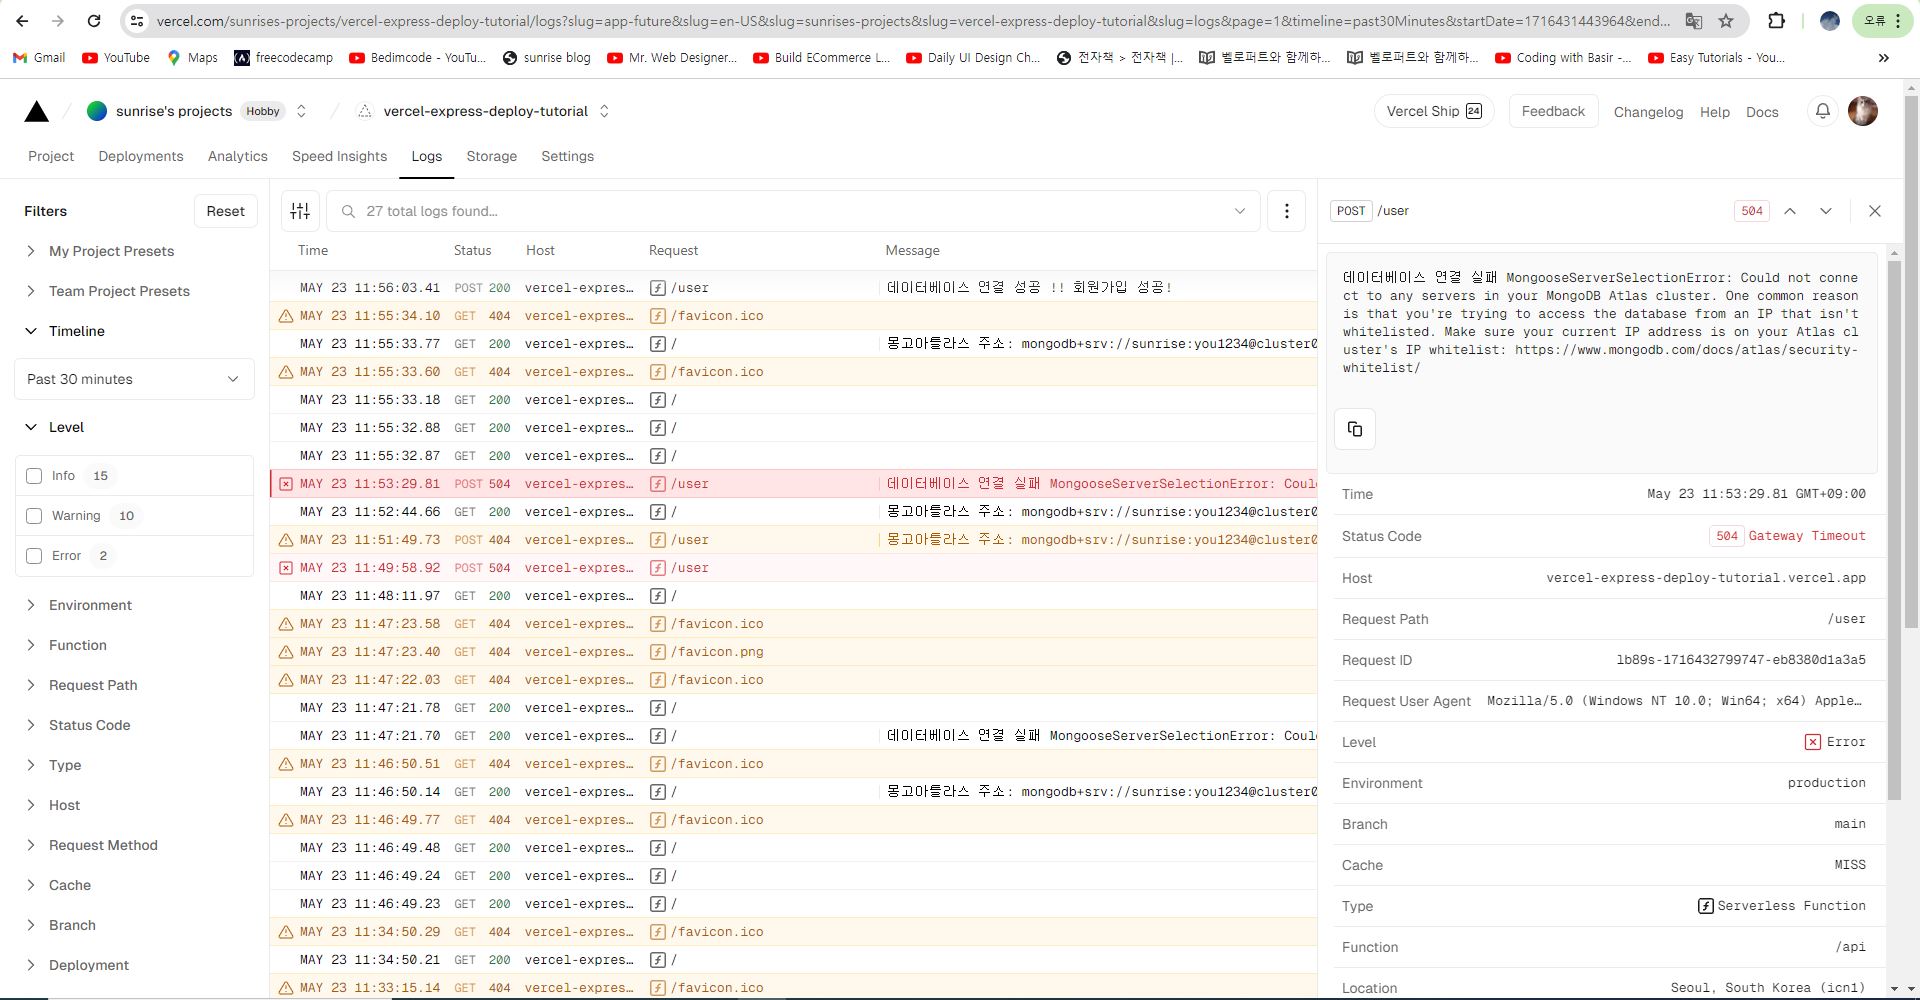
동일한 코드와 동일한 설정에서 에러가 나더라도 회원가입에 성공할 수 있으니 무시하고 회원가입을 시도해보자!
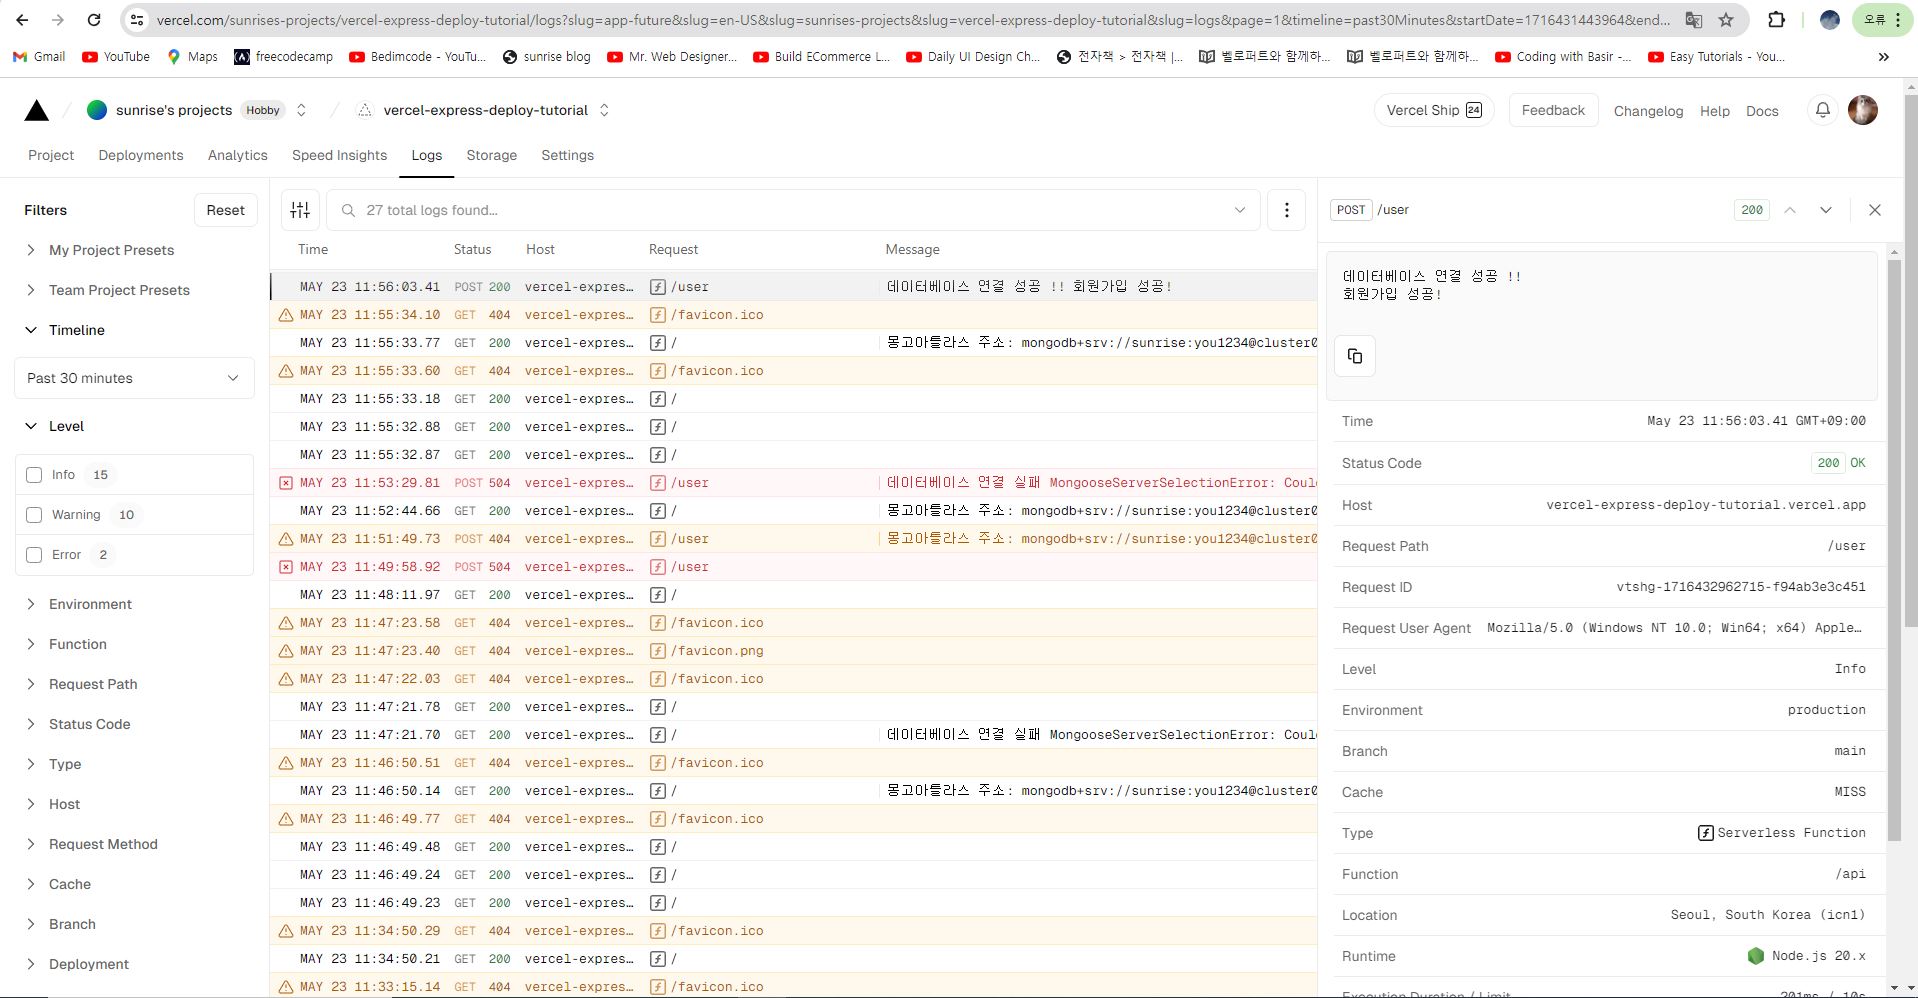
동일한 코드로 다시 회원가입을 시도하였고, 다시 성공하였다.
const express = require("express");
const mongoose = require("mongoose")
const cors = require('cors')
const app = express();
const User = require('./User')

const corsOptions = {
    origin: '*', // 해당 URL 주소만 요청을 허락함
    credentials: true // 사용자 인증이 필요한 리소스를 요청할 수 있도록 허용함
}

console.log("몽고아틀라스 주소: ", process.env.MONGODB_URI)
mongoose.connect(process.env.MONGODB_URI)
.then(() => console.log("데이터베이스 연결 성공 !!"))
.catch(e => console.log(`데이터베이스 연결 실패 ${e}`))

app.use(cors(corsOptions)) // cors 설정 미들웨어
app.use(express.json()) // 요청본문 (request body) 파싱(해석)을 위한 미들웨어

app.get("/", (req, res) => res.send("Express on Vercel"));

app.post("/user", (req, res) => {
    // user 데이터 생성 테스트
    console.log(req.body)
    const user = new User({
        name: req.body.name,
        email: req.body.email,
        userId: req.body.userId,
        password: req.body.password
    })
    user.save()
    .then(() => {
        console.log('회원가입 성공!')
        res.json({ newUser: user })
    })
    .catch(e => {
        console.log(e)
        res.status(400).json({ code: 400, message: 'Invalid User Data'})
    })
})

app.listen(3001, () => console.log("Server ready on port 3000."));

module.exports = app;
api > index.js 파일을 위와 같이 수정한다.
app.post("/user", (req, res) => {
    // user 데이터 생성 테스트
    console.log(req.body)
    const user = new User({
        name: req.body.name,
        email: req.body.email,
        userId: req.body.userId,
        password: req.body.password
    })
    user.save()
    .then(() => {
        console.log('회원가입 성공!')
        res.json({ newUser: user })
    })
    .catch(e => {
        console.log(e)
        res.status(400).json({ code: 400, message: 'Invalid User Data'})
    })
})
이제 요청본문으로 전달받은 값으로 회원가입을 진행하도록 한다.
요청본문을 파싱하기 위해서는 cors 설정이 필요하다.
npm install corscors 패키지를 설치한다.
const cors = require('cors')cors 패키지를 임포트한다.
const corsOptions = {
    origin: '*', // 해당 URL 주소만 요청을 허락함
    credentials: true // 사용자 인증이 필요한 리소스를 요청할 수 있도록 허용함
}
cors 옵션을 설정한다.
app.use(cors(corsOptions)) // cors 설정 미들웨어
app.use(express.json()) // 요청본문 (request body) 파싱(해석)을 위한 미들웨어
cors 미들웨어 설정과 요청본문 파싱을 위한 미들웨어를 설정한다.
git status
git add .
git commit -am"회원가입 로직 추가 3"
git push origin main
코드가 수정되었으므로 깃허브에 다시 푸쉬한다.

로그 기록을 확인해보면 데이터베이스가 성공적으로 연결되었다.
{
  "name": "테스터",
  "email": "tester@gmail.com",
  "userId": "tester",
  "password": "test123@"
}
API 테스트 도구에서 요청본문에 해당 사용자로 회원가입을 시도한다.
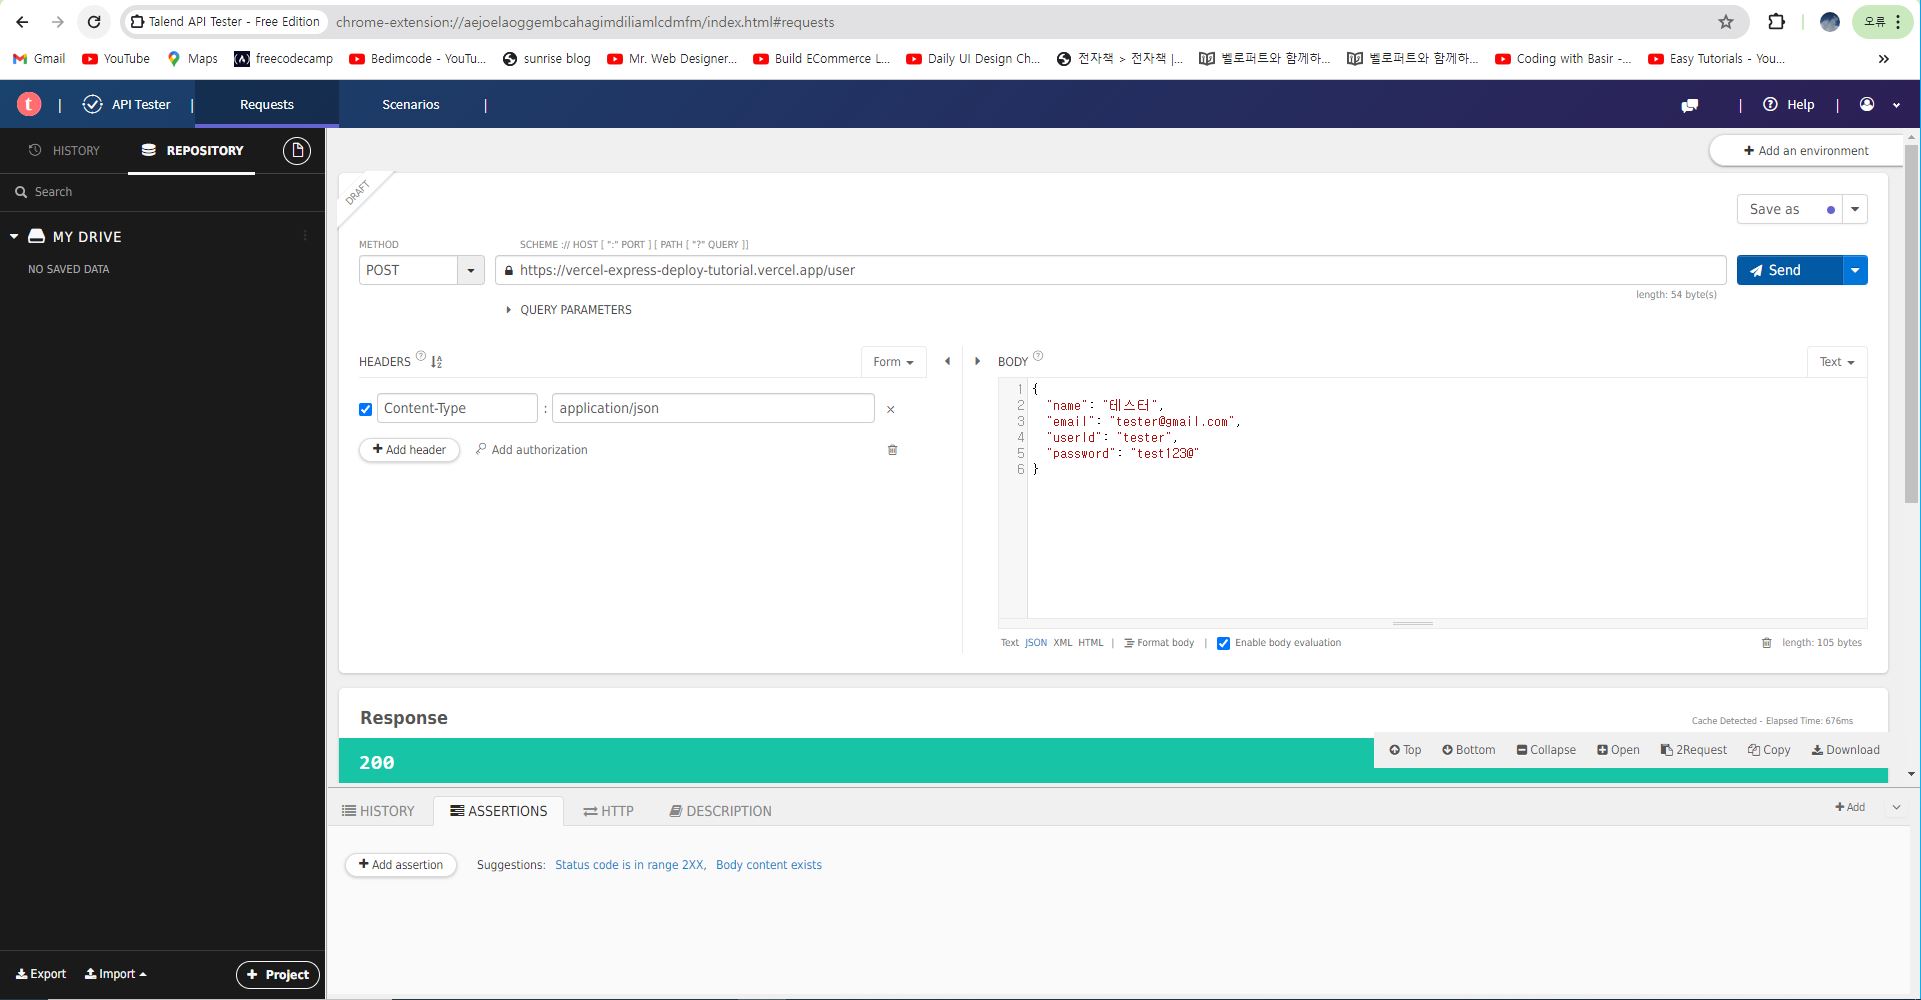

회원가입에 성공하였다.

MongoDB Atlas 에서도 제대로 추가된 것을 확인할 수 있다.
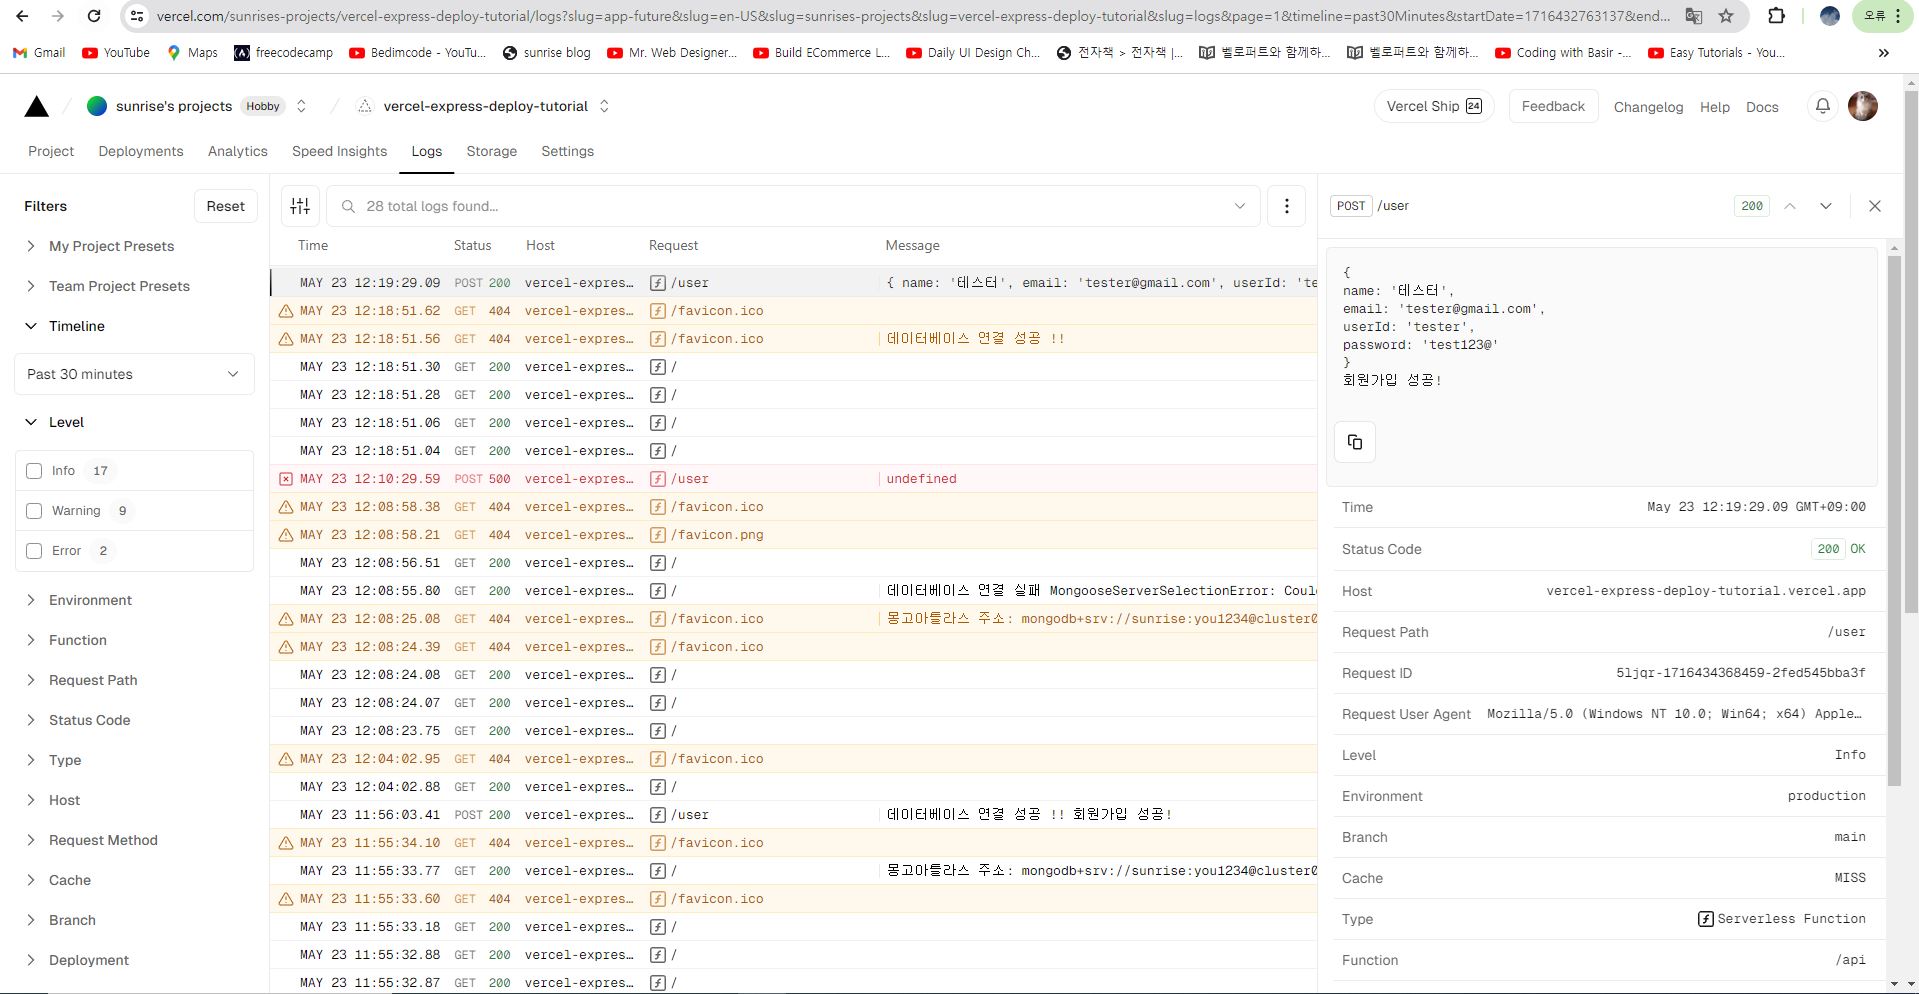
로그기록을 확인해보면 서버에서도 회원가입에 성공하였음을 확인할 수 있다.
mongodb+srv://vercel-admin-user:you1234@cluster0.q2zkcuy.mongodb.net/sunrise?retryWrites=true&w=majorityMONGODB_URI 환경변수에서 username 을 vercel-admin-user 로 수정하고, 설정을 적용하기 위하여 다시 깃허브에 푸쉬해서 서버를 재시작하였다.

{
  "name": "스카이",
  "email": "sky123@gmail.com",
  "userId": "sky",
  "password": "sky123@"
}
요청본문에 다른 사용자 정보를 추가한다.

API 테스트 도구에서 다시 회원가입을 진행한다.

회원가입에 성공하였다.
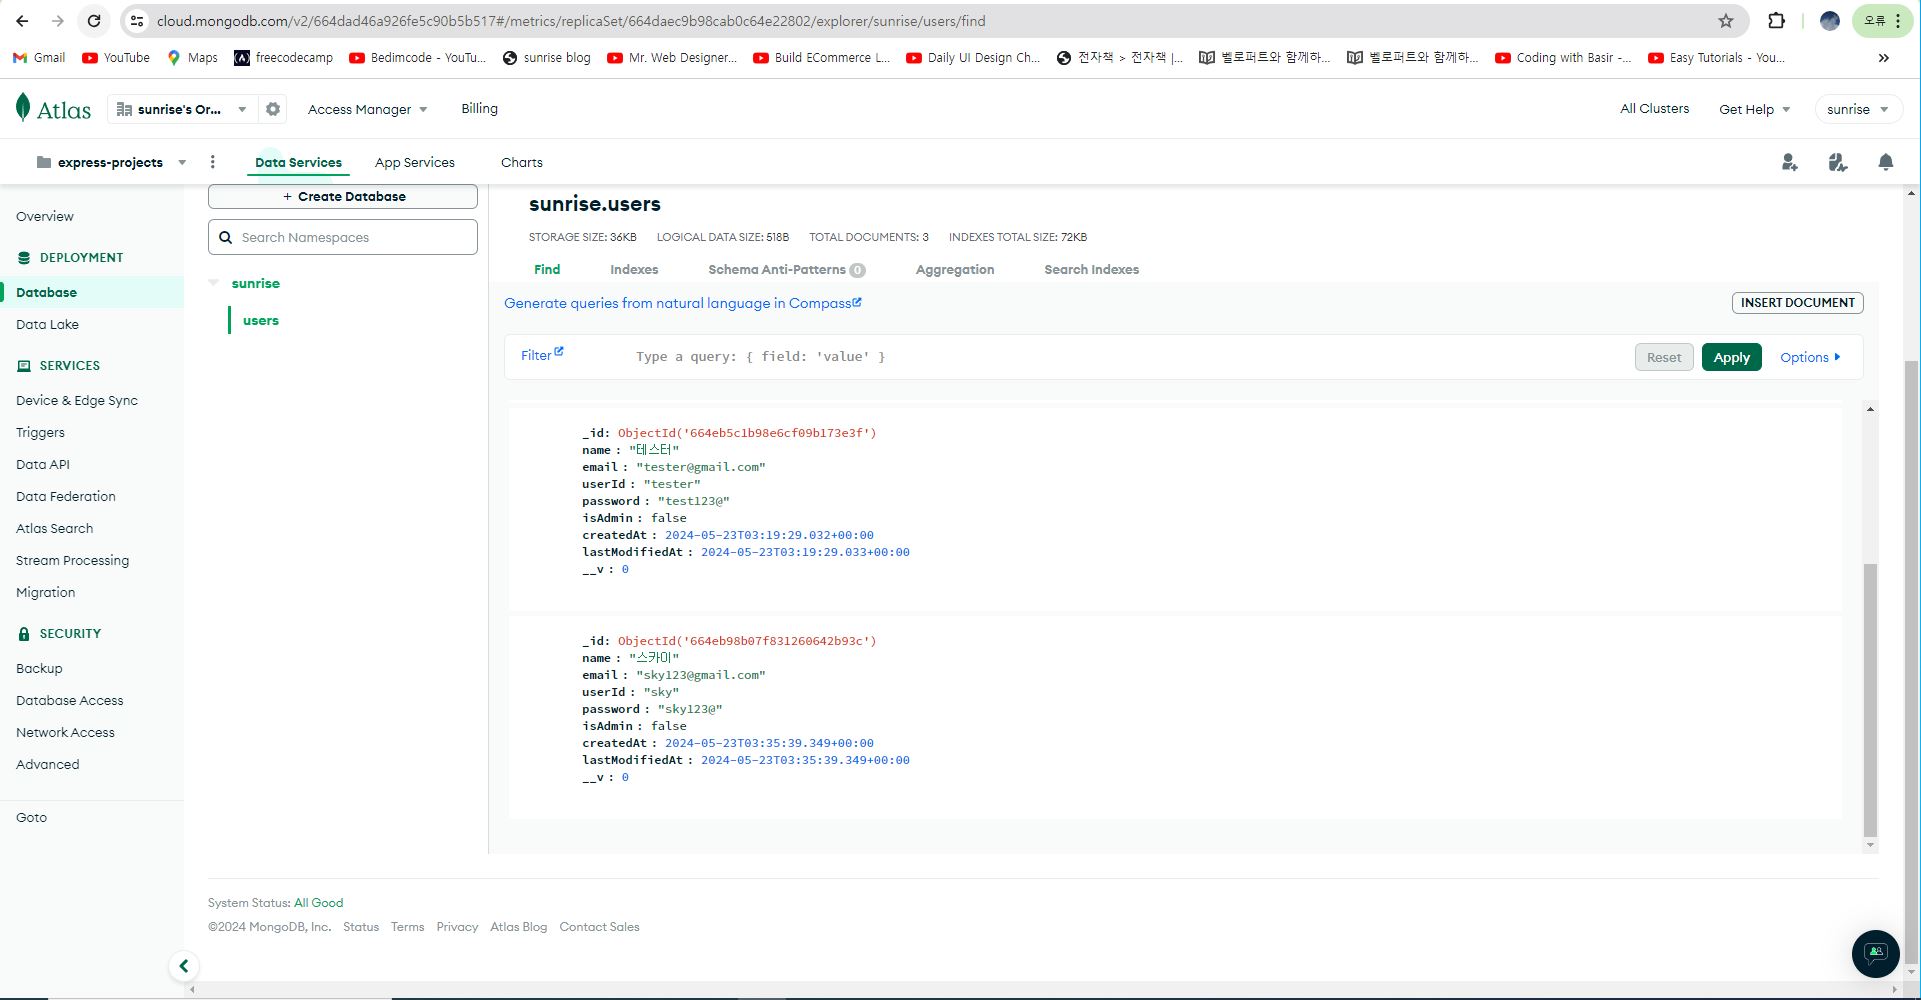
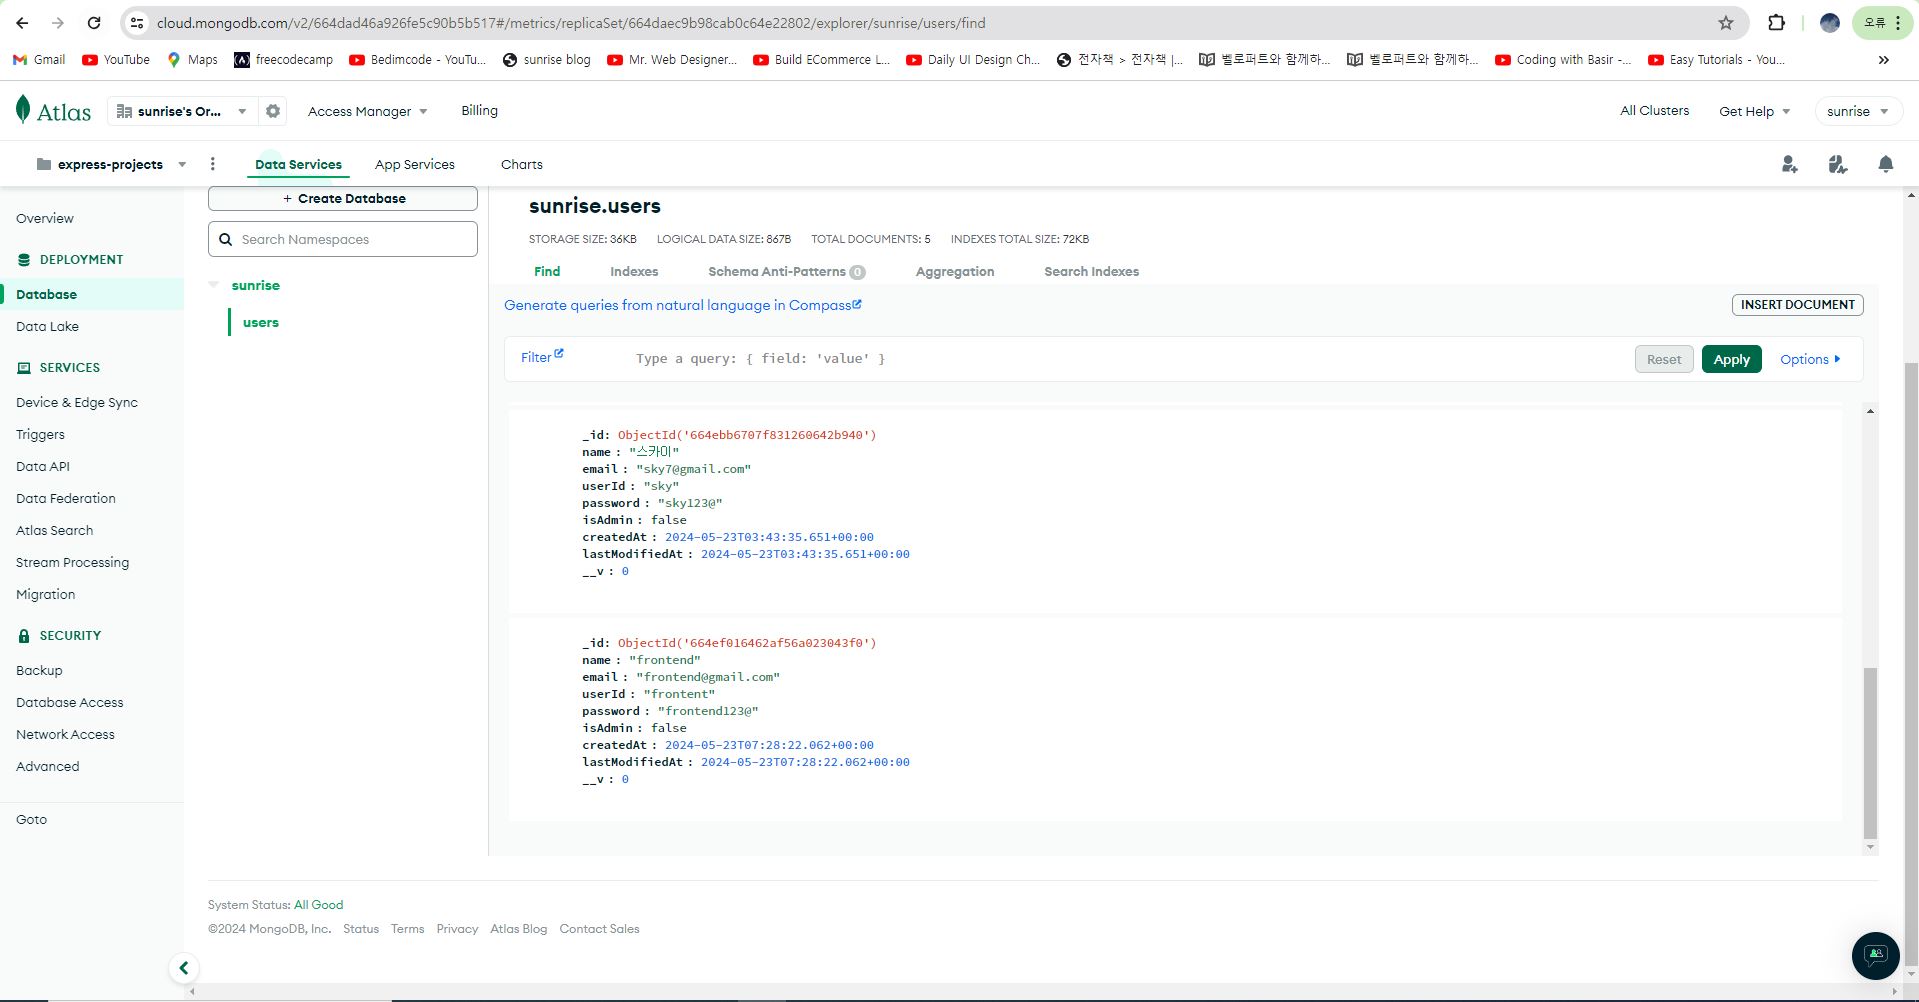
MongoDB Atlas 에도 사용자가 성공적으로 가입된 것을 확인할 수 있다.
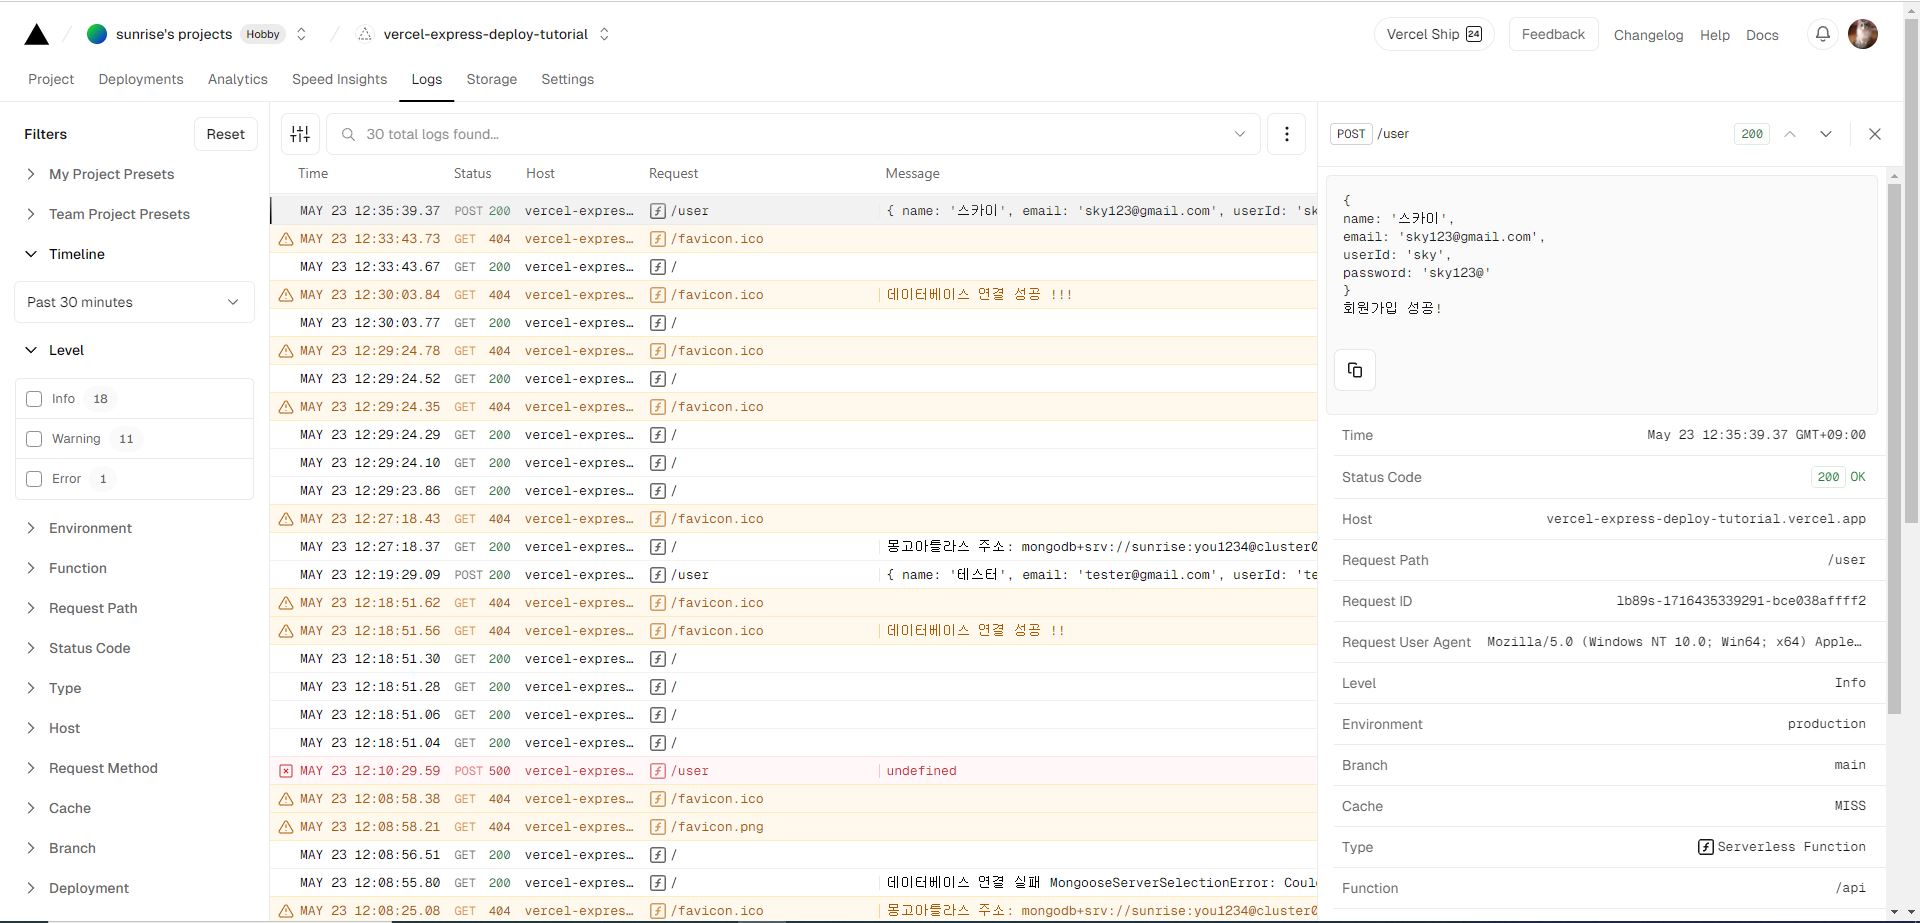
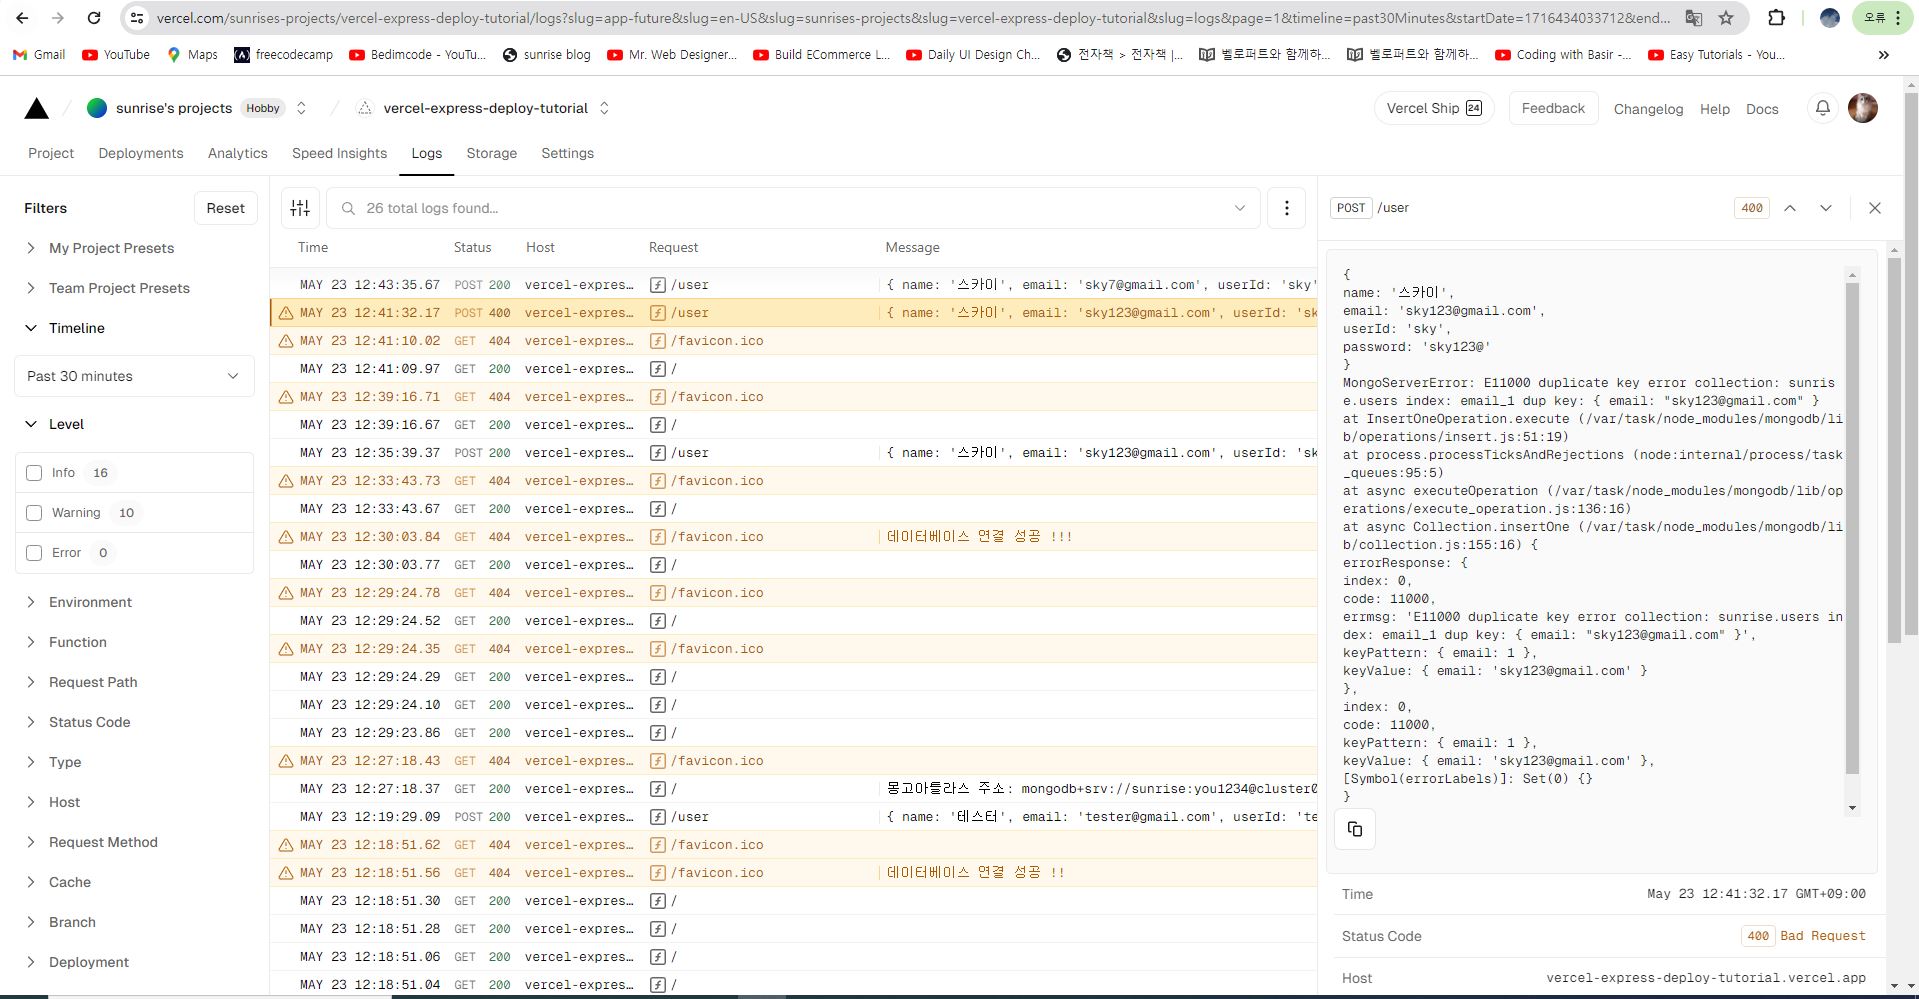
vecel 에서 해당 서버의 로그 기록을 확인해봐도 회원가입에 성공하였음을 확인할 수 있다.
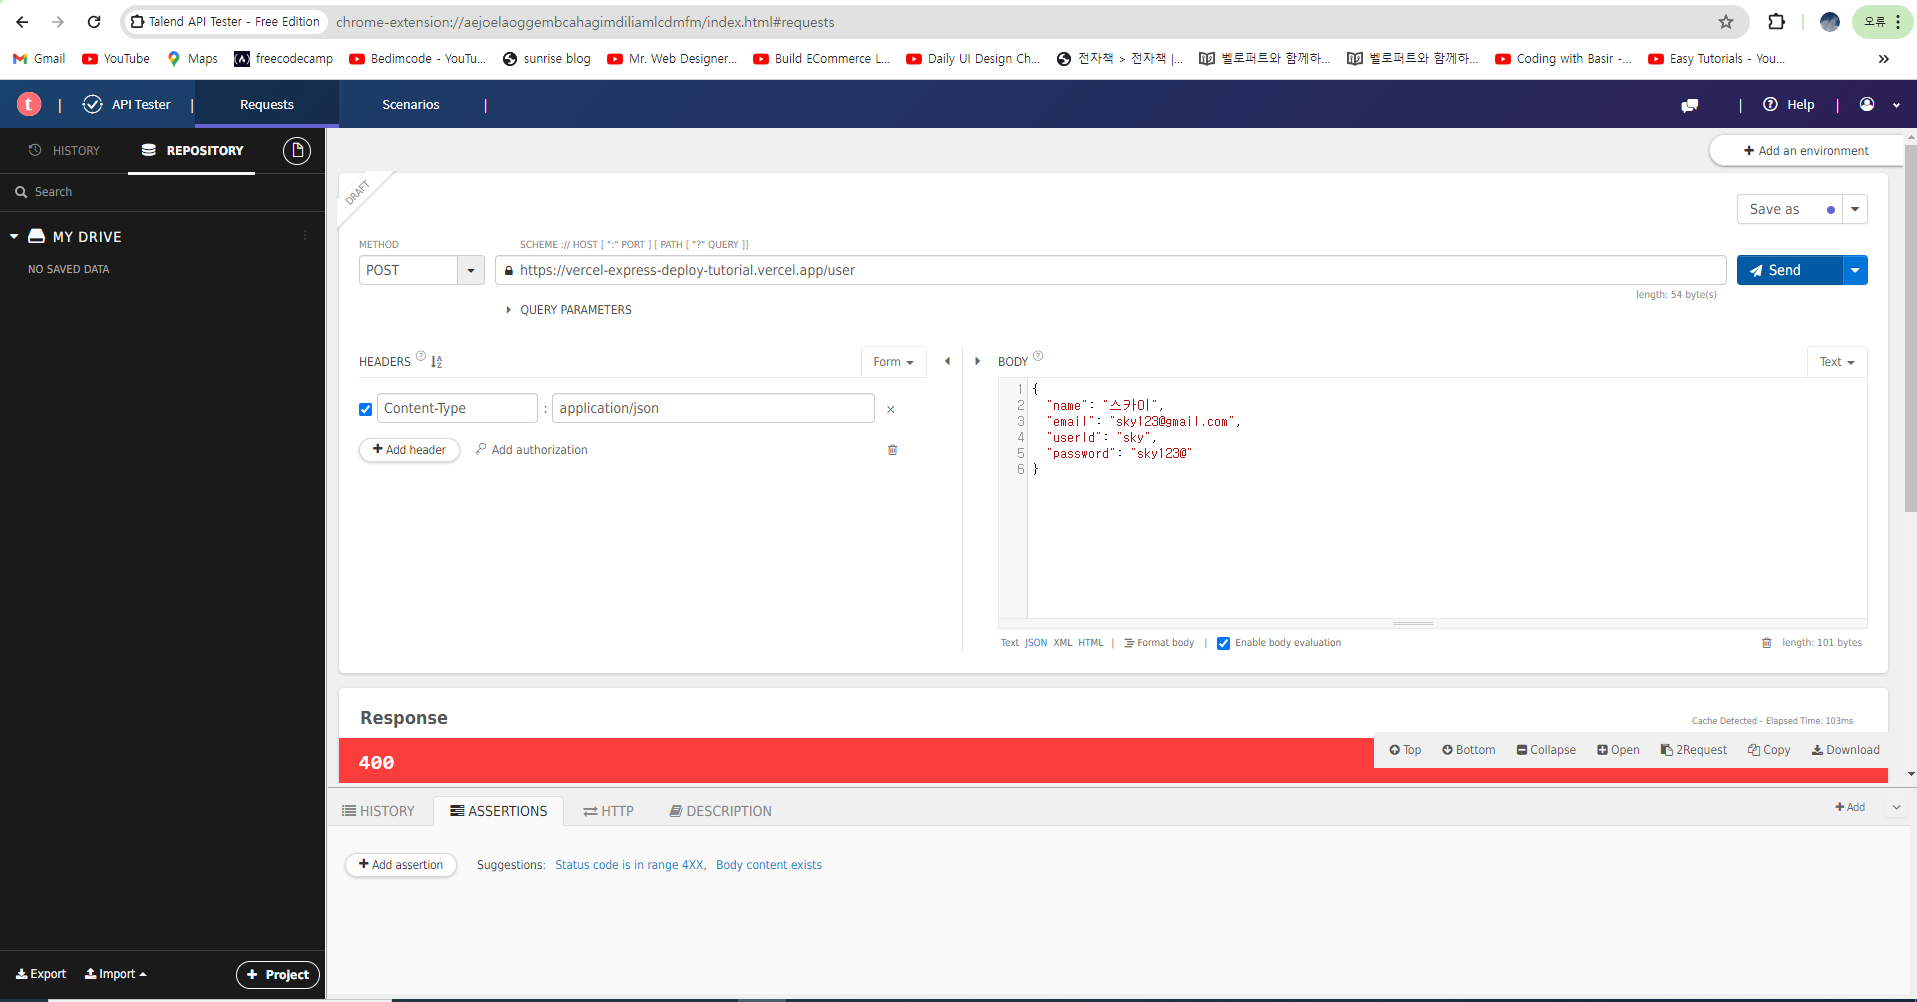
동일한 사용자를 다시 추가하려고 하면 Bad Requeust(400) 에러가 발생한다. 왜냐하면 이메일이 중복되기 때문이다. 이메일은 스키마에서 unique: true 로 설정되어 있기 때문이다.
{
  "name": "스카이",
  "email": "sky7@gmail.com",
  "userId": "sky",
  "password": "sky123@"
}
이메일을 수정하고, 다시 회원가입을 시도한다.

회원가입에 성공한다.
* 프론트엔드와 백엔드 배포 방법
풀스택 배포 방법에 관해서.. - 인프런
강의를 바탕으로 포트폴리오를 만들어서 이제 배포하려고 하는데요 aws를 안쓰고, 간단하게 netlify, github pages, vercel 등을 써서 배포하려고 하거든요.. 그런데 프로젝트에서 front와 back 폴더를 각각
www.inflearn.com

물론 프론트엔드와 백엔드를 동일한 서버에 배포해도 되지만 따로 하는 경우가 많다.
* API 테스트 도구가 아닌 실제 프론트엔드에서 서버 테스트하기
<!DOCTYPE html>
<html lang="en">
<head>
    <meta charset="UTF-8">
    <meta http-equiv="X-UA-Compatible" content="IE=edge">
    <meta name="viewport" content="width=device-width, initial-scale=1.0">
    <title>Document</title>
    <script src="https://cdn.jsdelivr.net/npm/chart.js"></script>
    <link rel="stylesheet" href="style.css">
</head>
<body>
    <div>
        <canvas id="myChart"></canvas>
    </div>
    <script src="app.js"></script>
</body>
</html>
index.html 파일을 위와 같이 작성한다.
const BASE_URL = 'https://vercel-express-deploy-tutorial.vercel.app'
fetch(BASE_URL)
.then(res => res.text())
.then(result => console.log(result))
app.js 파일을 위와 같이 작성한다.
app.get("/", (req, res) => res.send("Express on Vercel"));서버쪽에서 send 메서드로 응답을 보내면 text/html 파일로 인식하기 때문에 프론트엔드에서는 res.json() 이 아니라 res.text() 로 파싱해야 된다.

백엔드 단에서 응답이 잘 전송된 것을 확인할 수 있다.
const BASE_URL = 'https://vercel-express-deploy-tutorial.vercel.app'
fetch(`${BASE_URL}/user`, {
    headers: {
        'Content-Type': 'application/json'
    },
    method: 'POST',
    body: JSON.stringify({
        name: "frontend",
        email: "frontend@gmail.com",
        userId: "frontent",
        password: "frontend123@"
    })
})
.then(res => res.text())
.then(result => console.log(result))
app.js 파일을 위와 같이 수정하여, 회원가입을 테스트해보자!

프론트엔드 코드를 실행하면 vercel 에 호스팅된 서버에서 회원가입을 진행하고, 회원가입한 사용자의 정보가 응답으로 잘 전송된 것을 확인할 수 있다.
MongoDB Atlas 에도 프론트엔드 코드로 요청한 회원정보가 잘 저장된 것을 확인할 수 있다.
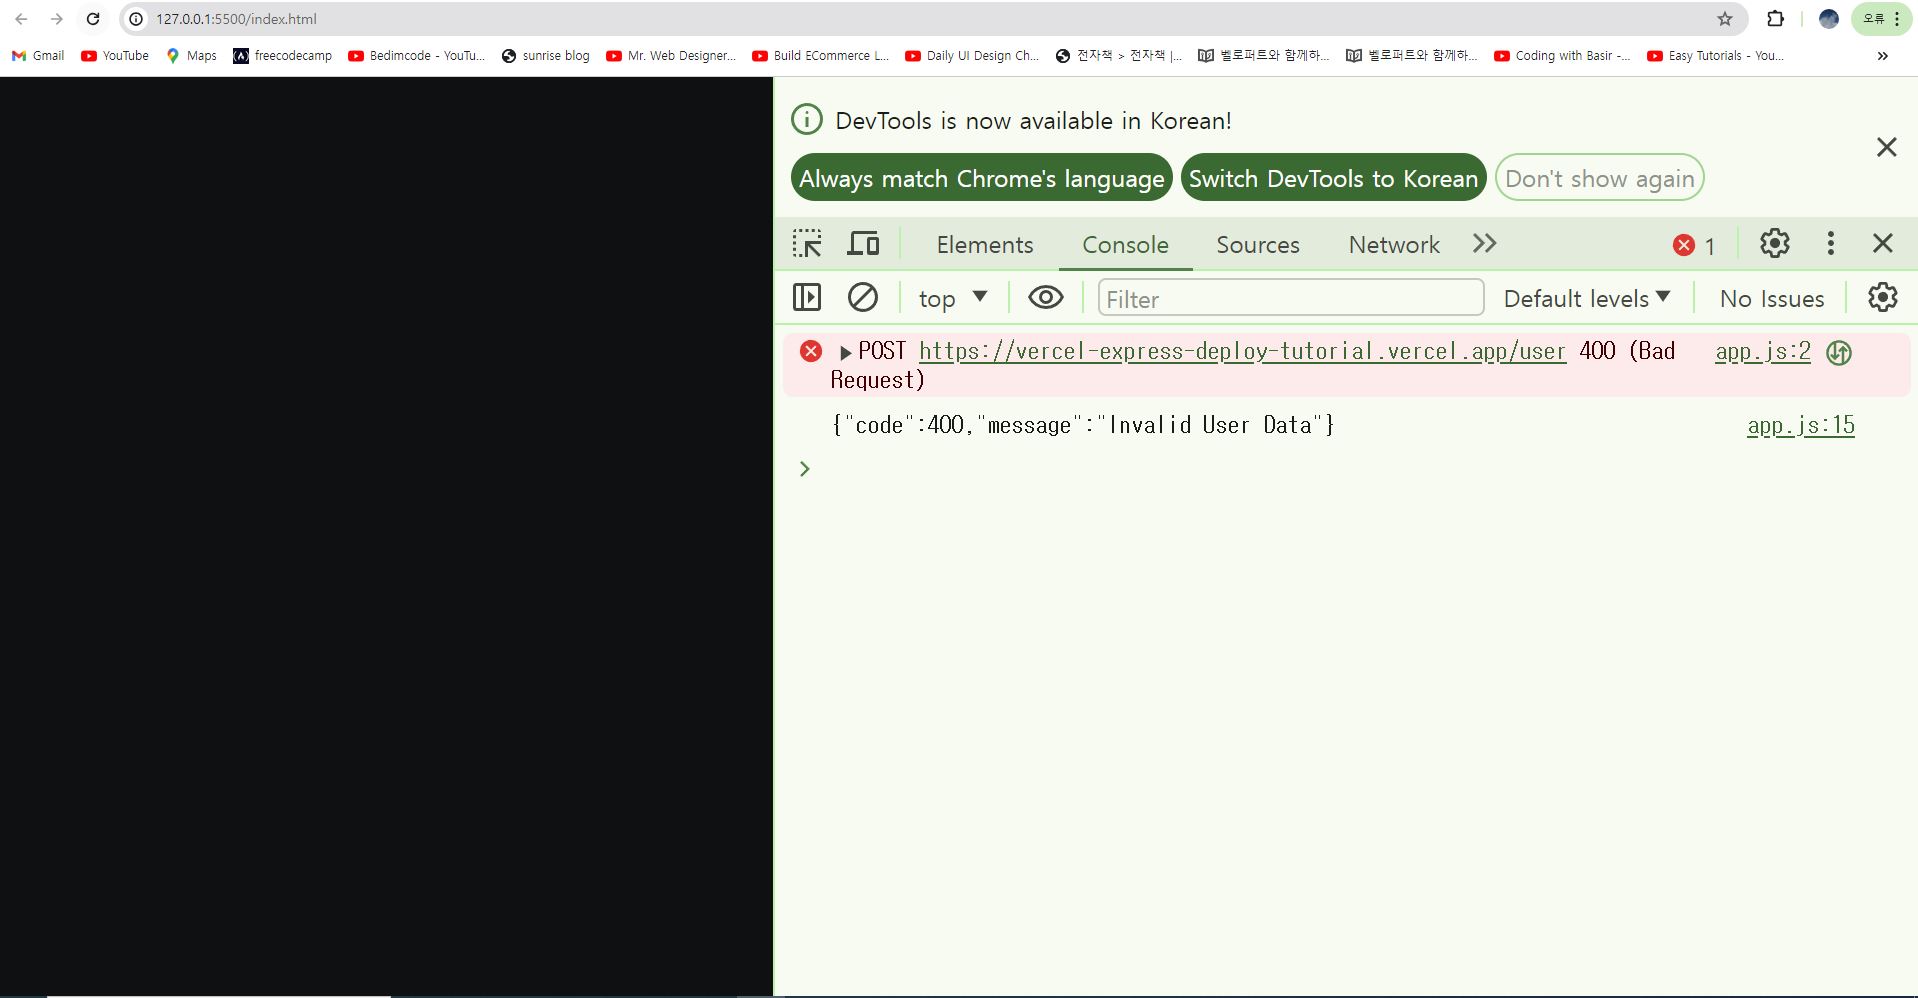
새로고침하면 동일한 정보로 회원가입을 요청하므로, 이메일 중복이 되면서 Bad Request(400) 에러가 발생한다.
추후 리액트를 vercel 에 배포하고, 현재 서버와 연동해서 데이터를 가져오려고 한다. 해당 수업은 아래 링크를 확인하자!
https://syleemomo.tistory.com/465
웹호스팅하기 (2) - vercel + react 배포하기
https://vercel.com/guides/deploying-react-with-vercel How to Create & Deploy a React App to VercelLearn how to create a React app and deploy it live with Vercel in only a few steps.vercel.comhttps://velog.io/@codns1223/Etc-Vercel%EB%A1%9C-React-%ED%94%84%
syleemomo.tistory.com
* 배포시 에러난 사항 기록
Error: Your `package.json` file is missing a `build` property inside the `scripts` property.
Learn More: https://vercel.link/missing-build-script
vercel dev 명령어를 실행할때 해당오류가 뜨면 api폴더에 index.js가없어서 발생하는 것이다. index.js 나 app.js 파일을 api 폴더를 생성해서 그안에 넣자!
https://vercel.com/guides/how-to-upload-and-store-files-with-vercel
How to Upload and Store Files and Images with Vercel
Learn how to upload and store files with Vercel using either a built-in file storage or a file storage provider like AWS S3 or Google Cloud Storage.
vercel.com
이미지 업로드를 위해 multer 라이브러리를 사용하였다면, vercel 에서 파일 업로드는 불가능하다. 그러므로 파일을 AWS S3 에 업로드하고, 경로를 얻어와서 서비스하는 방식을 사용해야 한다.
* 에러기록
const express = require("express");
const mongoose = require("mongoose")
const app = express();
const dotenv = require('dotenv')

dotenv.config({ path: '../.env' })

console.log("몽고아틀라스 주소: ", process.env.MONGODB_URI)
mongoose.connect(process.env.MONGODB_URI)
.then(() => console.log("데이터베이스 연결 성공 !!"))
.catch(e => console.log(`데이터베이스 연결 실패 ${e}`))

app.get("/", (req, res) => res.send("Express on Vercel"));

app.listen(3001, () => console.log("Server ready on port 3000."));

module.exports = app;
만약 로컬에서 DB를 연동할때 에러가 난다면 dotenv 패키지로 .env 파일에 설정한 환경변수를 추가해줘야 한다. 이때 dotenv 의 config 메서드로 환경변수를 설정할때 index.js 파일이 api 폴더 내부에 존재하고, .env 파일은 api 폴더 외부에 존재하기 때문에 path 속성으로 .env 파일의 위치를 상대경로로 설정해준다. 이렇게 하면 로컬환경에서 DB 연동이 된다.
'서비스 배포' 카테고리의 다른 글
| 웹 호스팅하기 (4) - vercel + react + esbuild 배포하기 (2) (0) | 2024.05.28 |
|---|---|
| 웹호스팅하기 (3) - vercel + react + esbuild 배포하기 (0) | 2024.05.24 |
| 웹호스팅하기 (2) - vercel + react 배포하기 (0) | 2024.05.23 |