
선택자는 CSS 에서 가장 중요한 개념 중 하나이다. 선택자를 자유자재로 잘쓰면 따로 클래스나 id 를 설정하지 않고도 스타일을 적용할 수 있다. 해당 수업에서는 자주 쓰이는 총 15개의 선택자를 학습하기로 한다. HTML 수업시간에 완성한 프로젝트의 index.html 파일을 이용하여 다양한 선택자를 연습해보자! 스타일 적용을 위하여 head 안에 link 태그로 style.css 파일과 연결해준다.
<!DOCTYPE html>
<html lang="ko">

    <head>
        <meta charset="UTF-8">
        <title>SunriseBucks Caffe</title>
        <link rel="stylesheet" href="style.css">
    </head>

    <body>
        <header>
            <a href="/index.html">
                <img src="/imgs/brand-logo.jpg" alt="sample logo" width="50" height="40">
                SunriseBucks
            </a>

            <nav>
                <ul>
                    <li><a href="/html/home.html">Home</a></li>
                    <li><a href="/html/about.html">About</a></li>
                    <li><a href="/html/service.html">Service</a></li>
                    <li><a href="/html/contact.html">Contact</a></li>
                    <li><a href="/html/register.html">Register</a></li>
                </ul>
            </nav>
        </header>

        <main>
            <h2>main content</h2>
            <p>주요 내용입니다.</p>
            <section>
                <h2>section title</h2>
                <p>
                    section description
                </p>
            </section>

            <article>
                <h1>List title</h1>
                <article class="item">
                    <h2>item title</h2>
                    <p>item description</p>
                </article>
                <article class="item">
                    <h2>item title</h2>
                    <p>item description</p>
                </article>
                <article class="item">
                    <h2>item title</h2>
                    <p>item description</p>
                </article>
            </article>

            <figure>
                <img src="imgs/elephants.jpeg" alt="Elephants">
                <figcaption>Elephants</figcaption>
            </figure>
        </main>

        <footer>
            <h3>Posted by: sunrise</h3>
            <p>Contact information: <a href="mailto:someone@example.com">someone@example.com</a></p>

            <address>
                <p>주소: 서울시 양천구 목1동 123-123</p>
                <p>전화번호: 02-1234-1234</p>
                <p>이메일: <a href="mailto:example@example.com">example@example.com</a></p>
            </address>
        </footer>

        <aside>
            <h3>사이드 메뉴</h3>
            <nav>
                <ul>
                    <li><a href="">메뉴 1</a></li>
                    <li><a href="">메뉴 2</a></li>
                    <li><a href="">메뉴 3</a></li>
                </ul>
            </nav>
        </aside>
    </body>

</html>
전체 선택자 (Universal Selector)
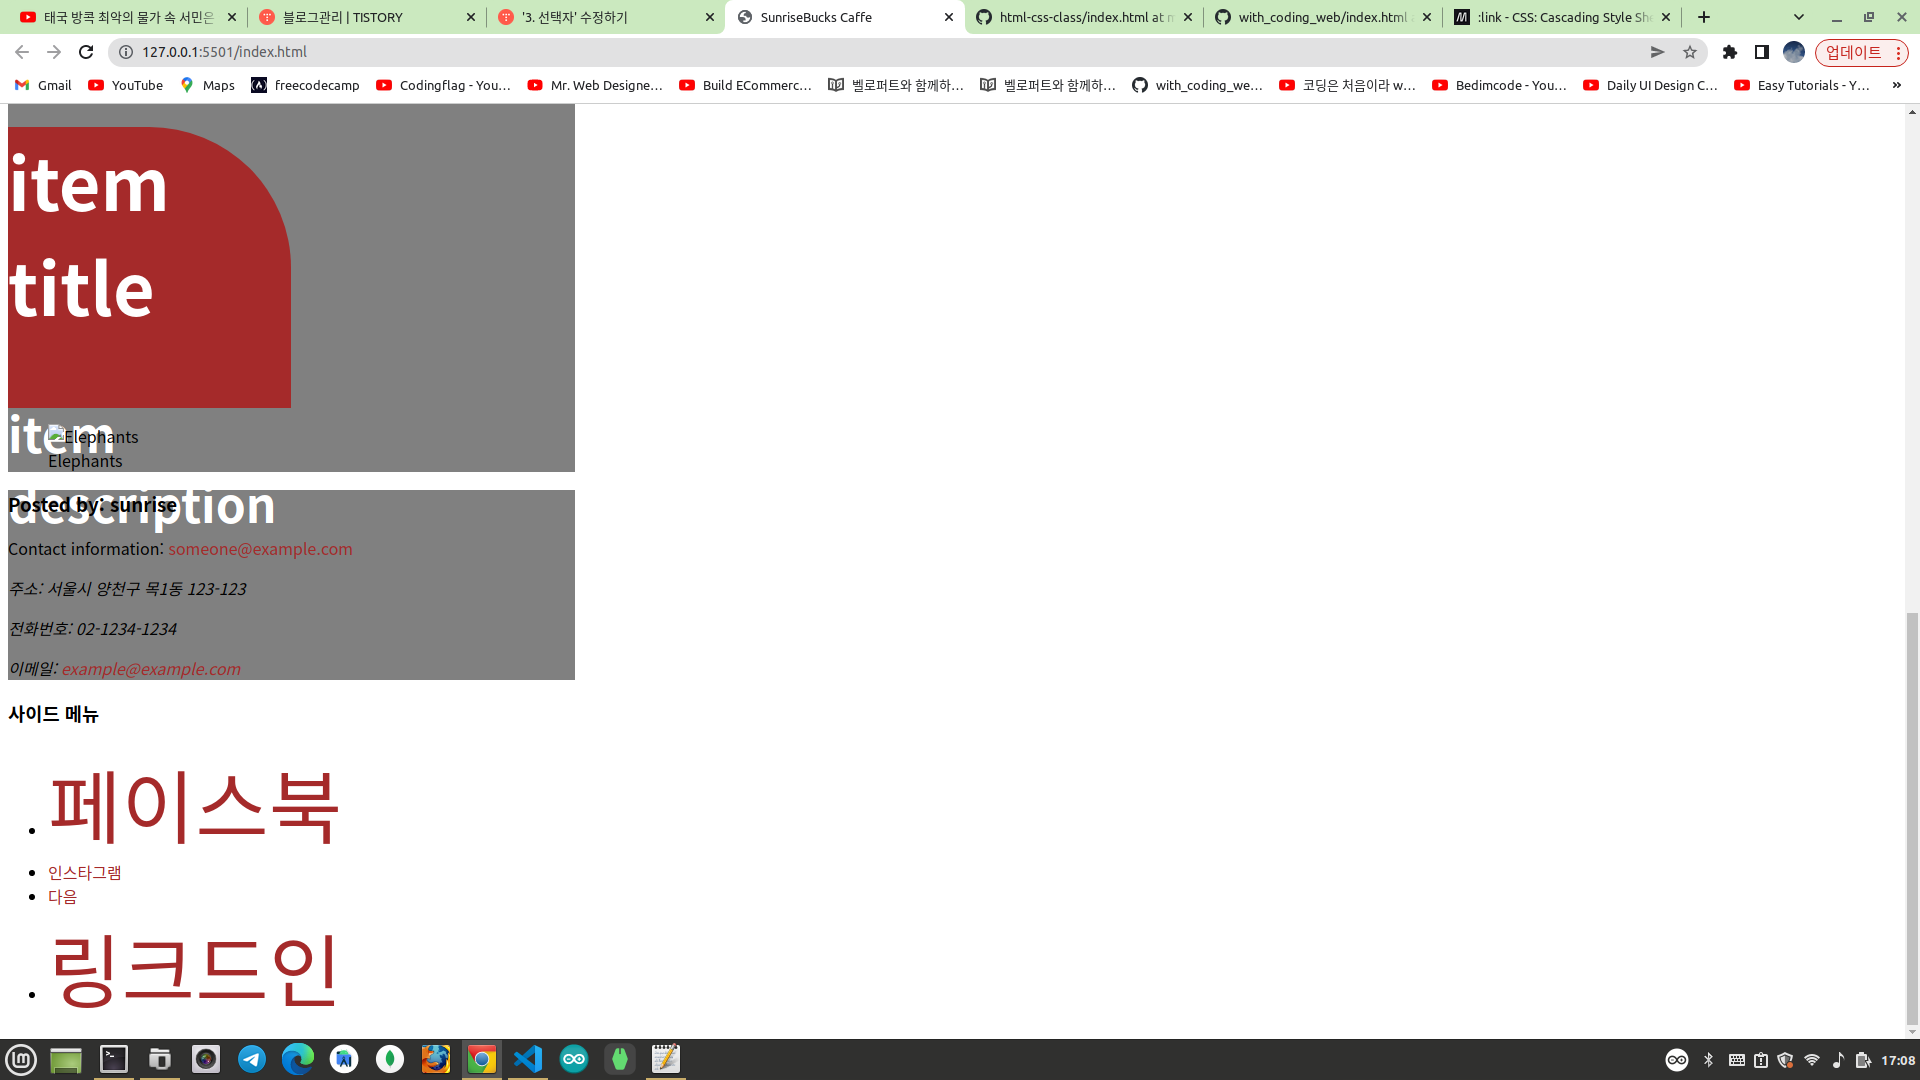
전체 선택자는 모든 요소를 선택한다. 선택자로 별표(*)를 사용한다.
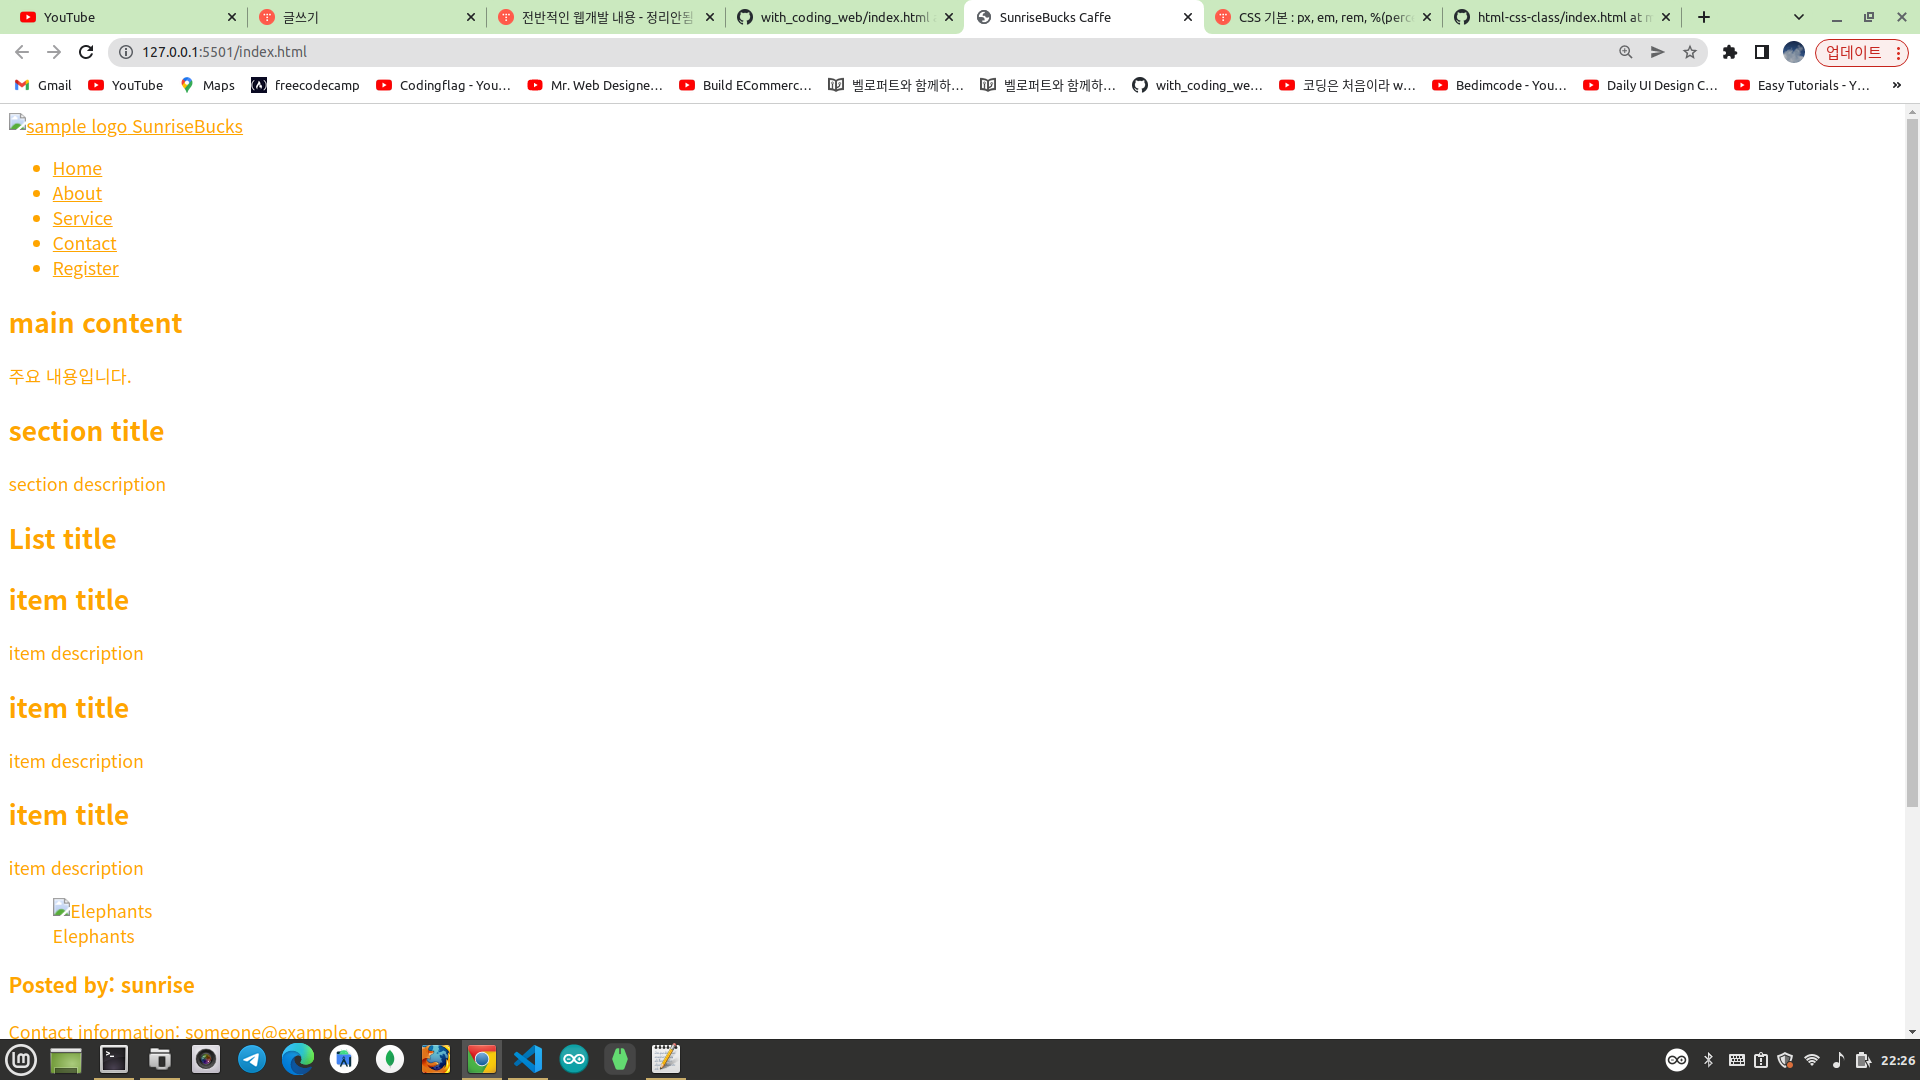
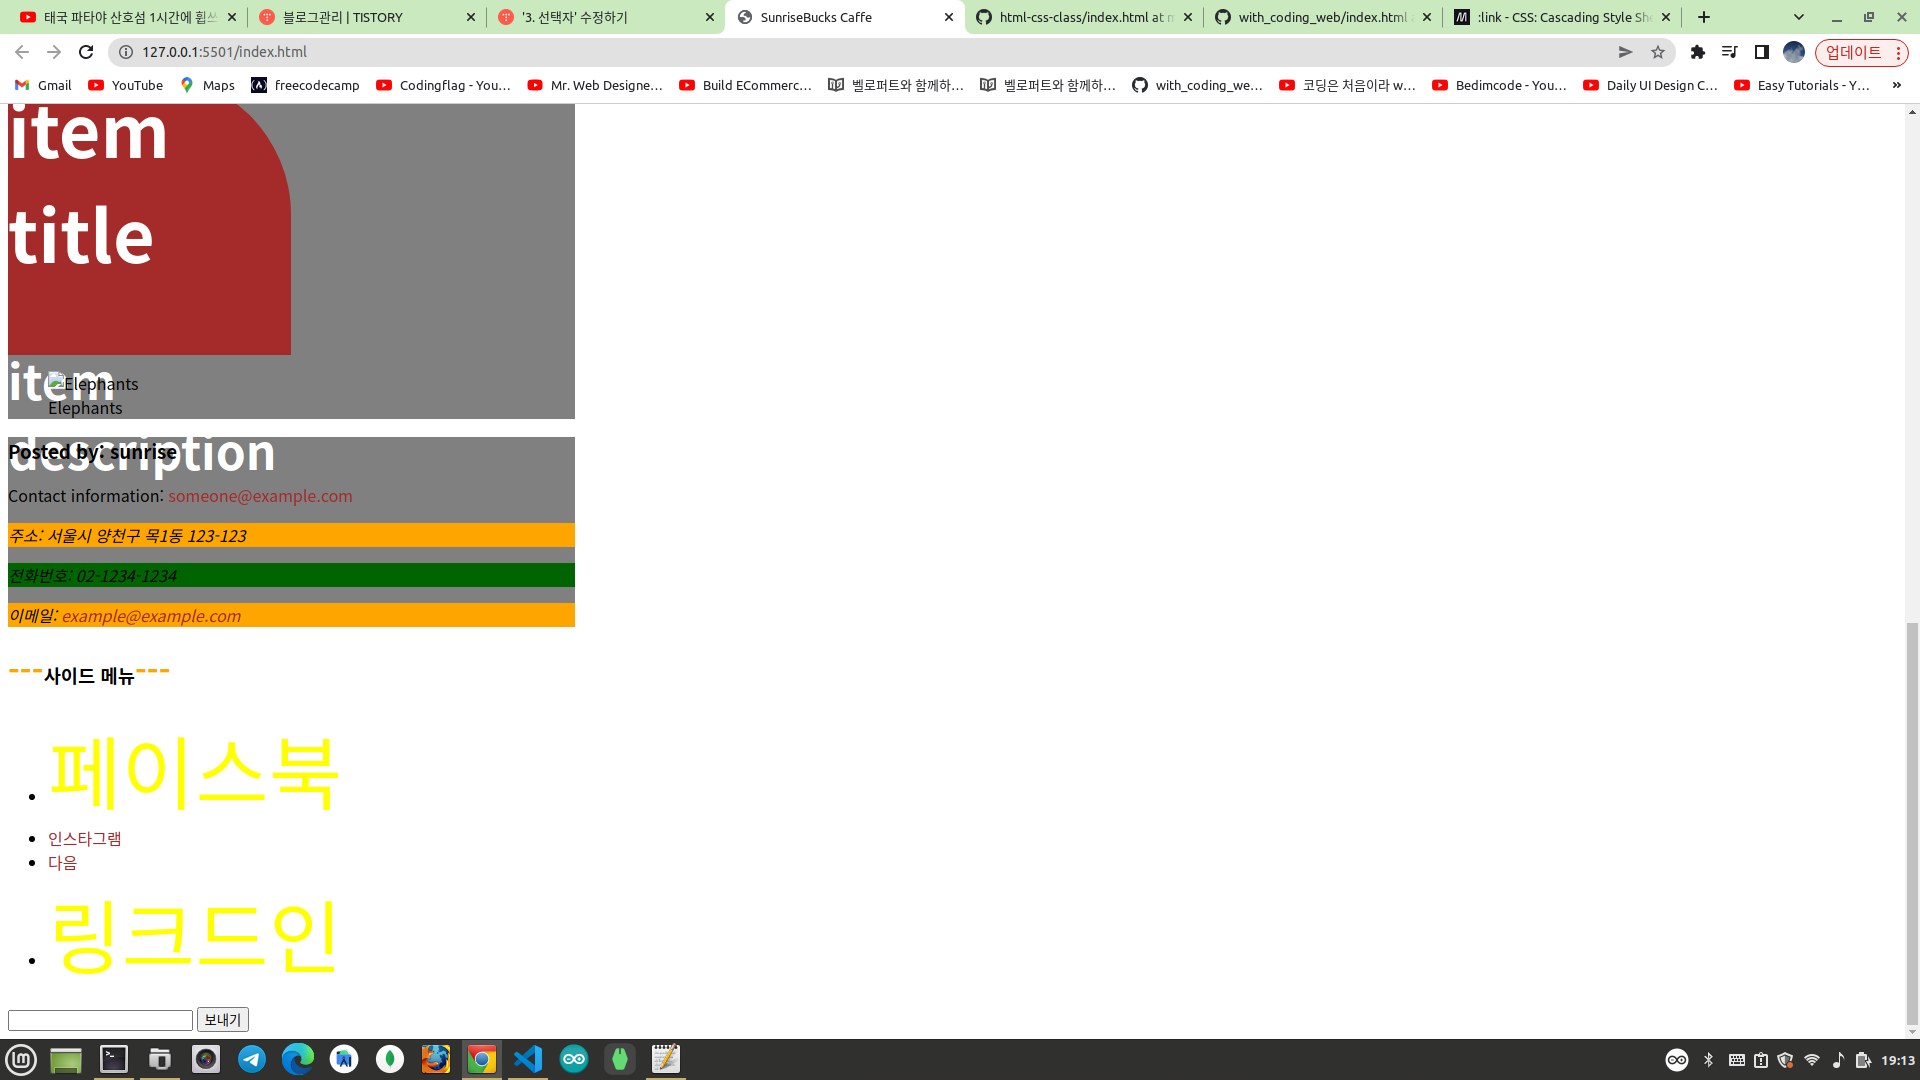
* { 속성: 값; }style.css 에 아래와 같이 전체 선택자를 사용하여 모든 요소의 글자 색상을 동일하게 설정한다.
* {
  color: orange;
}
브라우저 화면은 아래와 같다.
태그 선택자 (Tag Selector)
태그 선택자는 HTML 문서에서 스타일을 적용하고 싶은 태그 이름으로 원하는 요소를 선택하는 것이다.
태그명 { 속성: 값; }인덱스 페이지에서 헤더영역에 백그라운드 색상을 첨가하여 웹페이지의 다른 부분과 구분하려고 한다. 아래와 같이 태그 선택자를 이용하여 작성하면 된다. header 라는 태그의 이름으로 선택하고 있다.
header{
  background-color: orange;
}
아이디 선택자 (Id Selector)
아이디는 웹페이지(HTML 문서)에서 특정 요소에 지정하는 고유한 값이다. 즉, 특정 아이디 이름은 전체 문서에서 단 하나이다. 예를 들어 div 요소의 id 값이 home-container 라면 이 값을 사용하는 다른 요소는 존재하지 않는다. 아이디로 요소를 선택할때는 아이디 이름 앞에 샵(#)을 붙인다.
#아이디명 { 속성:값; }인덱스 페이지에서 헤더영역에 있는 로고의 글자 크기를 키우고 싶다고 하자!
<header>
    <a href="/index.html" id="logo">
        <img src="/imgs/brand-logo.jpg" alt="sample logo" width="50" height="40">
        SunriseBucks
    </a>

    <nav>
        <ul>
            <li><a href="/html/home.html">Home</a></li>
            <li><a href="/html/about.html">About</a></li>
            <li><a href="/html/service.html">Service</a></li>
            <li><a href="/html/contact.html">Contact</a></li>
            <li><a href="/html/register.html">Register</a></li>
        </ul>
    </nav>
</header>
아래와 같이 로고 글자를 감싸고 있는 a 태그에 id 값을 logo 로 설정한다.
<a href="/index.html" id="logo">
    <img src="/imgs/brand-logo.jpg" alt="sample logo" width="50" height="40">
    SunriseBucks
</a>
css 에서 아이디 선택자를 이용하여 로고 글자를 선택하고 폰트 크기를 변경해주고 있다.
header{
  background-color: orange;
}
#logo{
  font-size: 3rem;
}
클래스 선택자 (Class Selector)
아이디 선택자는 웹페이지에서 단 하나의 요소에만 스타일을 적용할때 사용한다. 이에 반해 클래스 선택자는 하나 또는 여러개의 요소에 동일한 스타일을 적용하려고 할때 사용한다. 클래스 선택자는 클래스 이름 앞에 점(.)을 붙여 요소를 선택한다.
.클래스명 { 속성:값; }인덱스 페이지에서 클래스명이 item 으로 설정된 요소들의 배경색을 동일하게 적용해보려고 한다. 아래와 같이 클래스 선택자를 이용하여 클래스명이 item 인 모든 요소들의 배경색을 동일하게 적용하고 있다.
header{
  background-color: orange;
}
#logo{
  font-size: 3rem;
}
.item{
  background-color: brown;
}
여기서 두번째 세번쩨 item 의 너비만 절반으로 줄이고 싶다고 하자.
중략...
<article>
    <h1>List title</h1>
    <article class="item">
        <h2>item title</h2>
        <p>item description</p>
    </article>
    <article class="item half-width">
        <h2>item title</h2>
        <p>item description</p>
    </article>
    <article class="item half-width">
        <h2>item title</h2>
        <p>item description</p>
    </article>
</article>
중략...
두번째와 세번째 item 만 변경하고 싶으므로 해당 요소들의 클래스명에 half-width 라는 클래스명을 추가해준다. half-width 는 시맨틱(의미가 통하는)한 이름이며 너비를 절반으로 줄인다는 의미의 클래스명이다.
header{
  background-color: orange;
}
#logo{
  font-size: 3rem;
}
.item{
  background-color: brown;
}
.half-width{
  width: 50%;
}
위와 같이 클래스 선택자를 이용하여 half-width 라는 클래스 이름이 첨가된 요소들의 너비를 50%로 설정한다. 아래 결과로 두번째 세번째 item 의 너비만 절반으로 줄었다.

마지막으로 세번째 item 의 폰트 크기와 색상만 변경하려고 한다.
<article>
    <h1>List title</h1>
    <article class="item">
        <h2>item title</h2>
        <p>item description</p>
    </article>
    <article class="item half-width">
        <h2>item title</h2>
        <p>item description</p>
    </article>
    <article class="item half-width highlight-color">
        <h2>item title</h2>
        <p>item description</p>
    </article>
</article>
세번째 item 에만 highlight-color 라는 클래스 이름을 추가하였다.
header{
  background-color: orange;
}
#logo{
  font-size: 3rem;
}
.item{
  background-color: brown;
}
.half-width{
  width: 50%;
}
.highlight-color{
  color: white;
  font-weight: bold;
  font-size: 3rem;
}
그리고 클래스 선택자를 이용하여 highlight-color 라는 클래스에 대한 스타일 코드를 추가한다.

세번째 item 의 글자 크기와 색상이 변경된 모습을 확인할 수 있다.
클래스 이름과 스타일 코드를 작성할때 유의할 사항이 있다. 위 예제처럼 클래스 이름을 정할때는 적용하려는 스타일이 어떤 건지 알 수 있도록 시맨틱한(의미있는) 이름을 지어주는 것이 좋다. 이름이 길때는 음절단위를 하이픈(-)이나 밑줄(_)로 연결한다. 또한, 하나의 클래스에 적용된 스타일 코드는 최대한 짧고 단순하게 작성하여 레고블록처럼 다른 요소에도 스타일을 재활용할 수 있도록 하는 것이 좋다.
<article>
    <h1>List title</h1>
    <article class="item">
        <h2>item title</h2>
        <p>item description</p>
    </article>
    <article class="item">
        <h2>item title</h2>
        <p>item description</p>
    </article>
    <article class="item">
        <h2>item title</h2>
        <p>item description</p>
    </article>
</article>
만약 해당 코드와 같이 하나의 클래스 이름에 적용된 스타일 코드가 길고 복잡하면 스타일 코드를 다른 요소에 동일하게 적용하거나 재활용하지 못한다. 또한, 스타일 코드의 중복이 발생한다. background-color: brown 이나 width:50% 라는 스타일 코드가 중복된다. 또한, 만약 모든 item 요소의 배경색을 변경해야 하는 경우 아래 코드처럼 작성하면 모든 item 에서 전부 변경해야 한다. 지금은 item 이 3개뿐이지만 100개라면 엄청나게 번거로운 일이 발생한다. 즉, 유지보수하기 힘들다.
header{
  background-color: orange;
}
#logo{
  font-size: 3rem;
}
.item:nth-child(2){
  background-color: brown;
}
.item:nth-child(3){
  background-color: brown;
  width: 50%;
}
.item:nth-child(4){
  background-color: brown;
  width: 50%;
  color: white;
  font-weight: bold;
  font-size: 3rem;
}
item 요소들에 클래스 이름 대신에 id 값을 설정하고 동일한 스타일을 적용해보자!
<article>
    <h1>List title</h1>
    <article id="item-1">
        <h2>item title</h2>
        <p>item description</p>
    </article>
    <article id="item-2">
        <h2>item title</h2>
        <p>item description</p>
    </article>
    <article id="item-3">
        <h2>item title</h2>
        <p>item description</p>
    </article>
</article>
이렇게 id 값으로 스타일을 설정해도 유지보수가 힘들다. 앞에서 본 예제코드와 거의 유사하기 때문이다. 만약 item 요소가 100개이고 배경색을 모두 변경해야 한다면 각각의 item 에 존재하는 background-color 속성을 전부 변경해야 한다. 결론적으로 유지보수가 편한 사이트를 만드려면 아이디 선택자보다는 클래스 선택자를 사용하고, 클래스 이름 하나당 적용되는 스타일은 짧고 간결할수록 좋다. 그리고 이를 레고블럭처럼 조합하고 재활용하여 스타일을 적용하면 유지보수하기 편한 사이트가 된다.
header{
  background-color: orange;
}
#logo{
  font-size: 3rem;
}
#item-1{
  background-color: brown;
}
#item-2{
  background-color: brown;
  width: 50%;
}
#item-3{
  background-color: brown;
  width: 50%;
  color: white;
  font-weight: bold;
  font-size: 3rem;
}
다시 원상복귀하고 아래 코드에서 수업을 진행하도록 한다.
<!DOCTYPE html>
<html lang="ko">

    <head>
        <meta charset="UTF-8">
        <title>SunriseBucks Caffe</title>
        <link rel="stylesheet" href="style.css">
    </head>

    <body>
        <header>
            <a href="/index.html" id="logo">
                <img src="/imgs/brand-logo.jpg" alt="sample logo" width="50" height="40">
                SunriseBucks
            </a>

            <nav>
                <ul>
                    <li><a href="/html/home.html">Home</a></li>
                    <li><a href="/html/about.html">About</a></li>
                    <li><a href="/html/service.html">Service</a></li>
                    <li><a href="/html/contact.html">Contact</a></li>
                    <li><a href="/html/register.html">Register</a></li>
                </ul>
            </nav>
        </header>

        <main>
            <h2>main content</h2>
            <p>주요 내용입니다.</p>
            <section>
                <h2>section title</h2>
                <p>
                    section description
                </p>
            </section>

            <article>
                <h1>List title</h1>
                <article class="item">
                    <h2>item title</h2>
                    <p>item description</p>
                </article>
                <article class="item half-width">
                    <h2>item title</h2>
                    <p>item description</p>
                </article>
                <article class="item half-width highlight-color">
                    <h2>item title</h2>
                    <p>item description</p>
                </article>
            </article>

            <figure>
                <img src="imgs/elephants.jpeg" alt="Elephants">
                <figcaption>Elephants</figcaption>
            </figure>
        </main>

        <footer>
            <h3>Posted by: sunrise</h3>
            <p>Contact information: <a href="mailto:someone@example.com">someone@example.com</a></p>

            <address>
                <p>주소: 서울시 양천구 목1동 123-123</p>
                <p>전화번호: 02-1234-1234</p>
                <p>이메일: <a href="mailto:example@example.com">example@example.com</a></p>
            </address>
        </footer>

        <aside>
            <h3>사이드 메뉴</h3>
            <nav>
                <ul>
                    <li><a href="">메뉴 1</a></li>
                    <li><a href="">메뉴 2</a></li>
                    <li><a href="">메뉴 3</a></li>
                </ul>
            </nav>
        </aside>
    </body>

</html>
header{
background-color: orange;
}
#logo{
font-size: 3rem;
}
.item{
background-color: brown;
}
.half-width{
width: 50%;
}
.highlight-color{
color: white;
font-weight: bold;
font-size: 3rem;
}
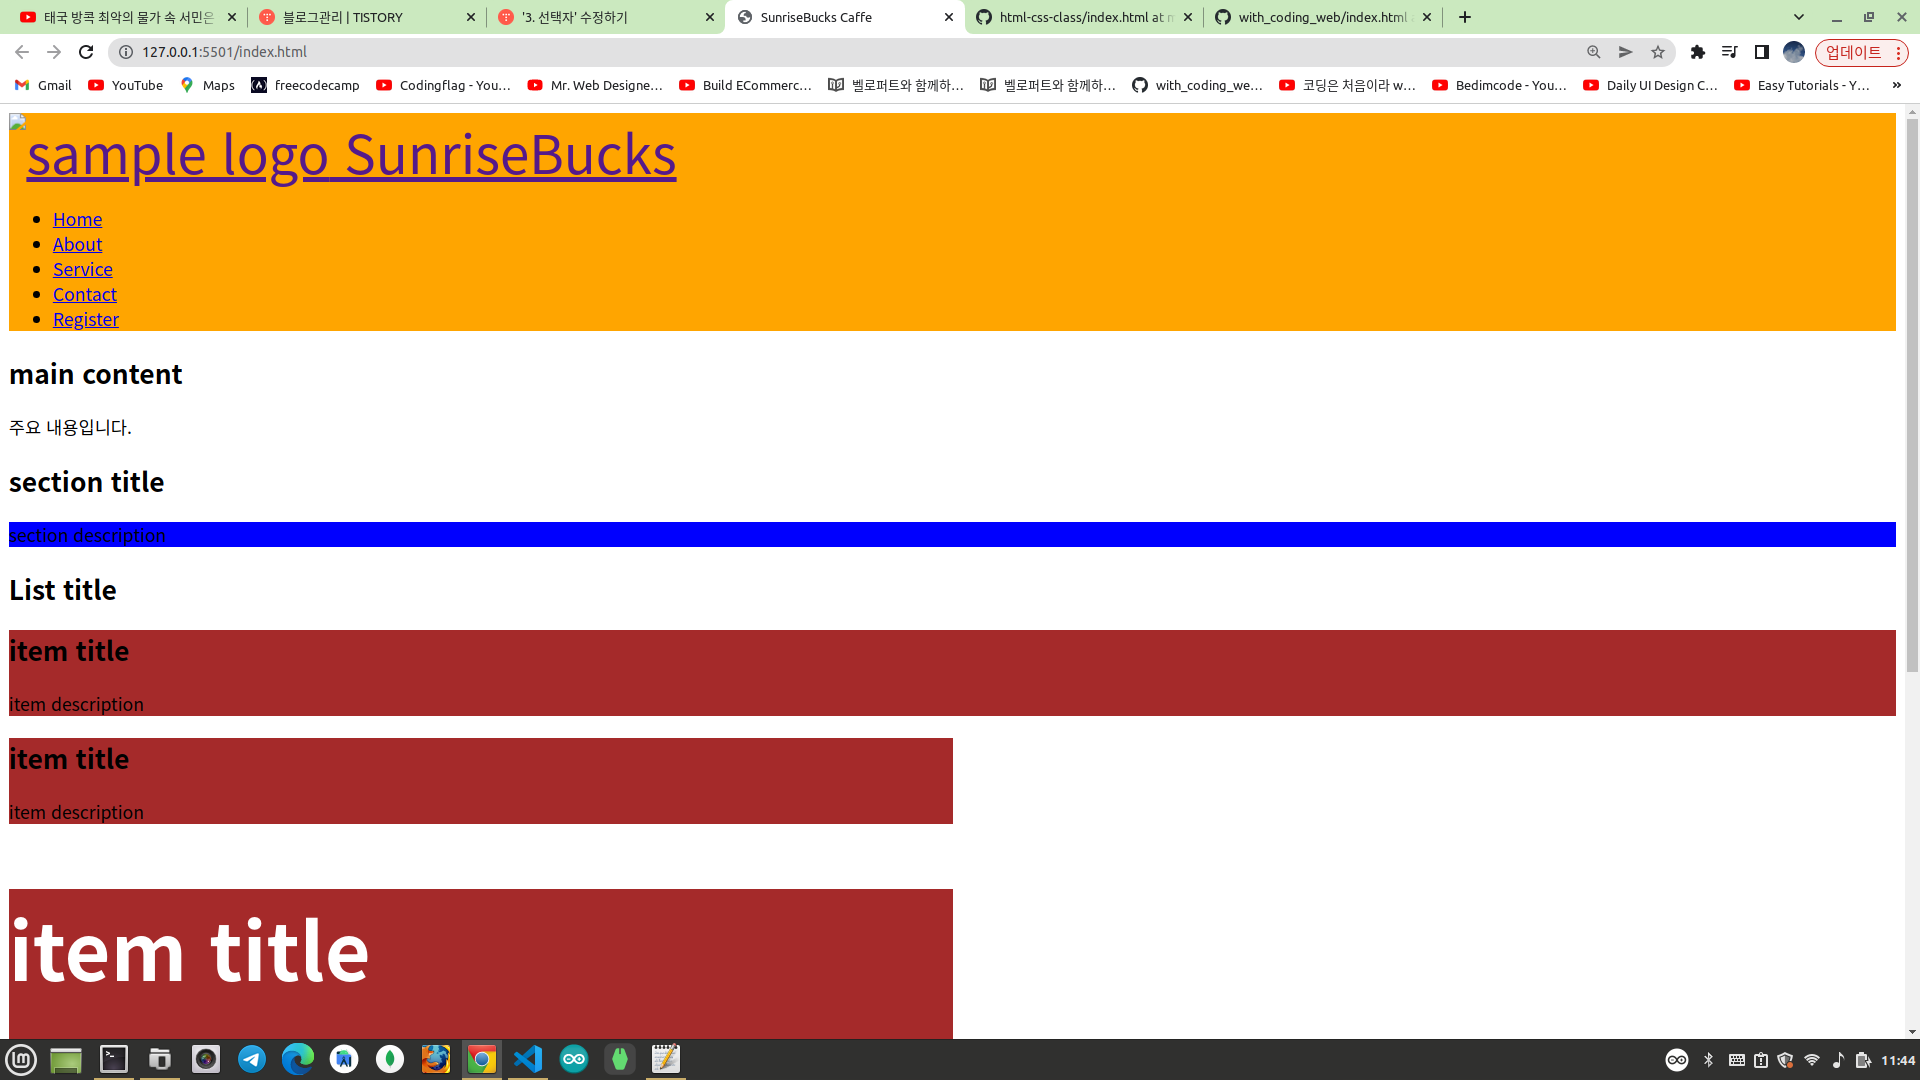
자손 선택자 (Descendant Selector)
자손 선택자는 HTML 문서에서 앞서 선택한 선택자의 자손을 선택한다. 선택자 사이에 공백(스페이스)을 두고 하위요소로 내려가면서 선택한다.
A B { 속성: 값; }HTML 문서에서 section 안에 있는 p 요소에 배경색을 적용하고 싶다고 하자! 아래와 같이 그냥 태그 선택자로 p 요소에 배경색을 지정하면 HTML 문서에 있는 모든 p 요소에 배경색이 동일하게 적용된다. p 요소는 section 에도 있지만 article 이나 footer 에도 있기 때문이다.
p {
background-color: blue;
}이때는 정확하게 어느 위치에 있는 p 요소를 선택할건지 명시해줘야 한다. 현재는 section 안에 있는 p 요소에만 스타일을 적용할 것이므로 자손 선택자를 이용하여 아래와 같이 원하는 요소를 선택해주면 된다. section 은 main 의 자손이므로 main 부터 선택하고 하위요소로 차근차근 내려가면서 선택한다.
header{
  background-color: orange;
}
#logo{
  font-size: 3rem;
}
.item{
  background-color: brown;
}
.half-width{
  width: 50%;
}
.highlight-color{
  color: white;
  font-weight: bold;
  font-size: 3rem;
}
main section p{
background-color: blue;
}
만약 아래와 같이 작성하면 main 안에 있는 모든 p 요소들에 스타일이 적용된다.
header{
  background-color: orange;
}
#logo{
  font-size: 3rem;
}
.item{
  background-color: brown;
}
.half-width{
  width: 50%;
}
.highlight-color{
  color: white;
  font-weight: bold;
  font-size: 3rem;
}
main p{
  background-color: blue;
}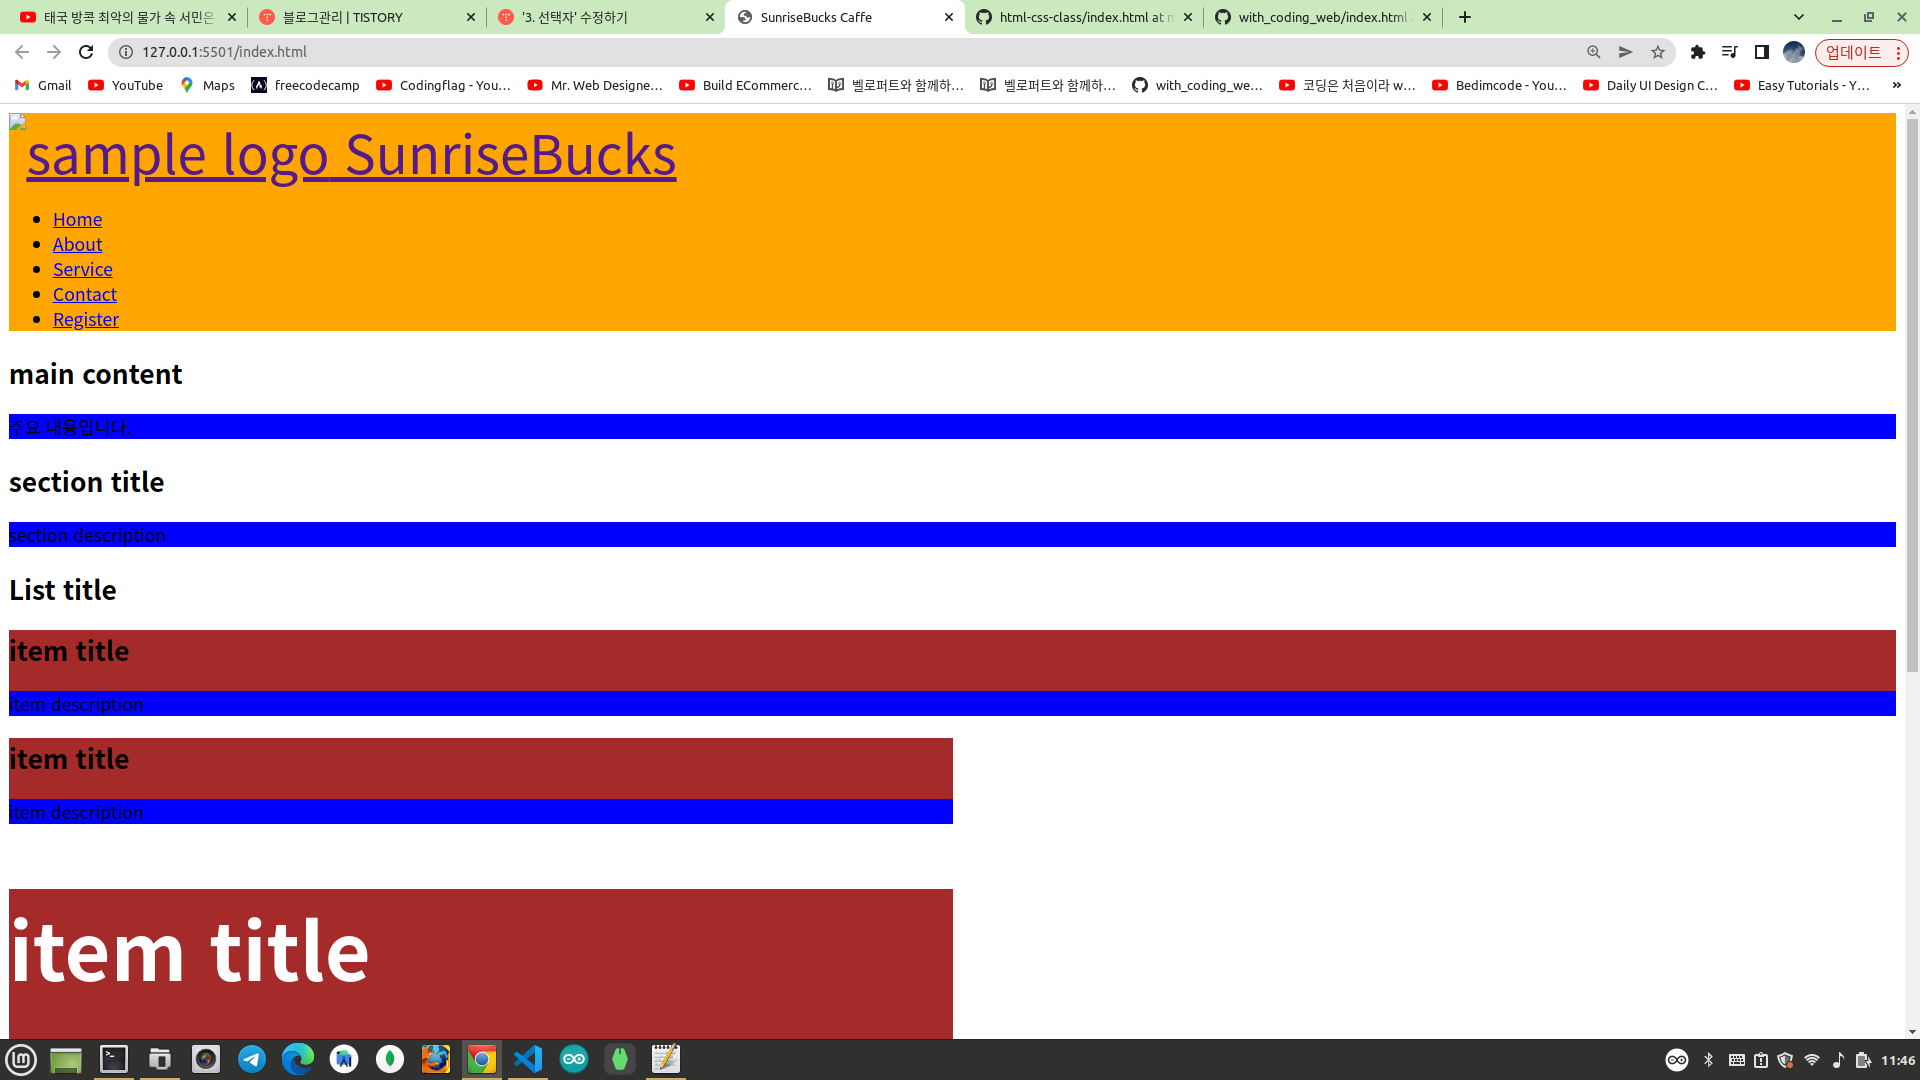
<p>주요 내용입니다.</p>main 에서 h2 태그 바로 밑에 있는 p 요소를 선택하는 방법은 자식 선택자에서 알아보도록 한다.
아래와 같이 section p 라고 선택해도 동일한 결과를 얻을 수 있다.
section p{
  background-color: blue;
}
하지만 만약 main 외부에 또다른 section 과 p 요소가 존재하면 해당 section 안의 p 요소에도 동일한 스타일이 적용된다.
<!DOCTYPE html>
<html lang="ko">
<head>
<meta charset="UTF-8">
<title>SunriseBucks Caffe</title>
<link rel="stylesheet" href="style.css">
</head>
<body>
<header>
<a href="/index.html" id="logo">
<img src="/imgs/brand-logo.jpg" alt="sample logo" width="50" height="40">
SunriseBucks
</a>
<nav>
<ul>
<li><a href="/html/home.html">Home</a></li>
<li><a href="/html/about.html">About</a></li>
<li><a href="/html/service.html">Service</a></li>
<li><a href="/html/contact.html">Contact</a></li>
<li><a href="/html/register.html">Register</a></li>
</ul>
</nav>
</header>
<section>
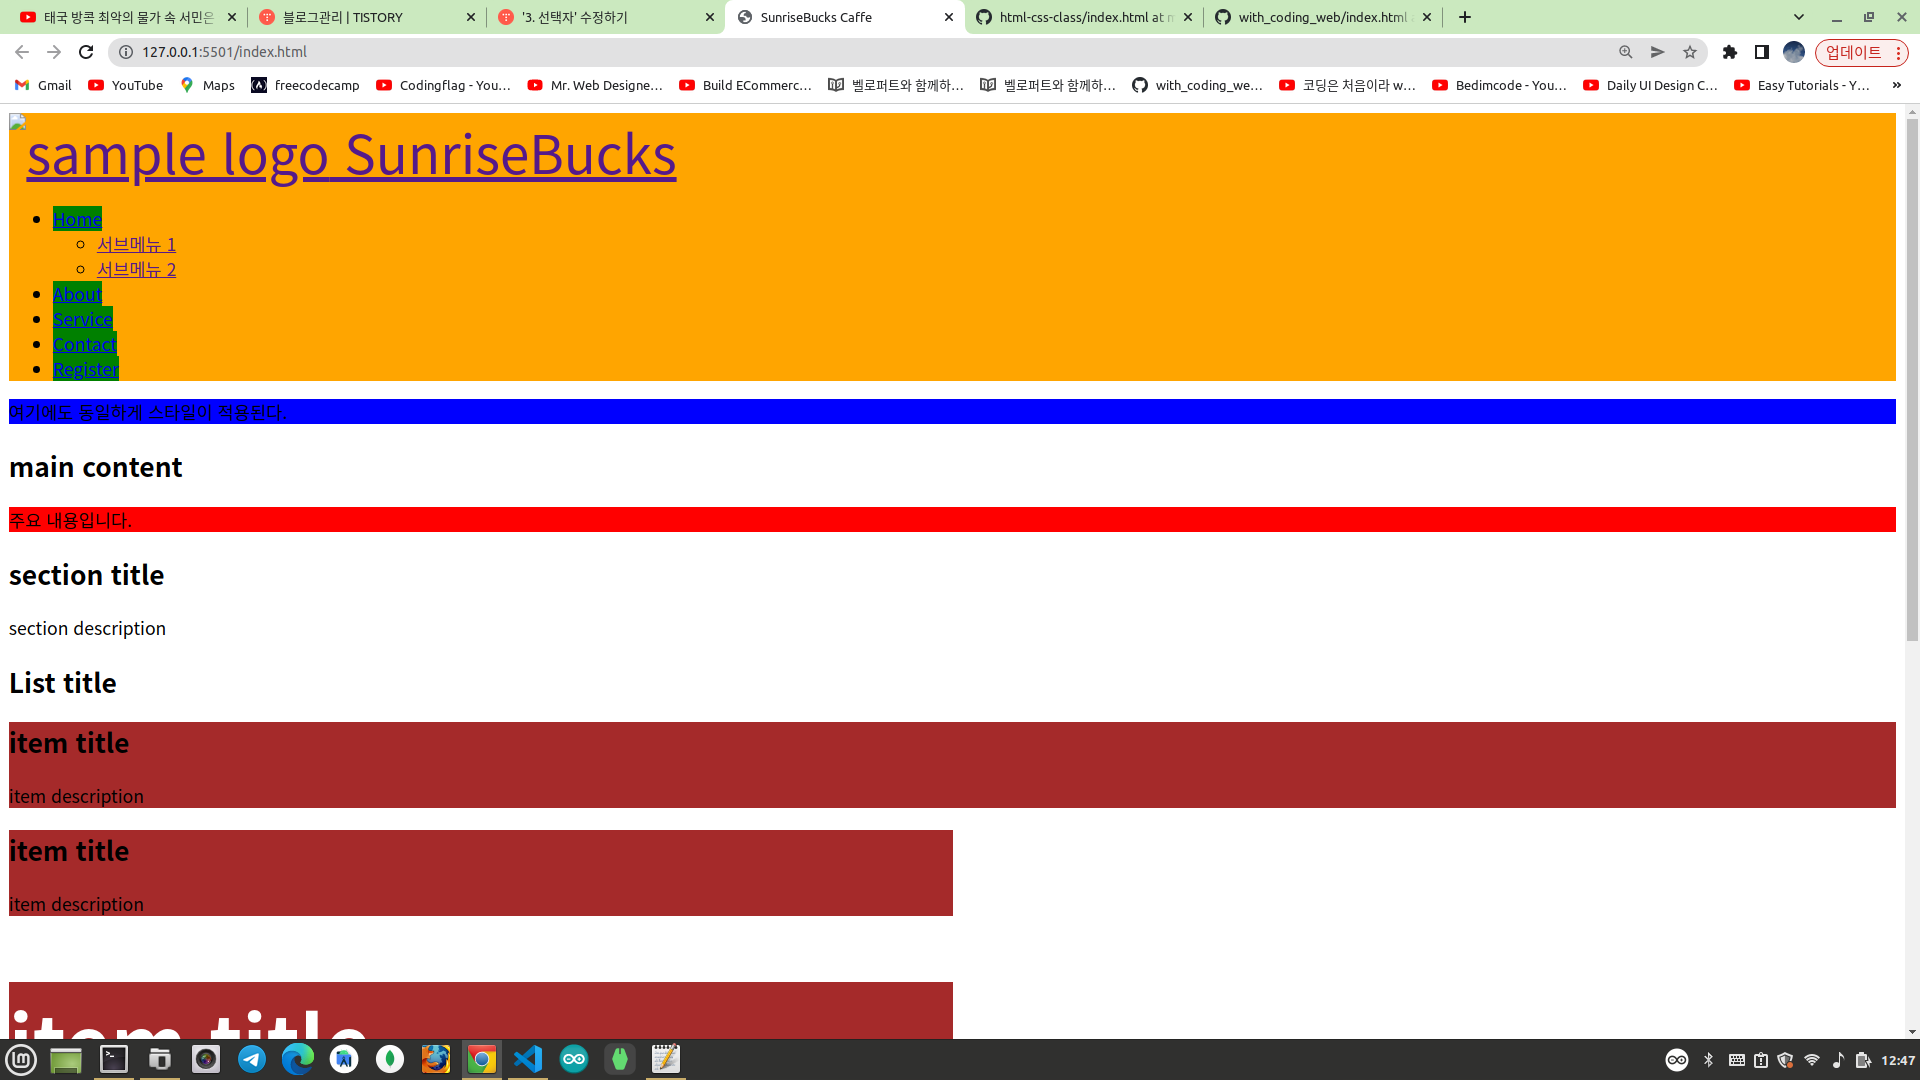
<p>여기에도 동일하게 스타일이 적용된다.</p>
</section>
<main>
<h2>main content</h2>
<p>주요 내용입니다.</p>
<section>
<h2>section title</h2>
<p>
section description
</p>
</section>
<article>
<h1>List title</h1>
<article class="item">
<h2>item title</h2>
<p>item description</p>
</article>
<article class="item half-width">
<h2>item title</h2>
<p>item description</p>
</article>
<article class="item half-width highlight-color">
<h2>item title</h2>
<p>item description</p>
</article>
</article>
<figure>
<img src="imgs/elephants.jpeg" alt="Elephants">
<figcaption>Elephants</figcaption>
</figure>
</main>
<footer>
<h3>Posted by: sunrise</h3>
<p>Contact information: <a href="mailto:someone@example.com">someone@example.com</a></p>
<address>
<p>주소: 서울시 양천구 목1동 123-123</p>
<p>전화번호: 02-1234-1234</p>
<p>이메일: <a href="mailto:example@example.com">example@example.com</a></p>
</address>
</footer>
<aside>
<h3>사이드 메뉴</h3>
<nav>
<ul>
<li><a href="">메뉴 1</a></li>
<li><a href="">메뉴 2</a></li>
<li><a href="">메뉴 3</a></li>
</ul>
</nav>
</aside>
</body>
</html>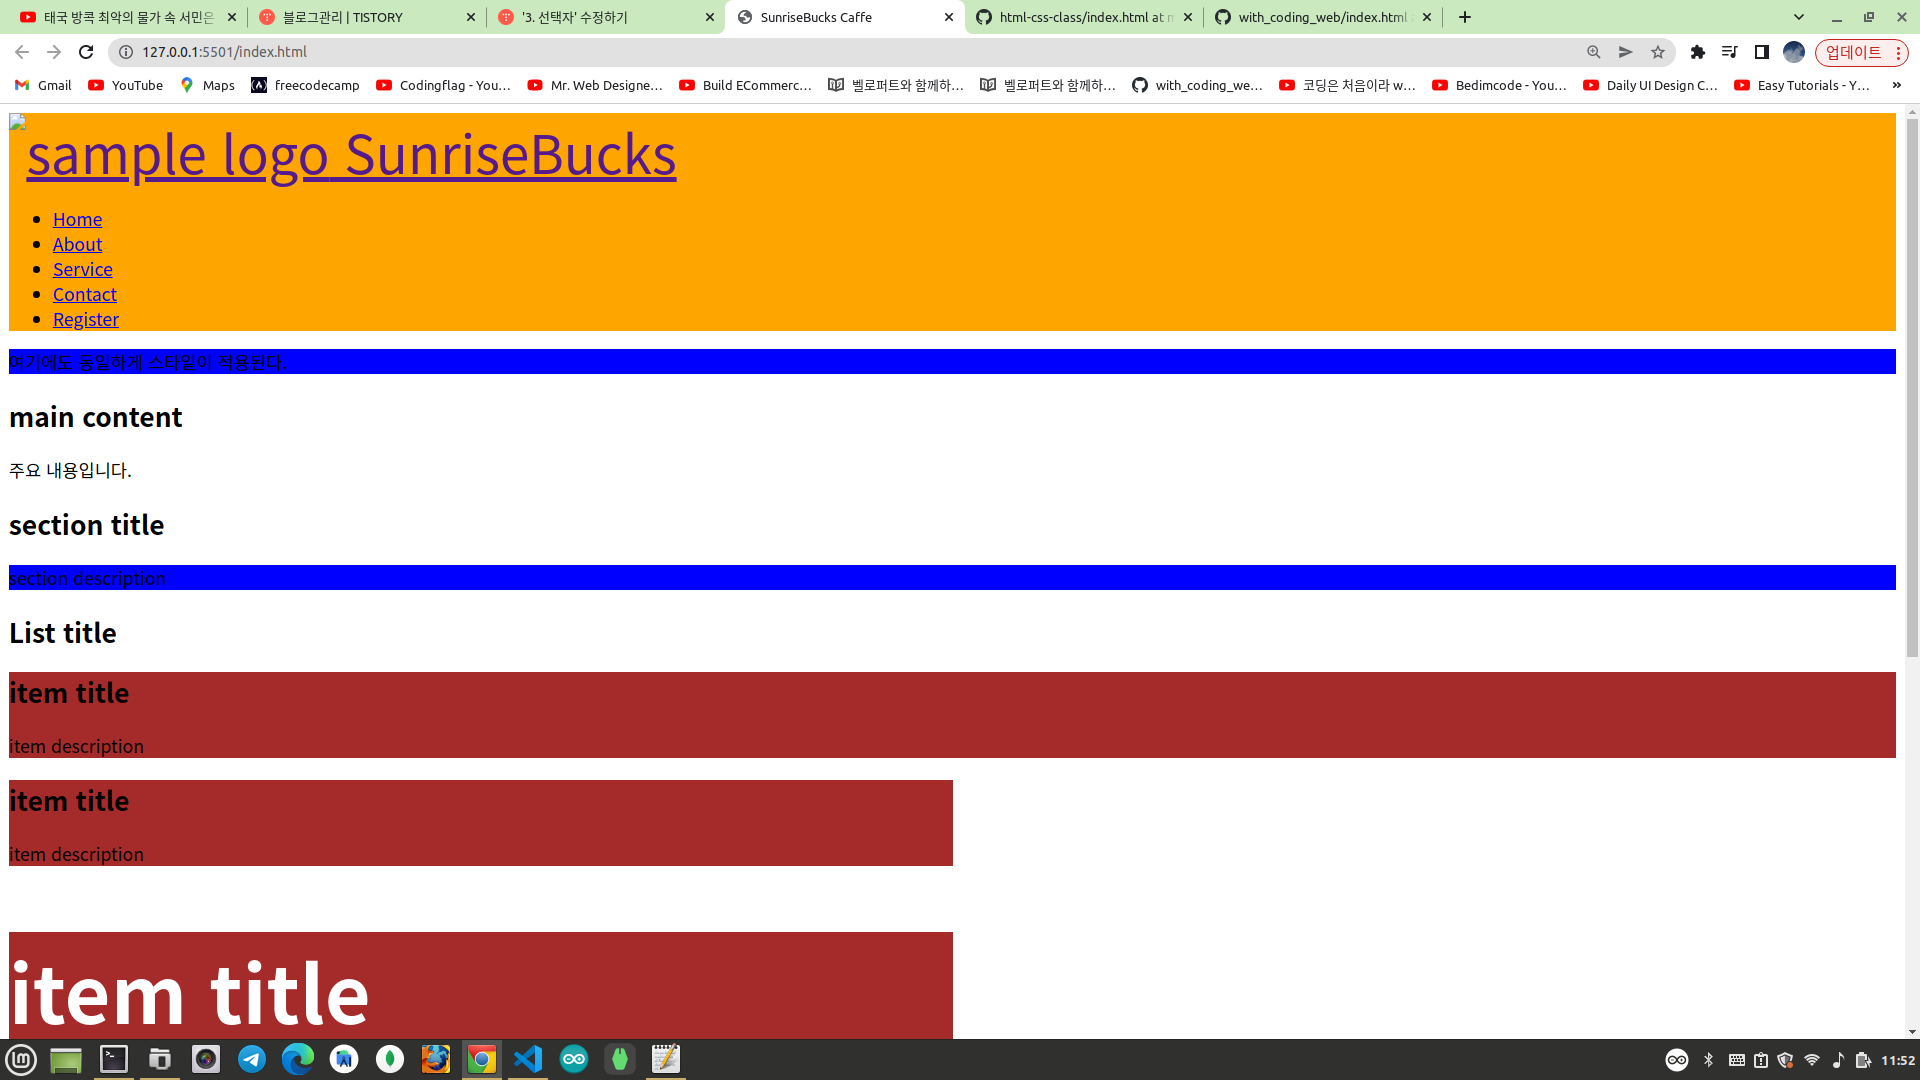
main section p{
  background-color: blue;
}
그래서 이러한 경우에는 반드시 main 이라는 선택자를 먼저 선택해서 main 안에 있는 요소들만 선택하기 위해 범위를 좁혀줘야 한다.

그럼 아래 p 요소에만 스타일을 적용시키려면 어떻게 하면 될까?
<section>
    <p>여기에도 동일하게 스타일이 적용된다.</p>
</section>
아래와 같이 작성해도 원하는대로 스타일이 적용되지 않는다. 이유는 body 의 하위에 section 은 두군데 있기 때문이다.
body section p{
  background-color: blue;
}
이 경우도 자식 선택자에서 알아보기로 한다.
현재까지 수정된 코드는 아래와 같다.
<!DOCTYPE html>
<html lang="ko">

    <head>
        <meta charset="UTF-8">
        <title>SunriseBucks Caffe</title>
        <link rel="stylesheet" href="style.css">
    </head>

    <body>
        <header>
            <a href="/index.html" id="logo">
                <img src="/imgs/brand-logo.jpg" alt="sample logo" width="50" height="40">
                SunriseBucks
            </a>

            <nav>
                <ul>
                    <li><a href="/html/home.html">Home</a></li>
                    <li><a href="/html/about.html">About</a></li>
                    <li><a href="/html/service.html">Service</a></li>
                    <li><a href="/html/contact.html">Contact</a></li>
                    <li><a href="/html/register.html">Register</a></li>
                </ul>
            </nav>
        </header>

        <section>
            <p>여기에도 동일하게 스타일이 적용된다.</p>
        </section>

        <main>
            <h2>main content</h2>
            <p>주요 내용입니다.</p>
            <section>
                <h2>section title</h2>
                <p>
                    section description
                </p>
            </section>

            <article>
                <h1>List title</h1>
                <article class="item">
                    <h2>item title</h2>
                    <p>item description</p>
                </article>
                <article class="item half-width">
                    <h2>item title</h2>
                    <p>item description</p>
                </article>
                <article class="item half-width highlight-color">
                    <h2>item title</h2>
                    <p>item description</p>
                </article>
            </article>

            <figure>
                <img src="imgs/elephants.jpeg" alt="Elephants">
                <figcaption>Elephants</figcaption>
            </figure>
        </main>

        <footer>
            <h3>Posted by: sunrise</h3>
            <p>Contact information: <a href="mailto:someone@example.com">someone@example.com</a></p>

            <address>
                <p>주소: 서울시 양천구 목1동 123-123</p>
                <p>전화번호: 02-1234-1234</p>
                <p>이메일: <a href="mailto:example@example.com">example@example.com</a></p>
            </address>
        </footer>

        <aside>
            <h3>사이드 메뉴</h3>
            <nav>
                <ul>
                    <li><a href="">메뉴 1</a></li>
                    <li><a href="">메뉴 2</a></li>
                    <li><a href="">메뉴 3</a></li>
                </ul>
            </nav>
        </aside>
    </body>

</html>
header{
background-color: orange;
}
#logo{
font-size: 3rem;
}
.item{
background-color: brown;
}
.half-width{
width: 50%;
}
.highlight-color{
color: white;
font-weight: bold;
font-size: 3rem;
}
body section p{
background-color: blue;
}
자식 선택자 (Child Selector)
자식 선택자는 부모요소 바로 밑에 있는 직속 자식요소를 선택할때 사용한다. 아래와 같이 부등호(>)를 이용하여 선택한다.
A > B { 속성:값; }header 부분에서 Home 메뉴 아래 서브메뉴 2개를 새로 생성한다.
<header>
    <a href="/index.html" id="logo">
        <img src="/imgs/brand-logo.jpg" alt="sample logo" width="50" height="40">
        SunriseBucks
    </a>

    <nav>
        <ul>
            <li>
                <a href="/html/home.html">Home</a>
                <ul>
                    <li><a href="">서브메뉴 1</a></li>
                    <li><a href="">서브메뉴 2</a></li>
                </ul>
            </li>
            <li><a href="/html/about.html">About</a></li>
            <li><a href="/html/service.html">Service</a></li>
            <li><a href="/html/contact.html">Contact</a></li>
            <li><a href="/html/register.html">Register</a></li>
        </ul>
    </nav>
</header>
서브메뉴를 제외한 주메뉴에만 배경색을 지정하고 싶다고 하자! 자손 선택자를 이용하여 아래와 같이 작성하면 서브메뉴까지도 배경색이 지정된다.
header nav ul li a{
  background: green;
}
<nav>
    <ul>
        <li>
            <a href="/html/home.html">Home</a>
            <ul>
                <li><a href="">서브메뉴 1</a></li>
                <li><a href="">서브메뉴 2</a></li>
            </ul>
        </li>
        <li><a href="/html/about.html">About</a></li>
        <li><a href="/html/service.html">Service</a></li>
        <li><a href="/html/contact.html">Contact</a></li>
        <li><a href="/html/register.html">Register</a></li>
    </ul>
</nav>
nav 밑에 url 태그는 두군데 있기 때문에 자손 선택자로 선택하면 두개 모두 선택된다. 그래서 아래와 같이 자식 선택자로 nav 바로 밑에 있는 ul 태그만 선택한다.
header nav > ul li a{
  background: green;
}
그래도 여전히 서브메뉴까지 스타일이 적용된다. 이유는 ul li 는 자손 선택자로 선택하고 있는데 이렇게 하면 ul 바로 밑에 있는 li 태그도 선택되지만 서브메뉴가 있는 li 태그도 같이 선택되기 때문이다. 그래서 아래와 같이 자식 선택자로 ul 바로 밑에 있는 li 태그만 선택한다.
header nav > ul > li a{
  background: green;
}
그래도 여전히 서브메뉴까지 스타일이 적용된다. 이유는 li a 는 자손 선택자로 선택하고 있는데 li 바로 밑에 a 태그 뿐만 아니라 서브메뉴에 있는 a 태그까지 선택되기 때문이다.
<nav>
    <ul>
        <li>
            <a href="/html/home.html">Home</a>
            <ul>
                <li><a href="">서브메뉴 1</a></li>
                <li><a href="">서브메뉴 2</a></li>
            </ul>
        </li>
        <li><a href="/html/about.html">About</a></li>
        <li><a href="/html/service.html">Service</a></li>
        <li><a href="/html/contact.html">Contact</a></li>
        <li><a href="/html/register.html">Register</a></li>
    </ul>
</nav>
그러므로 자식 선택자를 이용하여 li 태그 바로 밑에 있는 a 태그만 선택한다.
header nav > ul > li > a{
  background: green;
}
아래와 같이 원하는대로 서브메뉴는 스타일이 적용되지 않고 주메뉴만 스타일이 적용된다.

자손 선택자 수업에서 2가지 의문사항이 있었다. 하나는 main 외부에 있는 아래 부분에만 스타일을 적용하려면 어떻게 해야 할까?
<section>
    <p>여기에도 동일하게 스타일이 적용된다.</p>
</section>
아래와 같이 하면 원하는대로 스타일이 적용되지 않았다. body 안에 section 은 main 외부에도 있지만 내부에도 있기 때문이다.
body section p{
  background-color: blue;
}
그럼 main 외부 즉, body 바로 밑에 있는 section 을 선택하려면 자식 선택자로 아래와 같이 작성하면 된다.
body > section p{
  background-color: blue;
}
이렇게 하면 원하는대로 main 외부의 seciton 에만 스타일이 적용된다.

그 다음은 main 바로 밑에 있는 아래 부문만 스타일을 적용하려고 할때이다.
<p>주요 내용입니다.</p>하지만 아래와 같이 작성하면 main 내부의 모든 p 요소가 전부 선택된다.
main p{
  background-color: red;
}
이때도 자식 선택자로 main 바로 밑에 있는 p 요소만 선택해주면 원하는대로 스타일이 적용된다.
main > p{
  background-color: red;
}
현재까지의 수정된 코드는 아래와 같다.
<!DOCTYPE html>
<html lang="ko">

    <head>
        <meta charset="UTF-8">
        <title>SunriseBucks Caffe</title>
        <link rel="stylesheet" href="style.css">
    </head>

    <body>
        <header>
            <a href="/index.html" id="logo">
                <img src="/imgs/brand-logo.jpg" alt="sample logo" width="50" height="40">
                SunriseBucks
            </a>

            <nav>
                <ul>
                    <li>
                        <a href="/html/home.html">Home</a>
                        <ul>
                            <li><a href="">서브메뉴 1</a></li>
                            <li><a href="">서브메뉴 2</a></li>
                        </ul>
                    </li>
                    <li><a href="/html/about.html">About</a></li>
                    <li><a href="/html/service.html">Service</a></li>
                    <li><a href="/html/contact.html">Contact</a></li>
                    <li><a href="/html/register.html">Register</a></li>
                </ul>
            </nav>
        </header>

        <section>
            <p>여기에도 동일하게 스타일이 적용된다.</p>
        </section>

        <main>
            <h2>main content</h2>
            <p>주요 내용입니다.</p>
            <section>
                <h2>section title</h2>
                <p>
                    section description
                </p>
            </section>

            <article>
                <h1>List title</h1>
                <article class="item">
                    <h2>item title</h2>
                    <p>item description</p>
                </article>
                <article class="item half-width">
                    <h2>item title</h2>
                    <p>item description</p>
                </article>
                <article class="item half-width highlight-color">
                    <h2>item title</h2>
                    <p>item description</p>
                </article>
            </article>

            <figure>
                <img src="imgs/elephants.jpeg" alt="Elephants">
                <figcaption>Elephants</figcaption>
            </figure>
        </main>

        <footer>
            <h3>Posted by: sunrise</h3>
            <p>Contact information: <a href="mailto:someone@example.com">someone@example.com</a></p>

            <address>
                <p>주소: 서울시 양천구 목1동 123-123</p>
                <p>전화번호: 02-1234-1234</p>
                <p>이메일: <a href="mailto:example@example.com">example@example.com</a></p>
            </address>
        </footer>

        <aside>
            <h3>사이드 메뉴</h3>
            <nav>
                <ul>
                    <li><a href="">메뉴 1</a></li>
                    <li><a href="">메뉴 2</a></li>
                    <li><a href="">메뉴 3</a></li>
                </ul>
            </nav>
        </aside>
    </body>

</html>
header{
background-color: orange;
}
#logo{
font-size: 3rem;
}
.item{
background-color: brown;
}
.half-width{
width: 50%;
}
.highlight-color{
color: white;
font-weight: bold;
font-size: 3rem;
}
body > section p{
background-color: blue;
}
main > p{
background-color: red;
}
header nav > ul > li > a{
background: green;
}
인접형제 선택자 (Adjacent Siblings Selector)
인전형제 선택자는 앞선택자(A)의 형제 요소중 바로 다음 형제(B)만 선택하는 것이다. 플러스(+) 기호를 사용한다.
A + B { 속성:값; }아래에서 item 이라는 클래스 이름으로 설정된 모든 article 중에서 첫번째 article 만 선택하고 싶다고 하자.
<article>
<h1>List title</h1>
<article class="item">
<h2>item title</h2>
<p>item description</p>
</article>
<article class="item half-width">
<h2>item title</h2>
<p>item description</p>
</article>
<article class="item half-width highlight-color">
<h2>item title</h2>
<p>item description</p>
</article>
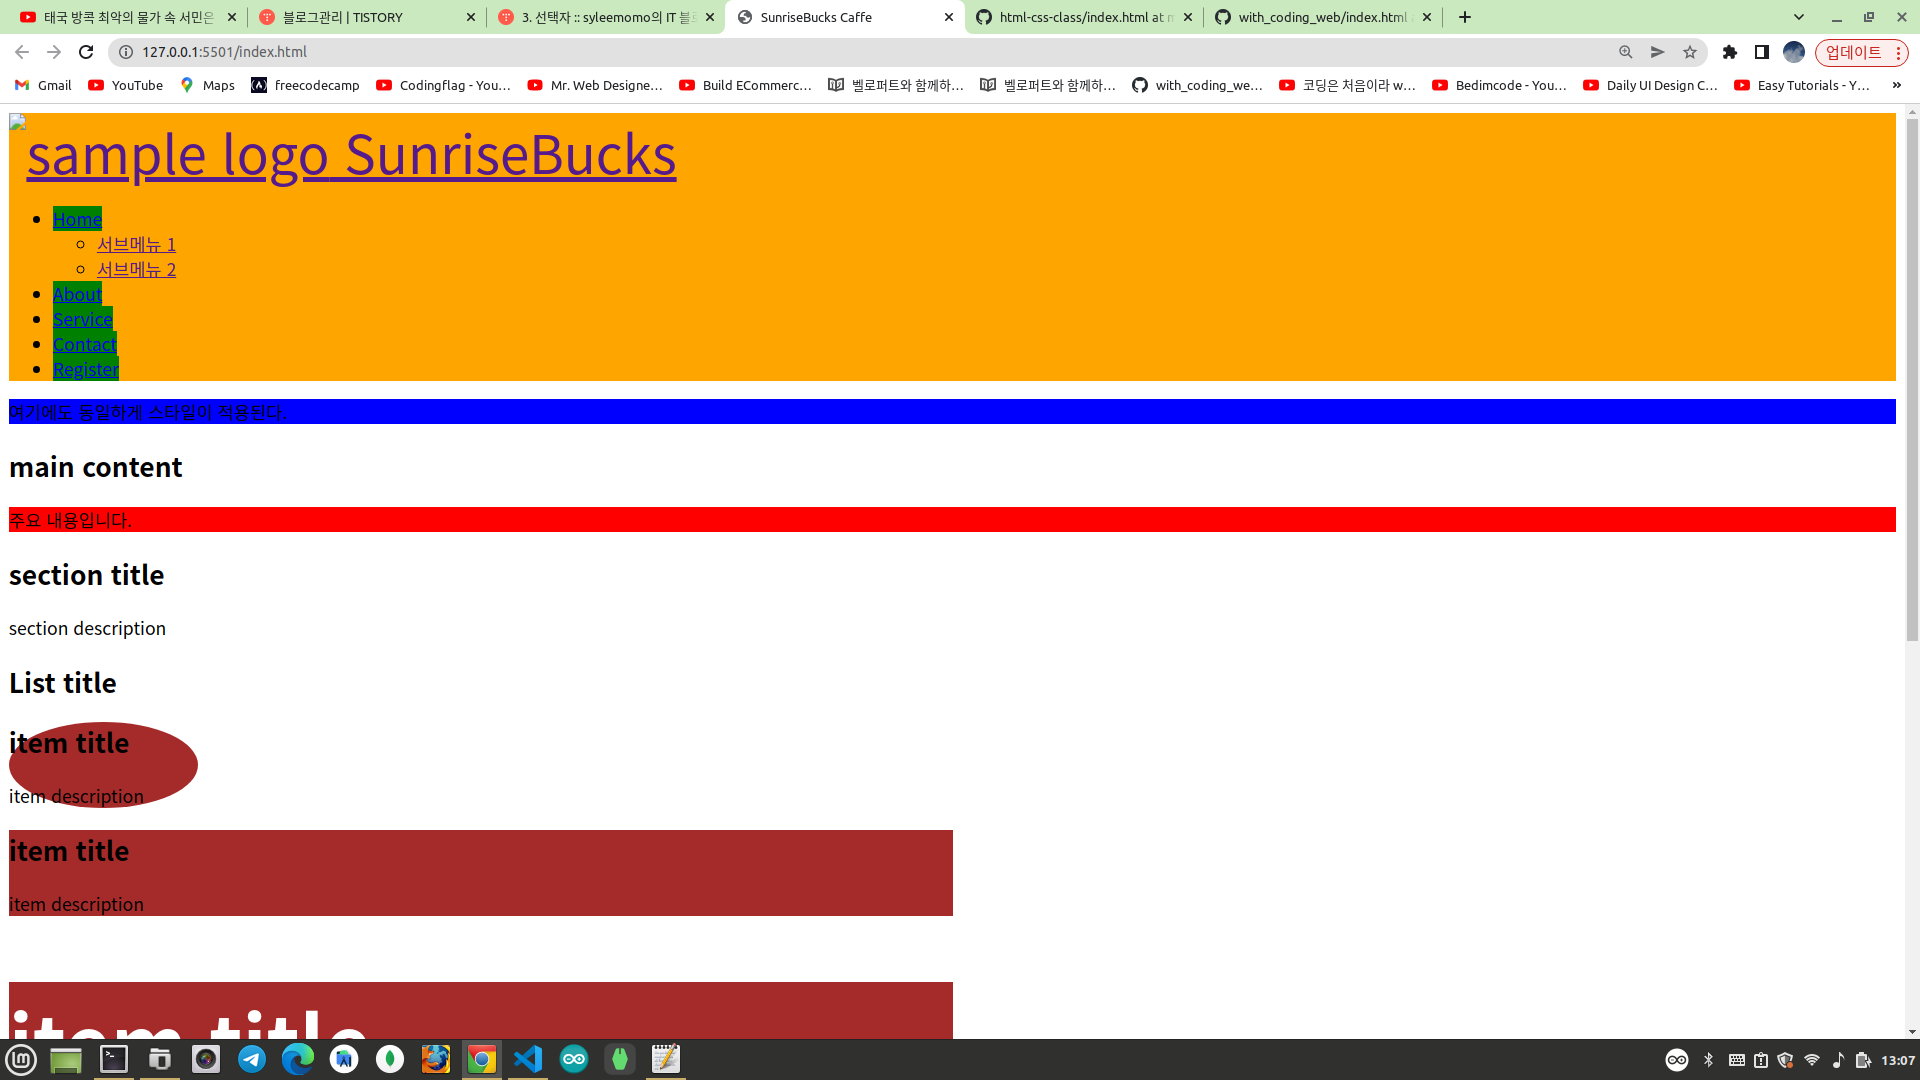
</article>아래와 같이 인접형제 선택자로 h1 태그 바로 밑에 있는 형제요소(aritcle)만 선택해보자! main 하위에 article 은 main 바로 밑에도 있지만 article 내부에 또다른 article 도 있다. 그러므로 자손 선택자가 아니라 자식 선택자(>)로 선택해야 main 바로 밑에 있는 article 태그만 선택된다. main 바로 밑(하위)에 있는 article 은 h1 을 하나만 가지고 있으므로 자손 선택자로 선택해도 무방하다.
main > article h1 + article{
  width: 10%;
  border-radius: 50%;
}
마지막으로 h1 과 동등한 요소(형제 요소)는 item 이라는 클래스 이름으로 설정된 3개의 article 이고 그 중에서 h1 과 가장 인접한 article 은 첫번째 article 이다. 그래서 인접형제 선택자로 첫번째 article 만 선택하고 스타일을 적용하고 있다. 너비를 설정하고 모서리 부분도 둥글게 깍았다.
일반형제 선택자 (General Siblings Selector)
일반형제 선택자는 앞 선택자(A) 뒤에 나오는 모든 형제 요소(B)를 선택한다.
A ~ B { 속성: 값; }이번에는 아래에서 item 이라는 클래스 이름으로 설정된 모든 article 중에서 두번째 세번째 article 만 선택하고 싶다고 하자.
<article>
    <h1>List title</h1>
    <article class="item">
        <h2>item title</h2>
        <p>item description</p>
    </article>
    <article class="item half-width">
        <h2>item title</h2>
        <p>item description</p>
    </article>
    <article class="item half-width highlight-color">
        <h2>item title</h2>
        <p>item description</p>
    </article>
</article>
앞에서 인접형제 선택자로 첫번째 article 을 선택했으므로 해당 선택자 부분을 복사붙여넣기 한 다음 첫번째 article 과 동등한 요소(형제 요소)이고 첫번째 article 다음에 작성된 모든 article (두번째 세번째 article)을 일반형제 선택자(~)로 선택하면 아래와 같다.
main > article h1 + article ~ article{
  border-radius: 0 50% 0 0 ;
  height: 30vh;
}
두번째 세번째 article 의 높이를 30vh 로 설정하고 우측상단 모서리만 둥글게 깍으면 위와 같다.

현재까지 수정된 코드는 다음과 같다.
<!DOCTYPE html>
<html lang="ko">

    <head>
        <meta charset="UTF-8">
        <title>SunriseBucks Caffe</title>
        <link rel="stylesheet" href="style.css">
    </head>

    <body>
        <header>
            <a href="/index.html" id="logo">
                <img src="/imgs/brand-logo.jpg" alt="sample logo" width="50" height="40">
                SunriseBucks
            </a>

            <nav>
                <ul>
                    <li>
                        <a href="/html/home.html">Home</a>
                        <ul>
                            <li><a href="">서브메뉴 1</a></li>
                            <li><a href="">서브메뉴 2</a></li>
                        </ul>
                    </li>
                    <li><a href="/html/about.html">About</a></li>
                    <li><a href="/html/service.html">Service</a></li>
                    <li><a href="/html/contact.html">Contact</a></li>
                    <li><a href="/html/register.html">Register</a></li>
                </ul>
            </nav>
        </header>

        <section>
            <p>여기에도 동일하게 스타일이 적용된다.</p>
        </section>

        <main>
            <h2>main content</h2>
            <p>주요 내용입니다.</p>
            <section>
                <h2>section title</h2>
                <p>
                    section description
                </p>
            </section>

            <article>
                <h1>List title</h1>
                <article class="item">
                    <h2>item title</h2>
                    <p>item description</p>
                </article>
                <article class="item half-width">
                    <h2>item title</h2>
                    <p>item description</p>
                </article>
                <article class="item half-width highlight-color">
                    <h2>item title</h2>
                    <p>item description</p>
                </article>
            </article>

            <figure>
                <img src="imgs/elephants.jpeg" alt="Elephants">
                <figcaption>Elephants</figcaption>
            </figure>
        </main>

        <footer>
            <h3>Posted by: sunrise</h3>
            <p>Contact information: <a href="mailto:someone@example.com">someone@example.com</a></p>

            <address>
                <p>주소: 서울시 양천구 목1동 123-123</p>
                <p>전화번호: 02-1234-1234</p>
                <p>이메일: <a href="mailto:example@example.com">example@example.com</a></p>
            </address>
        </footer>

        <aside>
            <h3>사이드 메뉴</h3>
            <nav>
                <ul>
                    <li><a href="">메뉴 1</a></li>
                    <li><a href="">메뉴 2</a></li>
                    <li><a href="">메뉴 3</a></li>
                </ul>
            </nav>
        </aside>
    </body>

</html>
header{
background-color: orange;
}
#logo{
font-size: 3rem;
}
.item{
background-color: brown;
}
.half-width{
width: 50%;
}
.highlight-color{
color: white;
font-weight: bold;
font-size: 3rem;
}
body > section p{
background-color: blue;
}
main > p{
background-color: red;
}
header nav > ul > li > a{
background: green;
}
main > article h1 + article{
width: 10%;
border-radius: 50%;
}
main > article h1 + article ~ article{
border-radius: 0 50% 0 0 ;
height: 30vh;
}
그룹 선택자 (Group Selector)
그룹 선택자는 다양한 요소에 공통적인 스타일을 한번에 설정하려고 할때 사용한다. 요소 선택자 사이에 콤마(,)로 구분해주면 된다.
A, B, C { 속성:값; }아래와 같이 헤더, 메인 컨텐츠, 푸터에 동일한 스타일을 적용하고 싶을때 그룹 선택자를 사용하고 있다.
header, main, footer{
  width: 30%;
  background-color: gray;
}
속성 선택자 (Attribute Selector)
속성 선택자는 HTML 태그의 속성을 이용하여 요소를 선택한다. 대괄호를 사용한다.
[속성] { 속성:값; }
[속성="값"] { 속성:값; }
[속성^="값"] { 속성:값; }
첫번째는 해당 속성을 포함하는 모든 요소를 선택한다. 두번째는 속성과 값이 일치하는 모든 요소를 선택한다. 세번째는 속성이 주어진 값으로 시작하는 모든 요소를 선택한다. 삿갓(^)은 시작한다는 의미다.
<aside>
    <h3>사이드 메뉴</h3>
    <nav>
        <ul>
            <li><a href="" class="side_menu">메뉴 1</a></li>
            <li><a href="" target="_blank">메뉴 2</a></li>
            <li><a href="" target="_blank">메뉴 3</a></li>
            <li><a href="" target="_self" class="side_menu">메뉴 4</a></li>
        </ul>
    </nav>
</aside>
사이드 메뉴를 위와 같이 수정하도록 한다.
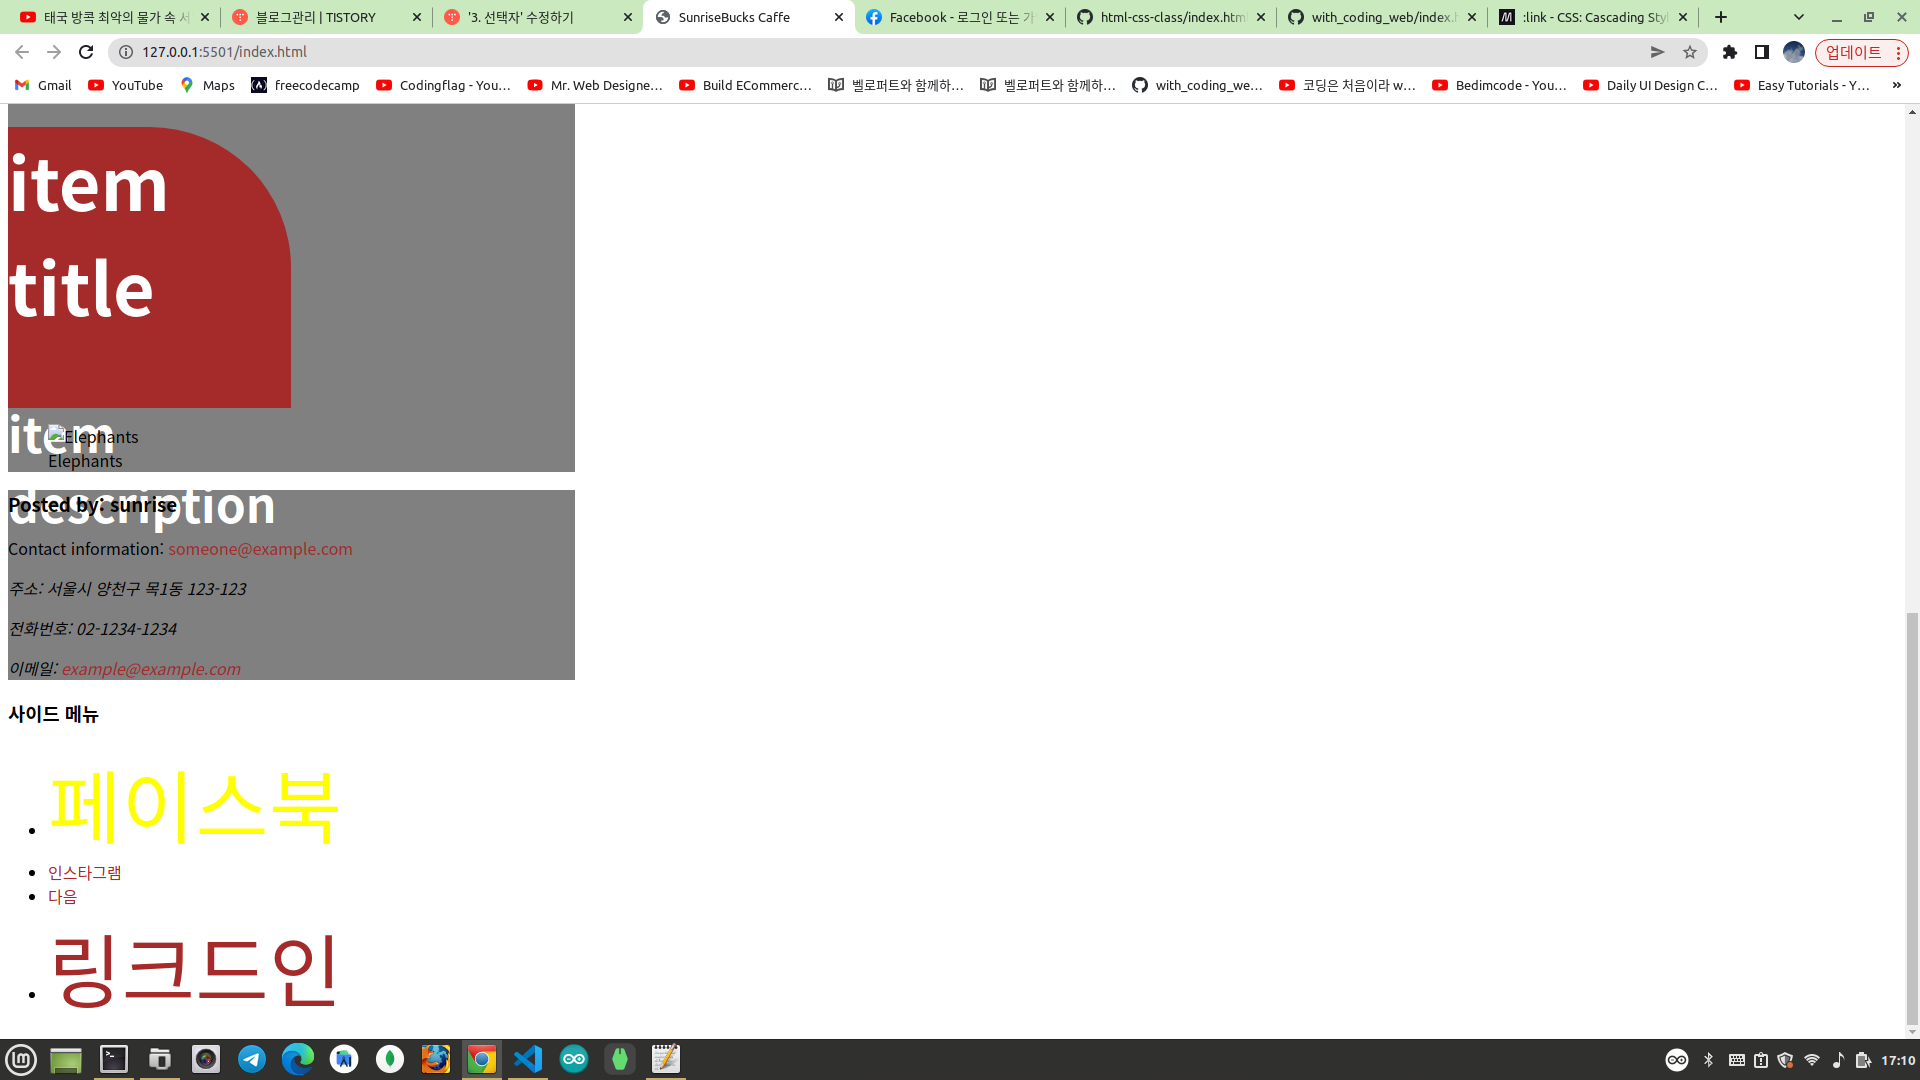
여기서 메뉴2, 메뉴3, 메뉴4만 선택하려고 한다. 해당 사이드 메뉴에만 target 속성이 있으므로 속성 선택자를 이용하여 아래와 같이 선택하면 된다.
[target]{
  text-decoration: none;
}
그러면 아래와 같이 메뉴2, 메뉴3, 메뉴4의 링크 밑줄만 제거된다.
이번에는 새탭으로 열리는 링크는 배경색을 오렌지색으로 설정하고 싶다. 새탭으로 열리는 링크는 메뉴2, 메뉴3이다.
[target="_blank"]{
  background-color: orange;
}
위와 같이 target 이 _blank 인 요소를 선택하고 배경색을 설정한다.

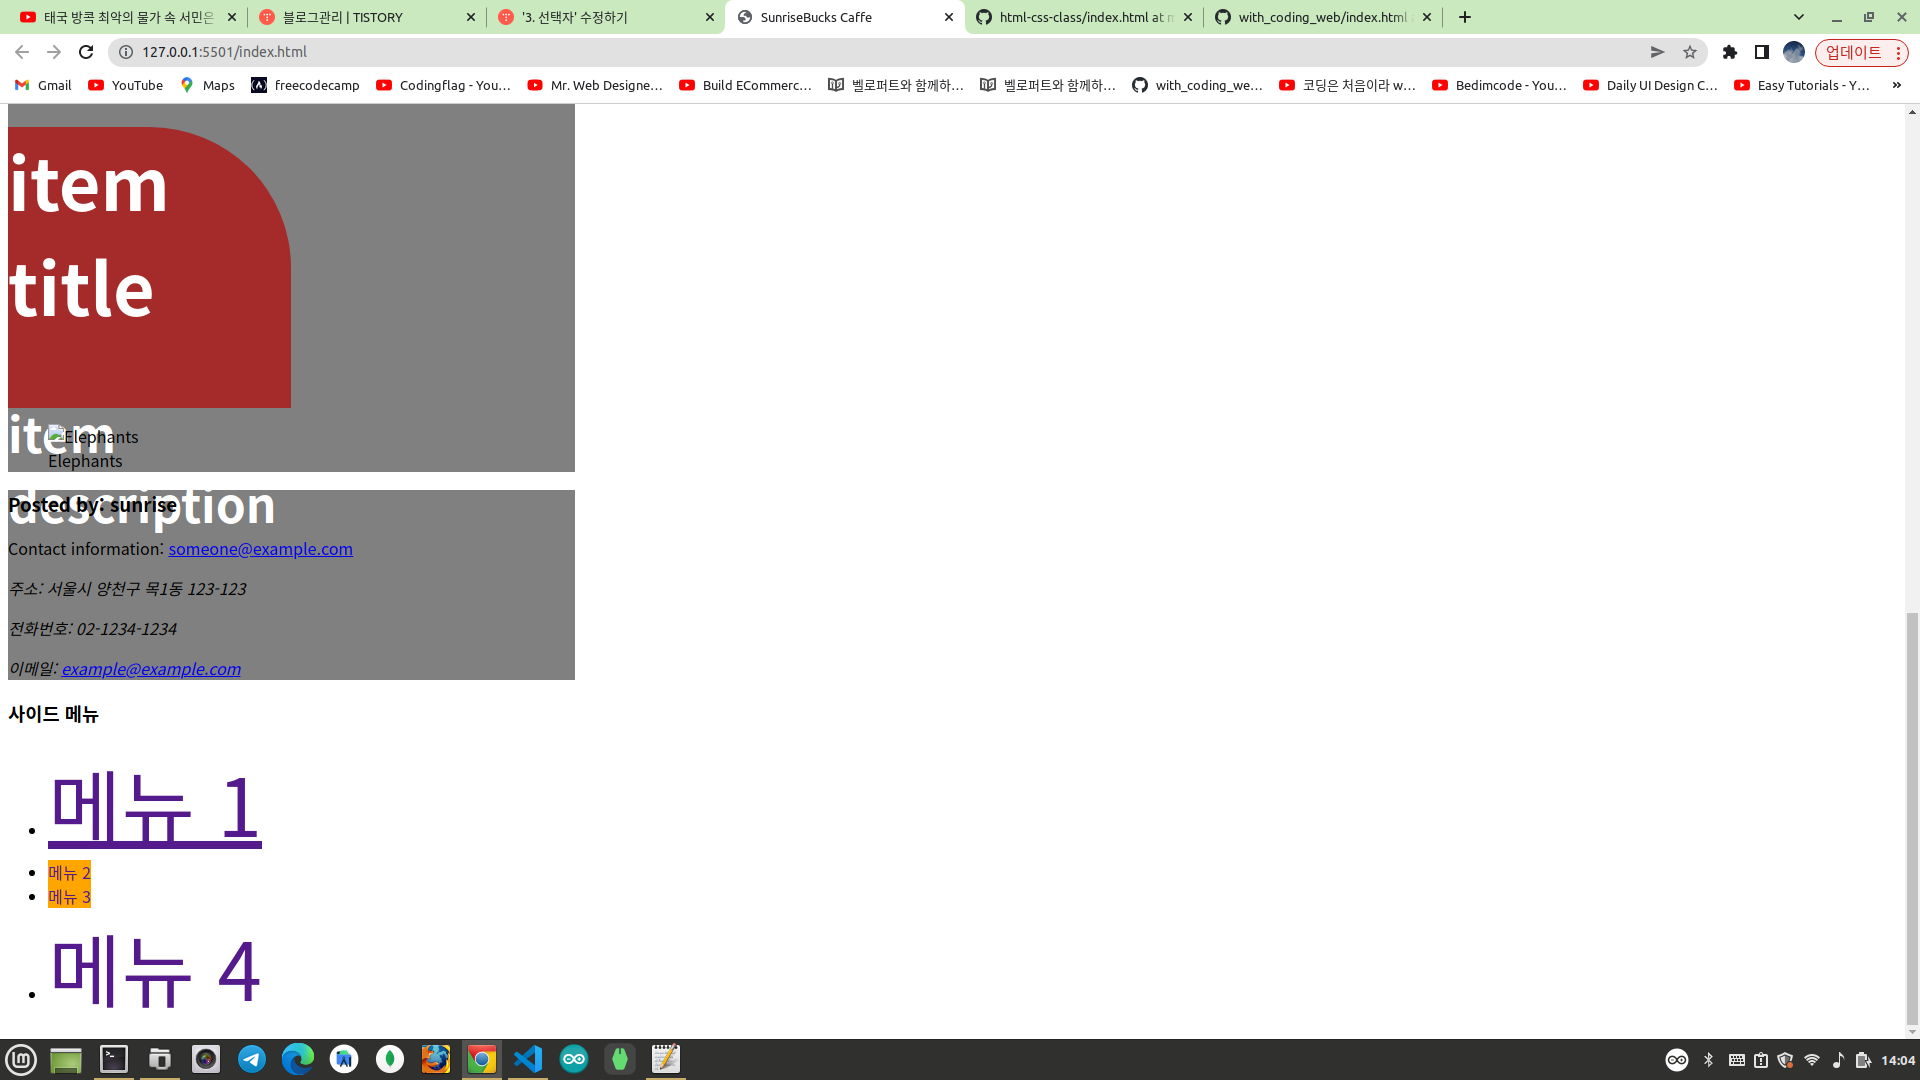
메뉴1, 메뉴4만 선택하고 싶다고 하자! 메뉴1과 메뉴4는 공통적으로 클래스 이름이 "side"로 시작한다. 그래서 아래와 같이 속성을 선택하면 된다.
[class^="side"]{
  font-size: 5rem;
}
메뉴1, 메뉴4의 글자만 대문짝만하게 커진 모습이다.
현재까지 수정된 코드는 다음과 같다.
<!DOCTYPE html>
<html lang="ko">

    <head>
        <meta charset="UTF-8">
        <title>SunriseBucks Caffe</title>
        <link rel="stylesheet" href="style.css">
    </head>

    <body>
        <header>
            <a href="/index.html" id="logo">
                <img src="/imgs/brand-logo.jpg" alt="sample logo" width="50" height="40">
                SunriseBucks
            </a>

            <nav>
                <ul>
                    <li>
                        <a href="/html/home.html">Home</a>
                        <ul>
                            <li><a href="">서브메뉴 1</a></li>
                            <li><a href="">서브메뉴 2</a></li>
                        </ul>
                    </li>
                    <li><a href="/html/about.html">About</a></li>
                    <li><a href="/html/service.html">Service</a></li>
                    <li><a href="/html/contact.html">Contact</a></li>
                    <li><a href="/html/register.html">Register</a></li>
                </ul>
            </nav>
        </header>

        <section>
            <p>여기에도 동일하게 스타일이 적용된다.</p>
        </section>

        <main>
            <h2>main content</h2>
            <p>주요 내용입니다.</p>
            <section>
                <h2>section title</h2>
                <p>
                    section description
                </p>
            </section>

            <article>
                <h1>List title</h1>
                <article class="item">
                    <h2>item title</h2>
                    <p>item description</p>
                </article>
                <article class="item half-width">
                    <h2>item title</h2>
                    <p>item description</p>
                </article>
                <article class="item half-width highlight-color">
                    <h2>item title</h2>
                    <p>item description</p>
                </article>
            </article>

            <figure>
                <img src="imgs/elephants.jpeg" alt="Elephants">
                <figcaption>Elephants</figcaption>
            </figure>
        </main>

        <footer>
            <h3>Posted by: sunrise</h3>
            <p>Contact information: <a href="mailto:someone@example.com">someone@example.com</a></p>

            <address>
                <p>주소: 서울시 양천구 목1동 123-123</p>
                <p>전화번호: 02-1234-1234</p>
                <p>이메일: <a href="mailto:example@example.com">example@example.com</a></p>
            </address>
        </footer>

        <aside>
            <h3>사이드 메뉴</h3>
            <nav>
                <ul>
                    <li><a href="" class="side_menu">메뉴 1</a></li>
                    <li><a href="" target="_blank">메뉴 2</a></li>
                    <li><a href="" target="_blank">메뉴 3</a></li>
                    <li><a href="" target="_self" class="side_menu">메뉴 4</a></li>
                </ul>
            </nav>
        </aside>
    </body>

</html>
header{
background-color: orange;
}
#logo{
font-size: 3rem;
}
.item{
background-color: brown;
}
.half-width{
width: 50%;
}
.highlight-color{
color: white;
font-weight: bold;
font-size: 3rem;
}
body > section p{
background-color: blue;
}
main > p{
background-color: red;
}
header nav > ul > li > a{
background: green;
}
main > article h1 + article{
width: 10%;
border-radius: 50%;
}
main > article h1 + article ~ article{
border-radius: 0 50% 0 0 ;
height: 30vh;
}
header, main, footer{
width: 30%;
background-color: gray;
}
[target]{
text-decoration: none;
}
[target="_blank"]{
background-color: orange;
}
[class^="side"]{
font-size: 5rem;
}
의사클래스 선택자 (Pseudo-Class Selector)
https://developer.mozilla.org/ko/docs/Web/CSS/Pseudo-classes
의사 클래스 - CSS: Cascading Style Sheets | MDN
CSS 의사 클래스(가상 클래스)는 선택자에 추가하는 키워드로, 선택한 요소가 특별한 상태여야 만족할 수 있습니다. 예를 들어 :hover를 사용하면 포인터를 올렸을 때에만 글씨 색을 바꾸고 싶을
developer.mozilla.org
의사클래스 선택자는 하나의 콜론(:)을 사용하여 요소를 선택한다. 의사클래스 선택자는 같은 요소라도 특정 상황과 조건에 맞는 경우에만 스타일이 적용된다.
선택자:의사클래스 { 속성:값; }| :hover | 요소에 마우스를 올렸을때 스타일 적용 |
| :link | 아직 방문하지 않은 a 요소에 스타일 적용 |
| :visited | 이미 방문한 a 요소에 스타일 적용 |
| :active | a, input, button 등의 요소를 누르는 순간 스타일 적용 |
| :focus | a, input, button 등의 요소에 포커스될때 스타일 적용 |
| :focus-within | 의사클래스가 적용된 요소의 자식요소에 포커스 될때 스타일 적용 |
| :nth-child() | 특정 자식요소를 선택해서 스타일 적용 |
| :first-child | 첫번째 자식요소를 선택해서 스타일 적용 |
| :last-child | 마지막 자식요소를 선택해서 스타일 적용 |
| :not() | 특정 요소를 제외한 요소를 선택해서 스타일 적용 |
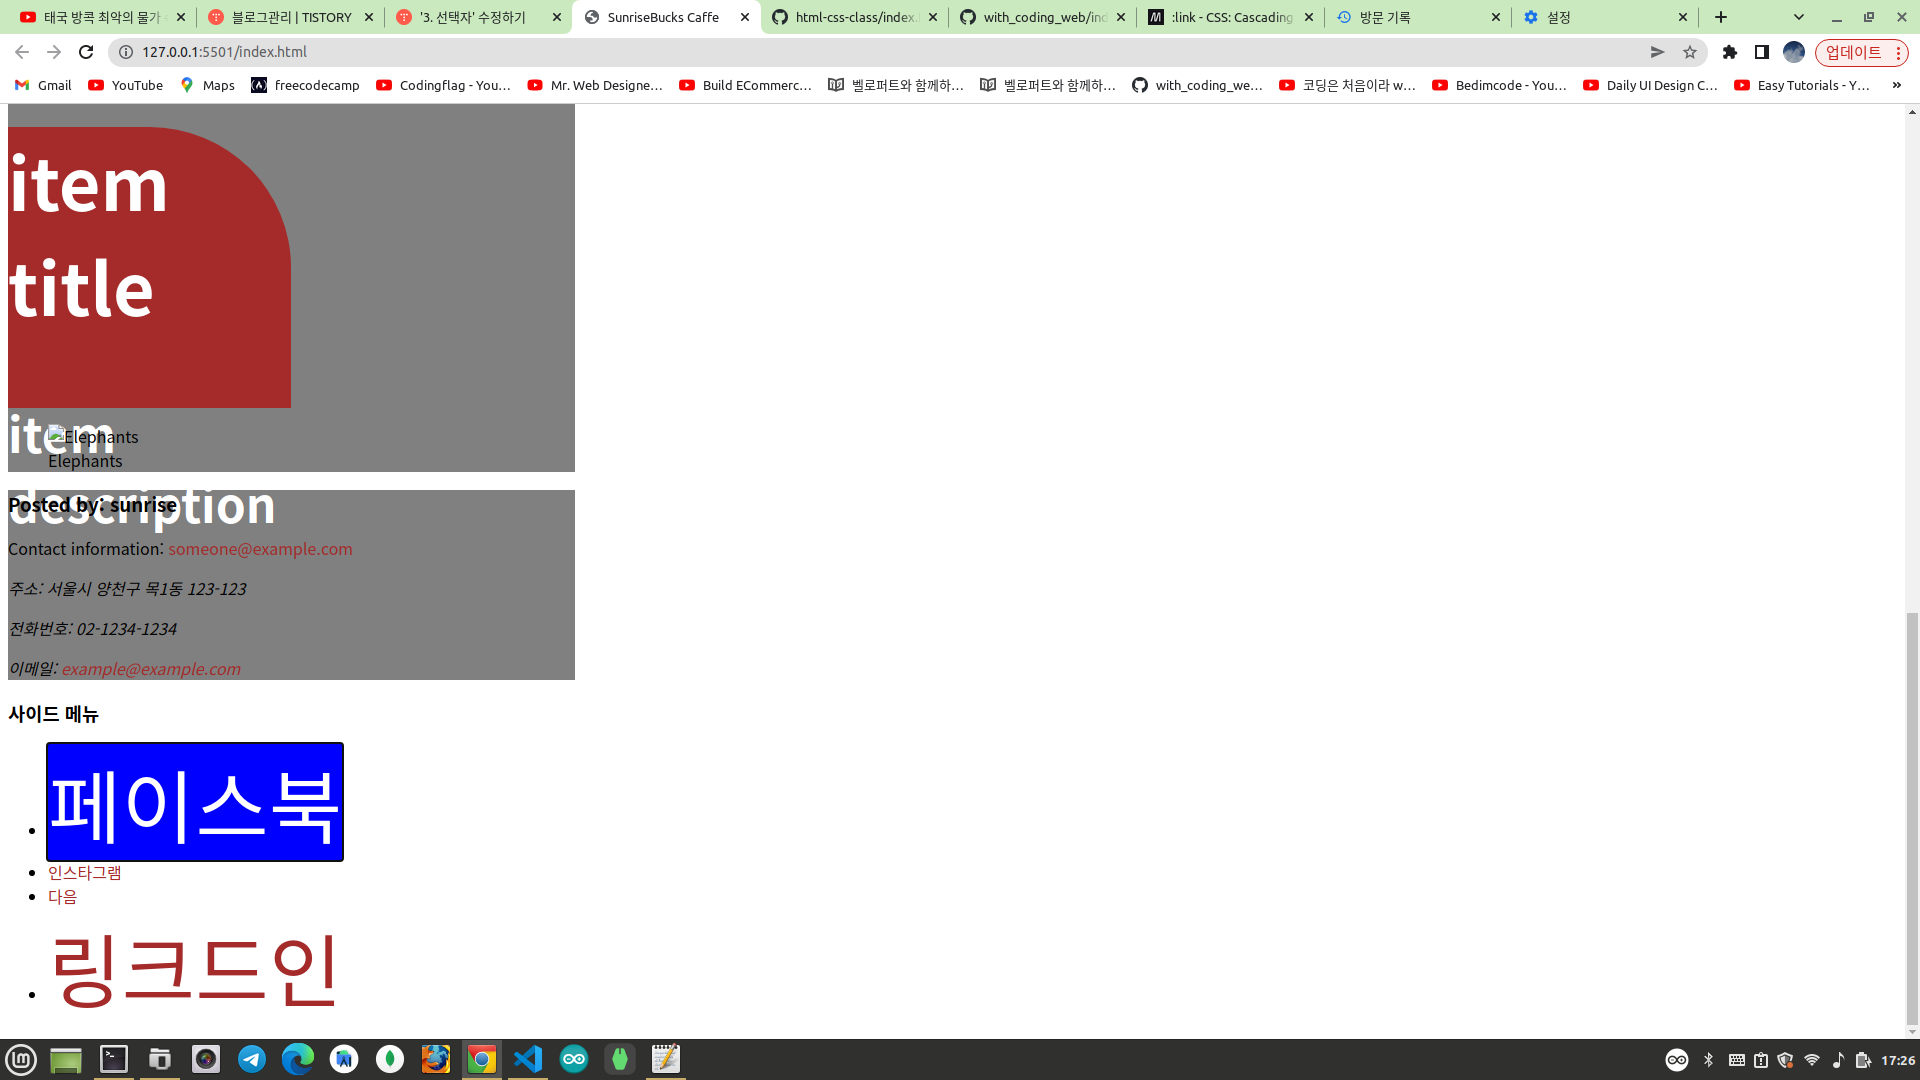
헤더의 로고 글자에 마우스를 올리면 글자 색상이 변하게 해보자! 자식 선택자를 이용하여 header 바로 아래 a 태그만 선택하면 된다.
header > a:hover{
  color: orange;
}
아니면 간단하게 id 값으로 선택해도 된다.
#logo:hover{
  color: orange;
}
실습을 하기 전에 아래와 같이 HTML 문서에서 링크(a 태그)의 href 속성에 반드시 경로를 설정해주자! 서브메뉴와 사이드 메뉴의 href 속성에 외부사이트의 링크 주소를 연결해주고 새탭에서 열리도록 target 을 _blank 로 설정한다. 그렇지 않으면 스타일이 제대로 적용되지 않는다.
<!DOCTYPE html>
<html lang="ko">

    <head>
        <meta charset="UTF-8">
        <title>SunriseBucks Caffe</title>
        <link rel="stylesheet" href="style.css">
    </head>

    <body>
        <header>
            <a href="/index.html" id="logo">
                <img src="/imgs/brand-logo.jpg" alt="sample logo" width="50" height="40">
                SunriseBucks
            </a>

            <nav>
                <ul>
                    <li>
                        <a href="/html/home.html">Home</a>
                        <ul>
                            <li><a href="https://www.naver.com" target="_blank">네이버</a></li>
                            <li><a href="https://www.google.com" target="_blank">구글</a></li>
                        </ul>
                    </li>
                    <li><a href="/html/about.html">About</a></li>
                    <li><a href="/html/service.html">Service</a></li>
                    <li><a href="/html/contact.html">Contact</a></li>
                    <li><a href="/html/register.html">Register</a></li>
                </ul>
            </nav>
        </header>

        <section>
            <p>여기에도 동일하게 스타일이 적용된다.</p>
        </section>

        <main>
            <h2>main content</h2>
            <p>주요 내용입니다.</p>
            <section>
                <h2>section title</h2>
                <p>
                    section description
                </p>
            </section>

            <article>
                <h1>List title</h1>
                <article class="item">
                    <h2>item title</h2>
                    <p>item description</p>
                </article>
                <article class="item half-width">
                    <h2>item title</h2>
                    <p>item description</p>
                </article>
                <article class="item half-width highlight-color">
                    <h2>item title</h2>
                    <p>item description</p>
                </article>
            </article>

            <figure>
                <img src="imgs/elephants.jpeg" alt="Elephants">
                <figcaption>Elephants</figcaption>
            </figure>
        </main>

        <footer>
            <h3>Posted by: sunrise</h3>
            <p>Contact information: <a href="mailto:someone@example.com">someone@example.com</a></p>

            <address>
                <p>주소: 서울시 양천구 목1동 123-123</p>
                <p>전화번호: 02-1234-1234</p>
                <p>이메일: <a href="mailto:example@example.com">example@example.com</a></p>
            </address>
        </footer>

        <aside>
            <h3>사이드 메뉴</h3>
            <nav>
                <ul>
                    <li><a href="https://www.facebook.com" class="side_menu" target="_blank">페이스북</a></li>
                    <li><a href="https://www.instagram.com" target="_blank">인스타그램</a></li>
                    <li><a href="https://www.daum.net" target="_blank">다음</a></li>
                    <li><a href="https://www.linkedin.com" target="_blank" class="side_menu">링크드인</a></li>
                </ul>
            </nav>
        </aside>
    </body>

</html>
target 이 _blank 인 링크에 배경색을 설정하는 부분은 주석처리한다. 헤더영역의 주메뉴에 설정된 배경색도 주석처리한다.
header{
  background-color: orange;
}
#logo{
  font-size: 3rem;
}
.item{
  background-color: brown;
}
.half-width{
  width: 50%;
}
.highlight-color{
  color: white;
  font-weight: bold;
  font-size: 3rem;
}
body > section p{
  background-color: blue;
}
main > p{
  background-color: red;
}
/* header nav > ul > li > a{
  background: green;
} */
main > article h1 + article{
  width: 10%;
  border-radius: 50%;
}
main > article h1 + article ~ article{
  border-radius: 0 50% 0 0 ;
  height: 30vh;
}
header, main, footer{
  width: 30%;
  background-color: gray;
}
[target]{
  text-decoration: none;
}
/* [target="_blank"]{
  background-color: orange;
} */
[class^="side"]{
  font-size: 5rem;
}
header > a:hover{
  color: orange;
}
테스트하면서 방문한 링크를 방문하지 않은 링크로 변경하려면 인터넷 사용 기록을 삭제하면 된다. 사용자가 특정 링크를 클릭하면 브라우저는 사용자가 방문한 링크를 기억하기 위하여 캐쉬하기 때문이다.
css 에 다음 코드를 추가한다. 아직 방문하지 않은 a 요소의 링크 밑줄을 제거하고 링크 색상을 변경한다. 그리고 사용자가 링크를 클릭하여 방문한 링크는 글자 색상이 노란색으로 변경되도록 한다.
:link{
  text-decoration: none;
  color:brown;
}
:visited{
  color: yellow;
}
아직 방문하지 않은 링크들은 글자 색상이 갈색이고 링크에 밑줄이 없다.
링크를 클릭해서 방문한 링크는 아래와 같이 글자 색상이 노란색으로 바뀐다.
현재까지의 수정된 코드는 다음과 같다.
<!DOCTYPE html>
<html lang="ko">

    <head>
        <meta charset="UTF-8">
        <title>SunriseBucks Caffe</title>
        <link rel="stylesheet" href="style.css">
    </head>

    <body>
        <header>
            <a href="/index.html" id="logo">
                <img src="/imgs/brand-logo.jpg" alt="sample logo" width="50" height="40">
                SunriseBucks
            </a>

            <nav>
                <ul>
                    <li>
                        <a href="/html/home.html">Home</a>
                        <ul>
                            <li><a href="https://www.naver.com" target="_blank">네이버</a></li>
                            <li><a href="https://www.google.com" target="_blank">구글</a></li>
                        </ul>
                    </li>
                    <li><a href="/html/about.html">About</a></li>
                    <li><a href="/html/service.html">Service</a></li>
                    <li><a href="/html/contact.html">Contact</a></li>
                    <li><a href="/html/register.html">Register</a></li>
                </ul>
            </nav>
        </header>

        <section>
            <p>여기에도 동일하게 스타일이 적용된다.</p>
        </section>

        <main>
            <h2>main content</h2>
            <p>주요 내용입니다.</p>
            <section>
                <h2>section title</h2>
                <p>
                    section description
                </p>
            </section>

            <article>
                <h1>List title</h1>
                <article class="item">
                    <h2>item title</h2>
                    <p>item description</p>
                </article>
                <article class="item half-width">
                    <h2>item title</h2>
                    <p>item description</p>
                </article>
                <article class="item half-width highlight-color">
                    <h2>item title</h2>
                    <p>item description</p>
                </article>
            </article>

            <figure>
                <img src="imgs/elephants.jpeg" alt="Elephants">
                <figcaption>Elephants</figcaption>
            </figure>
        </main>

        <footer>
            <h3>Posted by: sunrise</h3>
            <p>Contact information: <a href="mailto:someone@example.com">someone@example.com</a></p>

            <address>
                <p>주소: 서울시 양천구 목1동 123-123</p>
                <p>전화번호: 02-1234-1234</p>
                <p>이메일: <a href="mailto:example@example.com">example@example.com</a></p>
            </address>
        </footer>

        <aside>
            <h3>사이드 메뉴</h3>
            <nav>
                <ul>
                    <li><a href="https://www.facebook.com" class="side_menu" target="_blank">페이스북</a></li>
                    <li><a href="https://www.instagram.com" target="_blank">인스타그램</a></li>
                    <li><a href="https://www.daum.net" target="_blank">다음</a></li>
                    <li><a href="https://www.linkedin.com" target="_blank" class="side_menu">링크드인</a></li>
                </ul>
            </nav>
        </aside>
    </body>

</html>
header{
background-color: orange;
}
#logo{
font-size: 3rem;
}
.item{
background-color: brown;
}
.half-width{
width: 50%;
}
.highlight-color{
color: white;
font-weight: bold;
font-size: 3rem;
}
body > section p{
background-color: blue;
}
main > p{
background-color: red;
}
/* header nav > ul > li > a{
background: green;
} */
main > article h1 + article{
width: 10%;
border-radius: 50%;
}
main > article h1 + article ~ article{
border-radius: 0 50% 0 0 ;
height: 30vh;
}
header, main, footer{
width: 30%;
background-color: gray;
}
[target]{
text-decoration: none;
}
/* [target="_blank"]{
background-color: orange;
} */
[class^="side"]{
font-size: 5rem;
}
header > a:hover{
color: orange;
}
:link{
text-decoration: none;
color:brown;
}
:visited{
color: yellow;
}
css 에 다음 코드를 추가하자! focus 와 active 의사 클래스는 a 태그 뿐만 아니라 input, button 에도 사용되므로 a 태그에만 focus 와 active 를 주기 위하여 의사클래스 앞에 a 태그를 명시하였다. focus 는 키보드의 Tab 키를 이용하여 특정 링크에 포커스가 되면 적용되는 스타일이다. Tab 키를 눌러서 각각의 링크에 포커스를 설정해보자!
a:focus{
  background: blue;
  color: white;
}
a:active{
  background: black;
  color: red;
}
active 는 링크를 클릭하는 순간 적용되는 스타일이다. 특정 링크를 클릭해서 스타일이 제대로 적용되는지 테스트해보자!

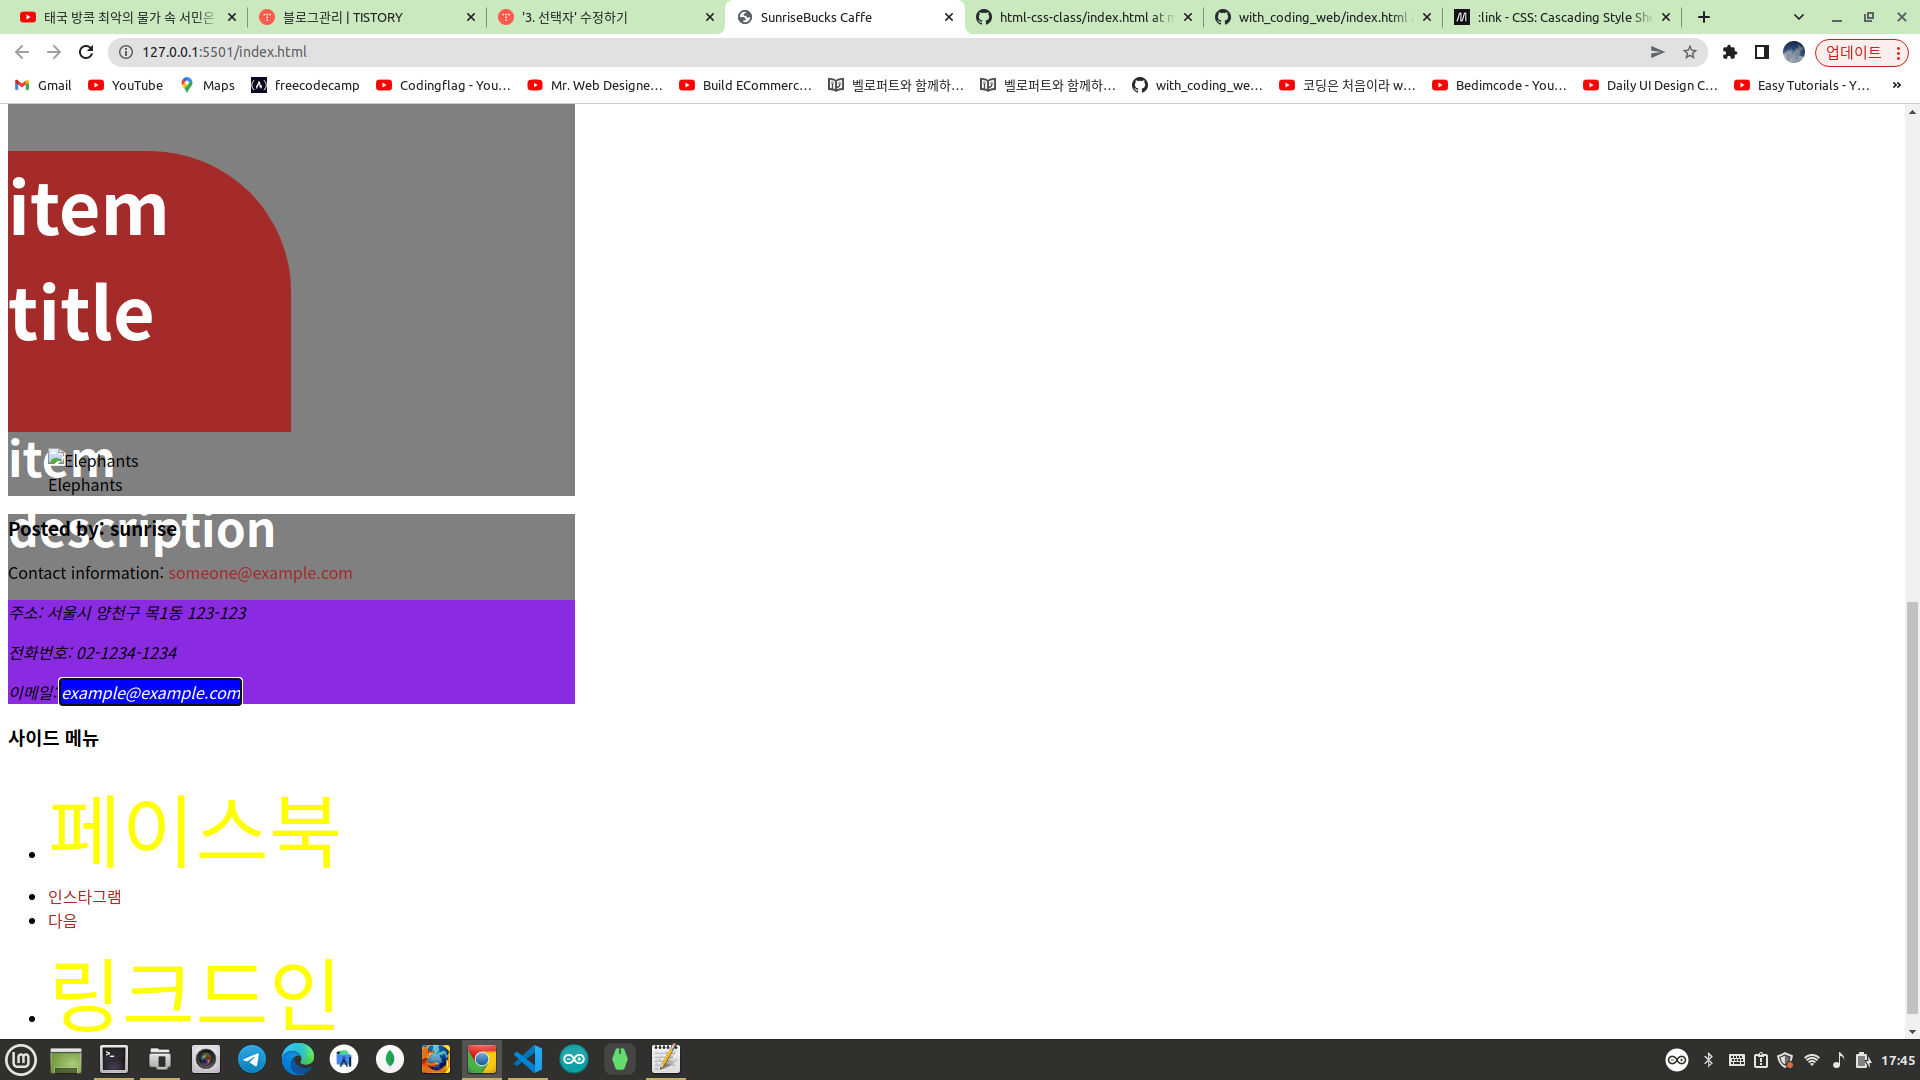
주소영역(address) 안에 있는 링크(a 태그)에 포커스될때 focus-within 이 적용된 부모 요소(address)의 스타일을 변경하려면 아래와 같이 코드를 추가해주면 된다. Tab 키를 이용하여 각 링크마다 포커스를 주다가 주소영역 안에 있는 링크가 포커스되면 주소영역의 배경색이 보라색으로 변한다.
address:focus-within{
  background-color:blueviolet;
}
사이드 메뉴 아래 form 을 추가한다.
<!DOCTYPE html>
<html lang="ko">

    <head>
        <meta charset="UTF-8">
        <title>SunriseBucks Caffe</title>
        <link rel="stylesheet" href="style.css">
    </head>

    <body>
        <header>
            <a href="/index.html" id="logo">
                <img src="/imgs/brand-logo.jpg" alt="sample logo" width="50" height="40">
                SunriseBucks
            </a>

            <nav>
                <ul>
                    <li>
                        <a href="/html/home.html">Home</a>
                        <ul>
                            <li><a href="https://www.naver.com" target="_blank">네이버</a></li>
                            <li><a href="https://www.google.com" target="_blank">구글</a></li>
                        </ul>
                    </li>
                    <li><a href="/html/about.html">About</a></li>
                    <li><a href="/html/service.html">Service</a></li>
                    <li><a href="/html/contact.html">Contact</a></li>
                    <li><a href="/html/register.html">Register</a></li>
                </ul>
            </nav>
        </header>

        <section>
            <p>여기에도 동일하게 스타일이 적용된다.</p>
        </section>

        <main>
            <h2>main content</h2>
            <p>주요 내용입니다.</p>
            <section>
                <h2>section title</h2>
                <p>
                    section description
                </p>
            </section>

            <article>
                <h1>List title</h1>
                <article class="item">
                    <h2>item title</h2>
                    <p>item description</p>
                </article>
                <article class="item half-width">
                    <h2>item title</h2>
                    <p>item description</p>
                </article>
                <article class="item half-width highlight-color">
                    <h2>item title</h2>
                    <p>item description</p>
                </article>
            </article>

            <figure>
                <img src="imgs/elephants.jpeg" alt="Elephants">
                <figcaption>Elephants</figcaption>
            </figure>
        </main>

        <footer>
            <h3>Posted by: sunrise</h3>
            <p>Contact information: <a href="mailto:someone@example.com">someone@example.com</a></p>

            <address>
                <p>주소: 서울시 양천구 목1동 123-123</p>
                <p>전화번호: 02-1234-1234</p>
                <p>이메일: <a href="mailto:example@example.com">example@example.com</a></p>
            </address>
        </footer>

        <aside>
            <h3>사이드 메뉴</h3>
            <nav>
                <ul>
                    <li><a href="https://www.facebook.com" class="side_menu" target="_blank">페이스북</a></li>
                    <li><a href="https://www.instagram.com" target="_blank">인스타그램</a></li>
                    <li><a href="https://www.daum.net" target="_blank">다음</a></li>
                    <li><a href="https://www.linkedin.com" target="_blank" class="side_menu">링크드인</a></li>
                </ul>
            </nav>
        </aside>

        <form action="">
            <input type="text">
            <button>보내기</button>
        </form>
    </body>

</html>
<form action="">
<input type="text">
<button>보내기</button>
</form>
input, button 은 기본적으로 Tab 키를 이용하여 포커스된다. 이는 웹 접근성 차원에서 브라우저에서 기본적으로 제공한다. 해당 포커스 기능을 제거하려면 아래와 같이 스타일을 적용하면 된다.
input, button{
outline: none;
}해당 스타일을 제거하면 Tab 키를 눌러도 포커스되지 않는다. 개발자가 input, button 의 포커스 스타일을 커스터마이징하려면 아래와 같이 focus 의사클래스를 적용하면 된다.
input:focus, button:focus{
background-color: red;
}이렇게 스타일을 적용하면 Tab 키로 포커스될때 배경색이 적용된다.

현재까지 수정된 코드는 다음과 같다.
<!DOCTYPE html>
<html lang="ko">
<head>
<meta charset="UTF-8">
<title>SunriseBucks Caffe</title>
<link rel="stylesheet" href="style.css">
</head>
<body>
<header>
<a href="/index.html" id="logo">
<img src="/imgs/brand-logo.jpg" alt="sample logo" width="50" height="40">
SunriseBucks
</a>
<nav>
<ul>
<li>
<a href="/html/home.html">Home</a>
<ul>
<li><a href="https://www.naver.com" target="_blank">네이버</a></li>
<li><a href="https://www.google.com" target="_blank">구글</a></li>
</ul>
</li>
<li><a href="/html/about.html">About</a></li>
<li><a href="/html/service.html">Service</a></li>
<li><a href="/html/contact.html">Contact</a></li>
<li><a href="/html/register.html">Register</a></li>
</ul>
</nav>
</header>
<section>
<p>여기에도 동일하게 스타일이 적용된다.</p>
</section>
<main>
<h2>main content</h2>
<p>주요 내용입니다.</p>
<section>
<h2>section title</h2>
<p>
section description
</p>
</section>
<article>
<h1>List title</h1>
<article class="item">
<h2>item title</h2>
<p>item description</p>
</article>
<article class="item half-width">
<h2>item title</h2>
<p>item description</p>
</article>
<article class="item half-width highlight-color">
<h2>item title</h2>
<p>item description</p>
</article>
</article>
<figure>
<img src="imgs/elephants.jpeg" alt="Elephants">
<figcaption>Elephants</figcaption>
</figure>
</main>
<footer>
<h3>Posted by: sunrise</h3>
<p>Contact information: <a href="mailto:someone@example.com">someone@example.com</a></p>
<address>
<p>주소: 서울시 양천구 목1동 123-123</p>
<p>전화번호: 02-1234-1234</p>
<p>이메일: <a href="mailto:example@example.com">example@example.com</a></p>
</address>
</footer>
<aside>
<h3>사이드 메뉴</h3>
<nav>
<ul>
<li><a href="https://www.facebook.com" class="side_menu" target="_blank">페이스북</a></li>
<li><a href="https://www.instagram.com" target="_blank">인스타그램</a></li>
<li><a href="https://www.daum.net" target="_blank">다음</a></li>
<li><a href="https://www.linkedin.com" target="_blank" class="side_menu">링크드인</a></li>
</ul>
</nav>
</aside>
<form action="">
    <input type="text">
    <button>보내기</button>
</form>
</body>
</html>header{
background-color: orange;
}
#logo{
font-size: 3rem;
}
.item{
background-color: brown;
}
.half-width{
width: 50%;
}
.highlight-color{
color: white;
font-weight: bold;
font-size: 3rem;
}
body > section p{
background-color: blue;
}
main > p{
background-color: red;
}
/* header nav > ul > li > a{
background: green;
} */
main > article h1 + article{
width: 10%;
border-radius: 50%;
}
main > article h1 + article ~ article{
border-radius: 0 50% 0 0 ;
height: 30vh;
}
header, main, footer{
width: 30%;
background-color: gray;
}
[target]{
text-decoration: none;
}
/* [target="_blank"]{
background-color: orange;
} */
[class^="side"]{
font-size: 5rem;
}
header > a:hover{
color: orange;
}
:link{
text-decoration: none;
color:brown;
}
:visited{
color: yellow;
}
a:focus{
background: blue;
color: white;
}
a:active{
background: black;
color: red;
}
address:focus-within{
background-color:blueviolet;
}
input, button{
  outline: none;
}
input:focus, button:focus{
  background-color: red;
}
다음은 부모요소에서 특정 자식요소를 선택하는 방법이다. address 요소 안에는 p 요소가 3개 있다. address 는 부모요소이고 p 요소들은 자식요소이다. 이 중에서 첫번째와 마지막 p 요소에 배경색을 동일하게 설정하는 코드는 아래와 같다.
address p:first-child, address p:last-child{
background-color: orange;
}
address 요소 안에서 두번째 자식 p 요소를 선택하려면 아래와 같이 하면 된다.
address p:nth-child(2){
background-color: darkgreen;
}
nth-child 는 아래와 같이 A*n + B 형태의 수열로도 선택이 가능하다. 전체 목록(리스트)에서 홀수번째 자식요소만 선택하려면 2n+1 형태로 넣어주면 된다. n 은 0부터 시작한다.
:nth-child(An+B)아래와 같이 작성하면 사이드 메뉴에서 홀수번째 메뉴의 배경색만 검은색으로 설정된다.
aside nav ul li:nth-child(2n+1){
background-color: black;
}아래와 같이 작성해도 동일한 결과를 얻는다.
aside nav ul li:nth-child(odd){
background-color: black;
}
아래와 같이 작성하면 사이드 메뉴에서 짝수번째 메뉴의 배경색만 검은색으로 설정된다.
aside nav ul li:nth-child(2n){
background-color: black;
}아래와 같이 작성해도 동일한 결과를 얻는다.
aside nav ul li:nth-child(even){
background-color: black;
}
의사요소 선택자 (Pseudo-Element Selector)
의사요소 선택자는 가상으로 만들어진 요소를 선택할때 사용한다. 대표적으로 ::before 와 ::after 가 있다. 주로 선택한 요소 근처에 자식요소를 배치할때 사용한다.
의사요소 선택자를 이용하여 "사이드 메뉴" 글자 앞뒤에 기호를 첨가해보자! 사이드 메뉴의 글자는 자손 선택자를 이용하여 아래와 같이 선택한다. 그리고 ::before 와 ::after 로 앞뒤에 기호(컨텐츠)를 추가한다.
aside h3::before{
content: '---';
font-size: 2rem;
color: orange;
}
aside h3::after{
content: '---';
font-size: 2rem;
color: orange;
}참고로 같은 스타일 코드가 중복되므로 그룹 선택자를 사용하여 아래와 같이 작성하는게 더 낫다.
aside h3::before, aside h3::after{
content: '---';
font-size: 2rem;
color: orange;
}한가지 주의할 점은 의사요소는 인라인 요소이기 때문에 너비나 높이를 설정하려면 display 속성을 block 이나 inline-block 으로 변경해야 한다.

지금까지 수정된 코드는 다음과 같다.
<!DOCTYPE html>
<html lang="ko">

    <head>
        <meta charset="UTF-8">
        <title>SunriseBucks Caffe</title>
        <link rel="stylesheet" href="style.css">
    </head>

    <body>
        <header>
            <a href="/index.html" id="logo">
                <img src="/imgs/brand-logo.jpg" alt="sample logo" width="50" height="40">
                SunriseBucks
            </a>

            <nav>
                <ul>
                    <li>
                        <a href="/html/home.html">Home</a>
                        <ul>
                            <li><a href="https://www.naver.com" target="_blank">네이버</a></li>
                            <li><a href="https://www.google.com" target="_blank">구글</a></li>
                        </ul>
                    </li>
                    <li><a href="/html/about.html">About</a></li>
                    <li><a href="/html/service.html">Service</a></li>
                    <li><a href="/html/contact.html">Contact</a></li>
                    <li><a href="/html/register.html">Register</a></li>
                </ul>
            </nav>
        </header>

        <section>
            <p>여기에도 동일하게 스타일이 적용된다.</p>
        </section>

        <main>
            <h2>main content</h2>
            <p>주요 내용입니다.</p>
            <section>
                <h2>section title</h2>
                <p>
                    section description
                </p>
            </section>

            <article>
                <h1>List title</h1>
                <article class="item">
                    <h2>item title</h2>
                    <p>item description</p>
                </article>
                <article class="item half-width">
                    <h2>item title</h2>
                    <p>item description</p>
                </article>
                <article class="item half-width highlight-color">
                    <h2>item title</h2>
                    <p>item description</p>
                </article>
            </article>

            <figure>
                <img src="imgs/elephants.jpeg" alt="Elephants">
                <figcaption>Elephants</figcaption>
            </figure>
        </main>

        <footer>
            <h3>Posted by: sunrise</h3>
            <p>Contact information: <a href="mailto:someone@example.com">someone@example.com</a></p>

            <address>
                <p>주소: 서울시 양천구 목1동 123-123</p>
                <p>전화번호: 02-1234-1234</p>
                <p>이메일: <a href="mailto:example@example.com">example@example.com</a></p>
            </address>
        </footer>

        <aside>
            <h3>사이드 메뉴</h3>
            <nav>
                <ul>
                    <li><a href="https://www.facebook.com" class="side_menu" target="_blank">페이스북</a></li>
                    <li><a href="https://www.instagram.com" target="_blank">인스타그램</a></li>
                    <li><a href="https://www.daum.net" target="_blank">다음</a></li>
                    <li><a href="https://www.linkedin.com" target="_blank" class="side_menu">링크드인</a></li>
                </ul>
            </nav>
        </aside>

        <form action="">
            <input type="text">
            <button>보내기</button>
        </form>
    </body>

</html>
header{
background-color: orange;
}
#logo{
font-size: 3rem;
}
.item{
background-color: brown;
}
.half-width{
width: 50%;
}
.highlight-color{
color: white;
font-weight: bold;
font-size: 3rem;
}
body > section p{
background-color: blue;
}
main > p{
background-color: red;
}
/* header nav > ul > li > a{
background: green;
} */
main > article h1 + article{
width: 10%;
border-radius: 50%;
}
main > article h1 + article ~ article{
border-radius: 0 50% 0 0 ;
height: 30vh;
}
header, main, footer{
width: 30%;
background-color: gray;
}
[target]{
text-decoration: none;
}
/* [target="_blank"]{
background-color: orange;
} */
[class^="side"]{
font-size: 5rem;
}
header > a:hover{
color: orange;
}
:link{
text-decoration: none;
color:brown;
}
:visited{
color: yellow;
}
a:focus{
background: blue;
color: white;
}
a:active{
background: black;
color: red;
}
address:focus-within{
background-color:blueviolet;
}
input, button{
outline: none;
}
input:focus, button:focus{
background-color: red;
}
address p:first-child, address p:last-child{
  background-color: orange;
}
address p:nth-child(2){
  background-color: darkgreen;
}
aside nav ul li:nth-child(even){
 background-color: black;
}
aside h3::before, aside h3::after{
  content: '---';
  font-size: 2rem;
  color: orange;
}
부정선택자는 아래와 같이 :not을 스타일 적용을 제외할 요소를 선택자로 선택한다.
:not(선택자)지금까지 적용된 스타일이 헷갈리니까 HTML 코드는 그대로 두고 CSS 코드만 전부 삭제하고 새로 작성하도록 하자!
주소영역(address)에서 두번째 p 요소를 제외한 나머지 p 요소의 배경색을 변경해보자!
address p:not(:nth-child(2)){
  background-color: orange;
}
위와 같이 작성하면 된다.
메인 컨텐츠 영역(main)에서 바로 아래에 있는 p 요소만 제외하고 스타일을 적용하려면 아래와 같이 하면 된다.
main *:not(main > p){
  background-color: gray;
}
별표는 main 요소 안에 있는 모든 요소를 의미한다. :not 으로 제외한 요소를 선택한다. 제외할 요소는 main 요소 바로 아래에 있는 p 요소이다.

이 부분은 다시 주석처리한다.
/* main *:not(main > p){
  background-color: gray;
} */
이번에는 부정 선택자로 메인 컨텐츠 안의 article 영역을 통으로 제외하고 나머지 부분에 배경색을 설정하고 싶다고 해보자!
main  *:not(article){
  background-color: blue;
}
이렇게 작성했지만 제대로 동작하지 않는다. 이유는 main 안의 모든 요소 중에서 aritlce 요소를 제외하고 스타일이 설정되기 때문이다. article 요소를 제외하더라도 텍스트 부분들은 모두 h1, h2, p 태그이므로 텍스트 부분은 모두 스타일이 적용된다.
<main>
    <h2>main content</h2>
    <p>주요 내용입니다.</p>
    <section>
        <h2>section title</h2>
        <p>
            section description
        </p>
    </section>

    <article>
        <h1>List title</h1>
        <article class="item">
            <h2>item title</h2>
            <p>item description</p>
        </article>
        <article class="item half-width">
            <h2>item title</h2>
            <p>item description</p>
        </article>
        <article class="item half-width highlight-color">
            <h2>item title</h2>
            <p>item description</p>
        </article>
    </article>

    <figure>
        <img src="imgs/elephants.jpeg" alt="Elephants">
        <figcaption>Elephants</figcaption>
    </figure>
</main>
처음에 의도한대로 article 영역만 제외하려면 아래와 같이 작성하면 된다. 자식연산자를 이용하여 main 바로 아래에 위치한 모든 자식요소(h2, p, section, article, figure) 중에서 article 요소를 제외한다.
main > *:not(article){
  background-color: blue;
}
CSS 가상 클래스 셀렉터 :nth-child와 :nth-of-type의 차이점
종종 헷갈리는 CSS 가상 선택자 :nth-child와 :nth-of-type의 차이점에 대해서 알아보겠습니다. 예를 들어 다음과 같은 HTML 코드가 있습니다. Lorem ipsum dolor nth-child와 nth-of-type을 이용해서 ipsum라는 텍스
hogni.tistory.com
HTML 코드는 그대로 두고 CSS 코드만 지우고 새로 작성하도록 한다. 아래 main 영역에서 item 으로 클래스를 지정한 article 요소 중에서 두번째 아이템을 선택해서 스타일을 적용하려고 한다.
<main>
<h2>main content</h2>
<p>주요 내용입니다.</p>
<section>
<h2>section title</h2>
<p>
section description
</p>
</section>
<article>
<h1>List title</h1>
<article class="item">
<h2>item title</h2>
<p>item description</p>
</article>
<article class="item half-width">
<h2>item title</h2>
<p>item description</p>
</article>
<article class="item half-width highlight-color">
<h2>item title</h2>
<p>item description</p>
</article>
</article>
<figure>
<img src="imgs/elephants.jpeg" alt="Elephants">
<figcaption>Elephants</figcaption>
</figure>
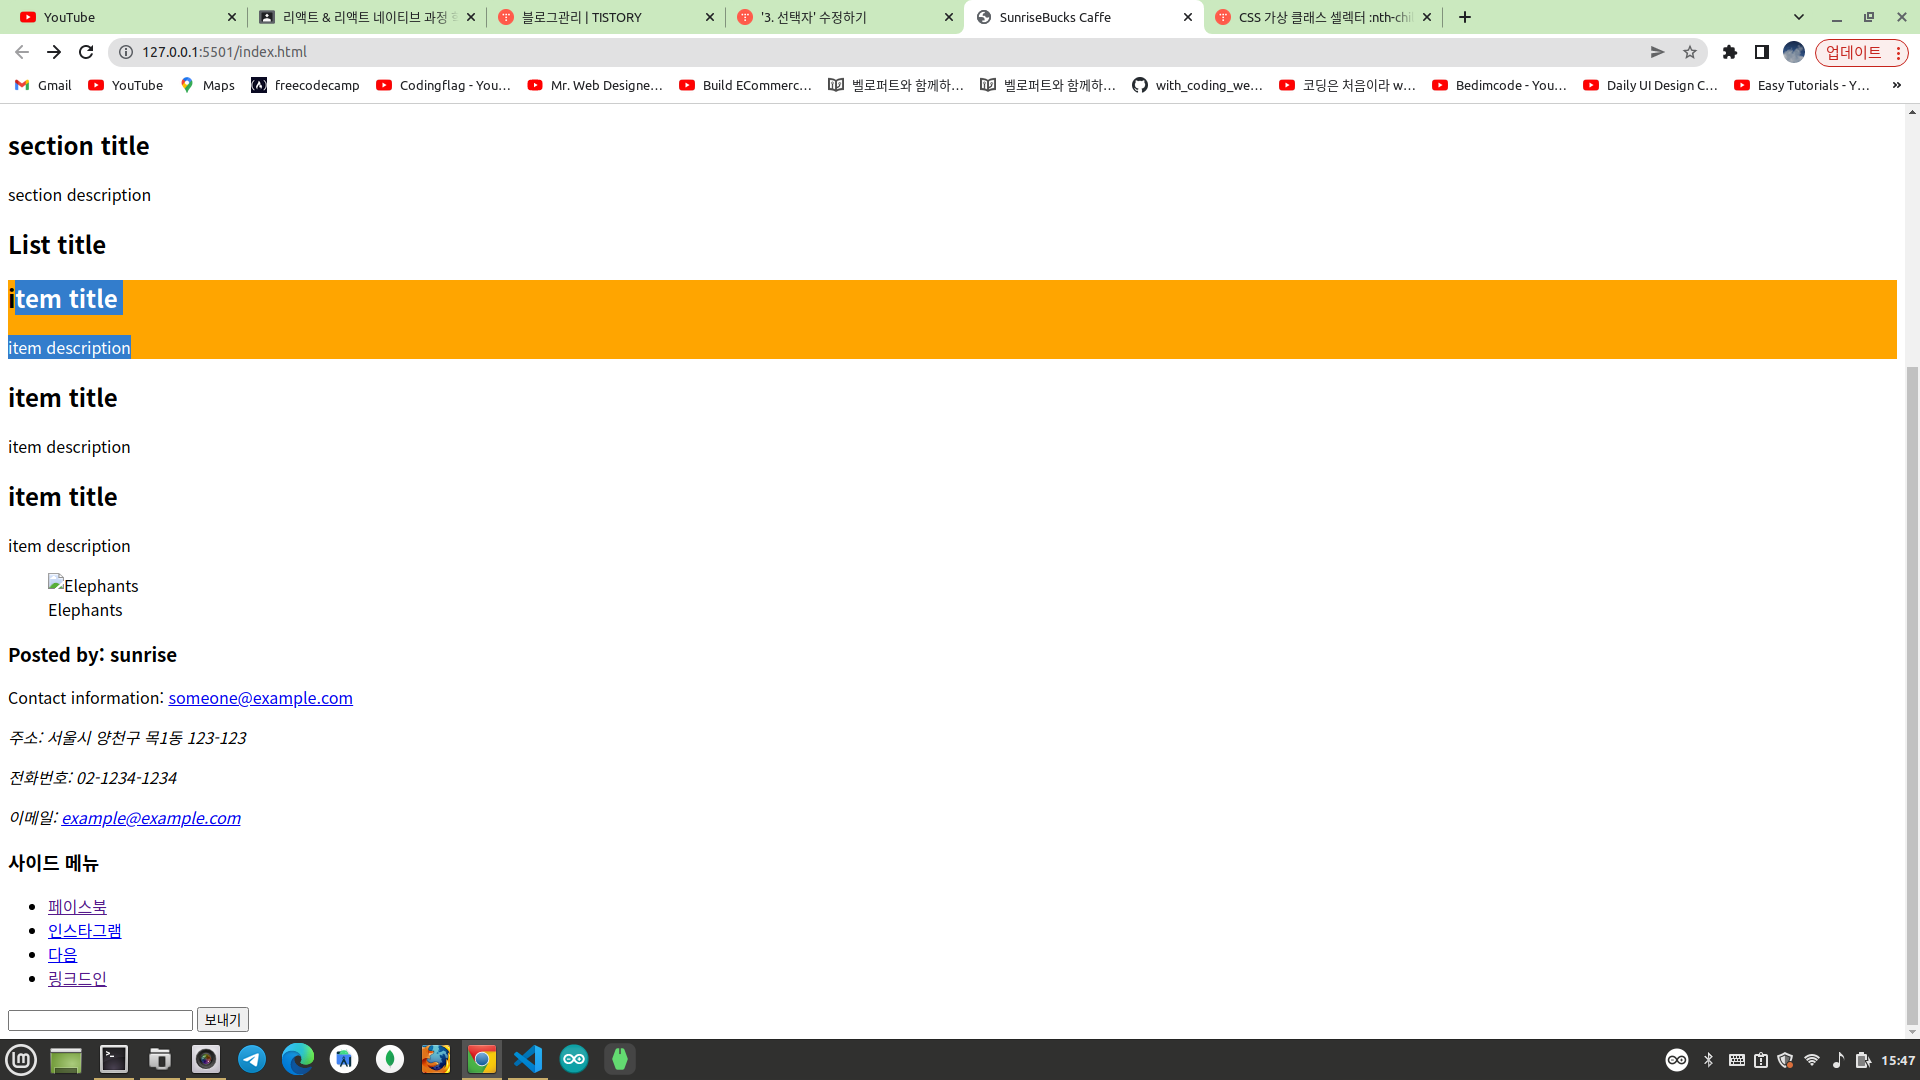
</main>하지만 아래와 같이 작성하면 첫번째 아이템이 선택된다. 이유는 "List title" 이라고 작성된 h1 요소 때문이다. nth-child 는 .item 의 부모요소인 main 바로 아래의 article 에서 두번째 자식요소를 선택한다. 첫번째 자식요소는 "List title" 이라고 작성된 h1 이고 두번째 자식요소는 item 클래스로 지정된 article 중 첫번째 아이템이다.
main .item:nth-child(2){
  background-color: orange;
}
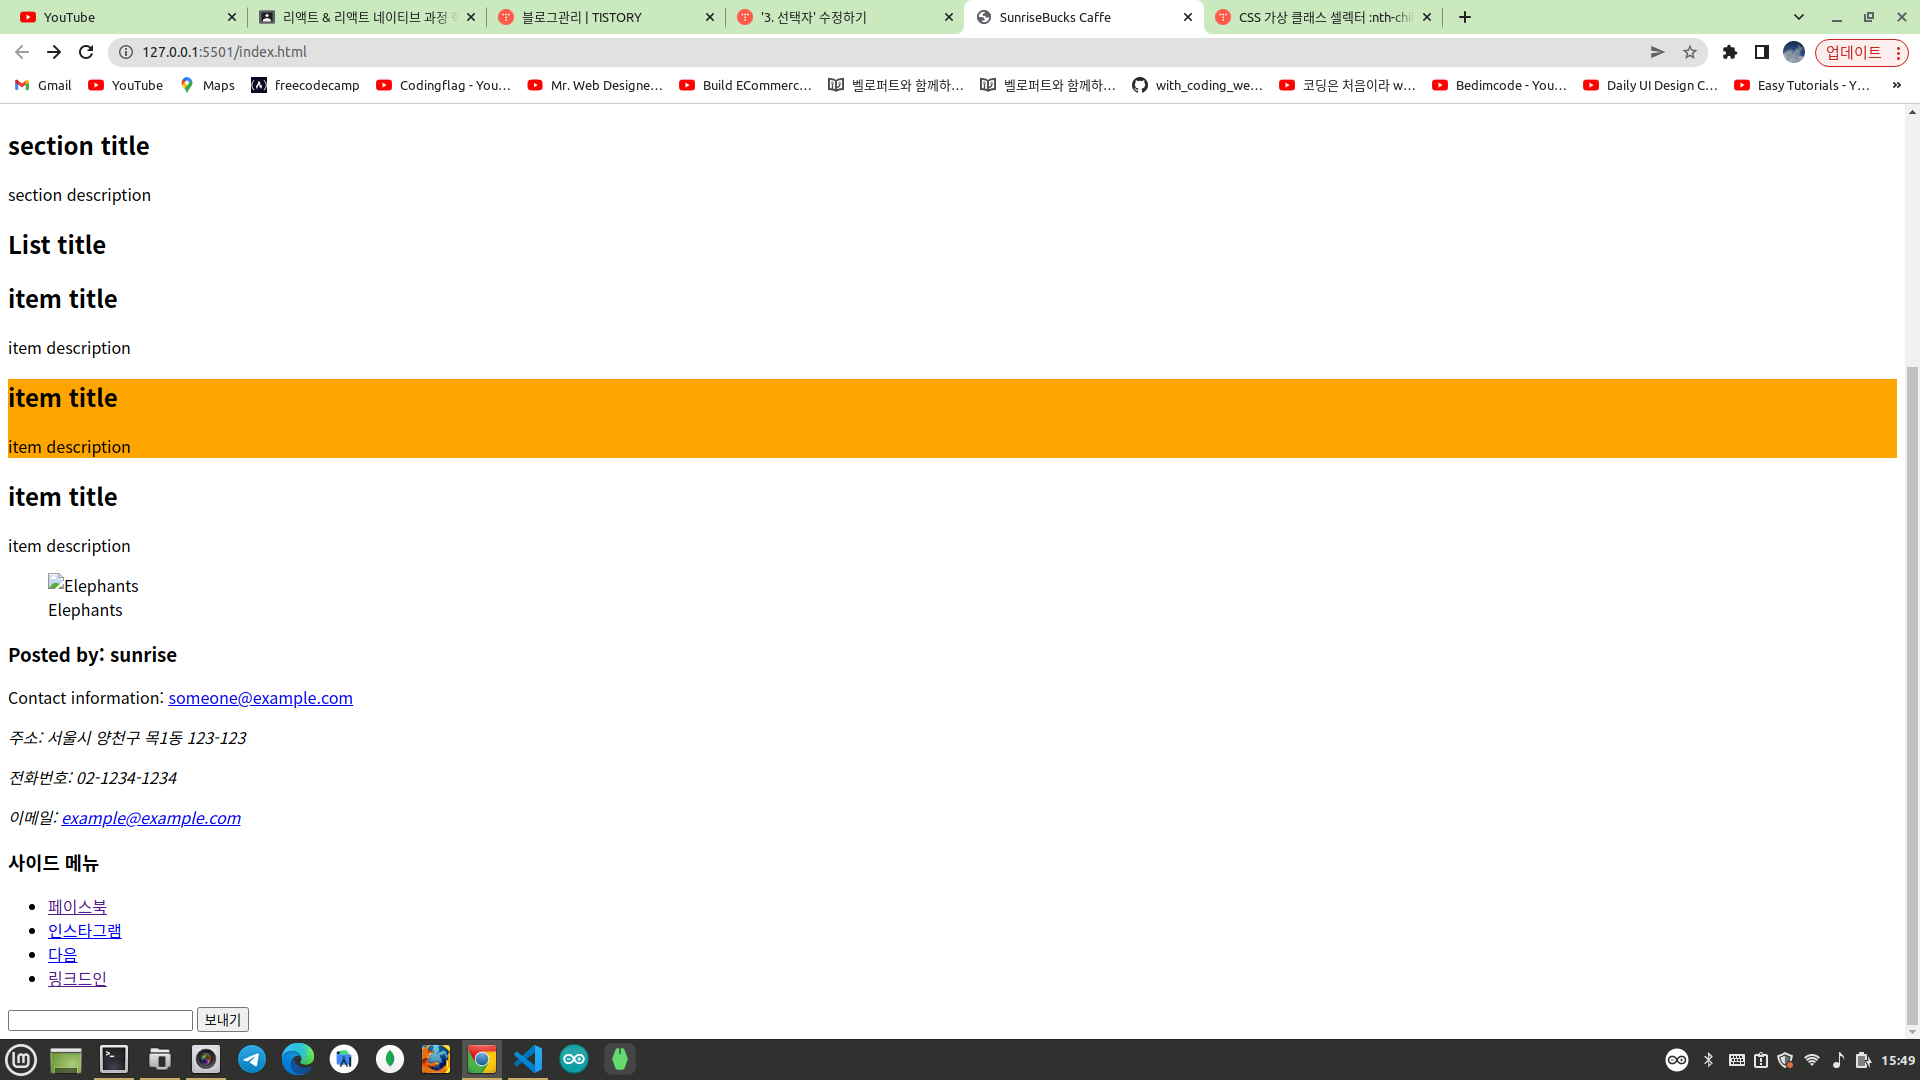
그래서 우리가 원하는대로 nth-child 를 이용해서 두번째 article 아이템을 선택하려면 아래와 같이 nth-child 의 인자로 3 을 설정해야 한다.
main .item:nth-child(3){
  background-color: orange;
}
하지만 뭔가 코드의 의미가 퇴색된 느낌이다. 그래서 의미가 통하도록 아래와 같이 작성하면 된다. 이렇게 작성해도 두번째 aritcle 을 선택한다. nth-of-type 은 .item 의 부모요소인 main 바로 아래 article 요소에서 클래스명이 item 으로 설정된 요소들 중에서 2번째 요소를 선택하기 때문이다.
main .item:nth-of-type(2){
  background-color: blue;
}
결론적으로 nth-child 는 모든 자식요소 중에서 n 번째 요소를 선택하지만 nth-of-type 은 type 이 일치하는 요소들 중에서 n 번째 요소를 선택한다.

상태 선택자
상태 선택자는 주로 input, button 태그에 많이 사용된다. 실습은 폼 요소 수업에서 완성한 예제 코드를 가지고 진행하도록 하자!
<!DOCTYPE html>
<html lang="ko">
    <head>
        <meta charset="UTF-8">
        <title>Register 페이지</title>
        <style>
            textarea {
            resize: none;
            }
        </style>
        <link rel="stylesheet" href="style.css">
    </head>
    <body>
        <h1>회원가입 페이지</h1>
        <form action="/" method="post">
            <fieldset>
                <legend>필수 사항</legend>
                <table>
                    <tr>
                        <td><label for="username">사용자 이름: </label></td>
                        <td><input type="text" placeholder="아이디를 입력하세요." id="username" required></td>
                    </tr>
                    <tr>
                        <td><label for="useremail">이메일 주소: </label></td>
                        <td><input type="email" placeholder="이메일 주소를 입력하세요." id="useremail" required></td>
                    </tr>
                    <tr>
                        <td><label for="userpassword">사용자 비밀번호: </label></td>
                        <td><input type="password" placeholder="비밀번호를 입력하세요." id="userpassword" required></td>
                    </tr>
                </table>
            </fieldset>

            <fieldset>
                <legend>옵션 사항</legend>
                <p>
                    <label for="address">주소: </label>
                    <select name="address" id="address">
                        <option value="seoul">서울특별시</option>
                        <option value="busan">부산광역시</option>
                        <option value="deagu">대구광역시</option>
                    </select>
                </p>
                <p>
                    <span>성별: </span>
                    <input type="radio" id="male" name="gender" value="남성">
                    <label for="male">남성</label>
                    <input type="radio" id="female" name="gender" value="여성">
                    <label for="female">여성</label>
                </p>
                <p>
                    <span>관심사: </span>
                    <input type="checkbox" id="html" name="html" value="HTML">
                    <label for="html">HTML</label>
                    <input type="checkbox" id="css" name="css" value="CSS">
                    <label for="css">CSS</label>
                    <input type="checkbox" id="javascript" name="javascript" value="JAVASCRIPT">
                    <label for="javascript">JAVASCRIPT</label>
                </p>
                <p>
                    <label for="message">인사말</label>
                    <textarea name="message" id="message" cols="30" rows="10"></textarea>
                </p>
                <p>
                    <label for="profile">프로필 사진</label>
                    <input type="file" id="profile" name="profile" accept="image/png, image/jpeg">
                </p>
                <p>
                  <label for="website">웹사이트: </label>
                  <input type="url" id="website" name="website">
                </p>
                <p>
                  <label for="birth">생년월일: </label>
                  <input type="date" id="birth" name="birth">
                </p>
                <p>
                  <label for="fruit-choice">좋아하는 과일: </label>
                  <input id="fruit-choice" name="fruit-choice" list="fruit-flavors">
                  <datalist id="fruit-flavors">
                    <option value="apple">
                    <option value="banana">
                    <option value="orange">
                    <option value="mango">
                    <option value="watermelon">
                  </datalist>
                </p>
            </fieldset>
            <p>
                <input type="submit" value="가입하기">
            </p>
        </form>
    </body>
</html>
성별과 관심사 부분의 input, label 은 스타일의 원활한 적용을 위하여 순서를 변경하도록 한다.
<p>
    <span>성별: </span>
    <input type="radio" id="male" name="gender" value="남성">
    <label for="male">남성</label>
    <input type="radio" id="female" name="gender" value="여성">
    <label for="female">여성</label>
</p>
<p>
    <span>관심사: </span>
    <input type="checkbox" id="html" name="html" value="HTML">
    <label for="html">HTML</label>
    <input type="checkbox" id="css" name="css" value="CSS">
    <label for="css">CSS</label>
    <input type="checkbox" id="javascript" name="javascript" value="JAVASCRIPT">
    <label for="javascript">JAVASCRIPT</label>
</p>
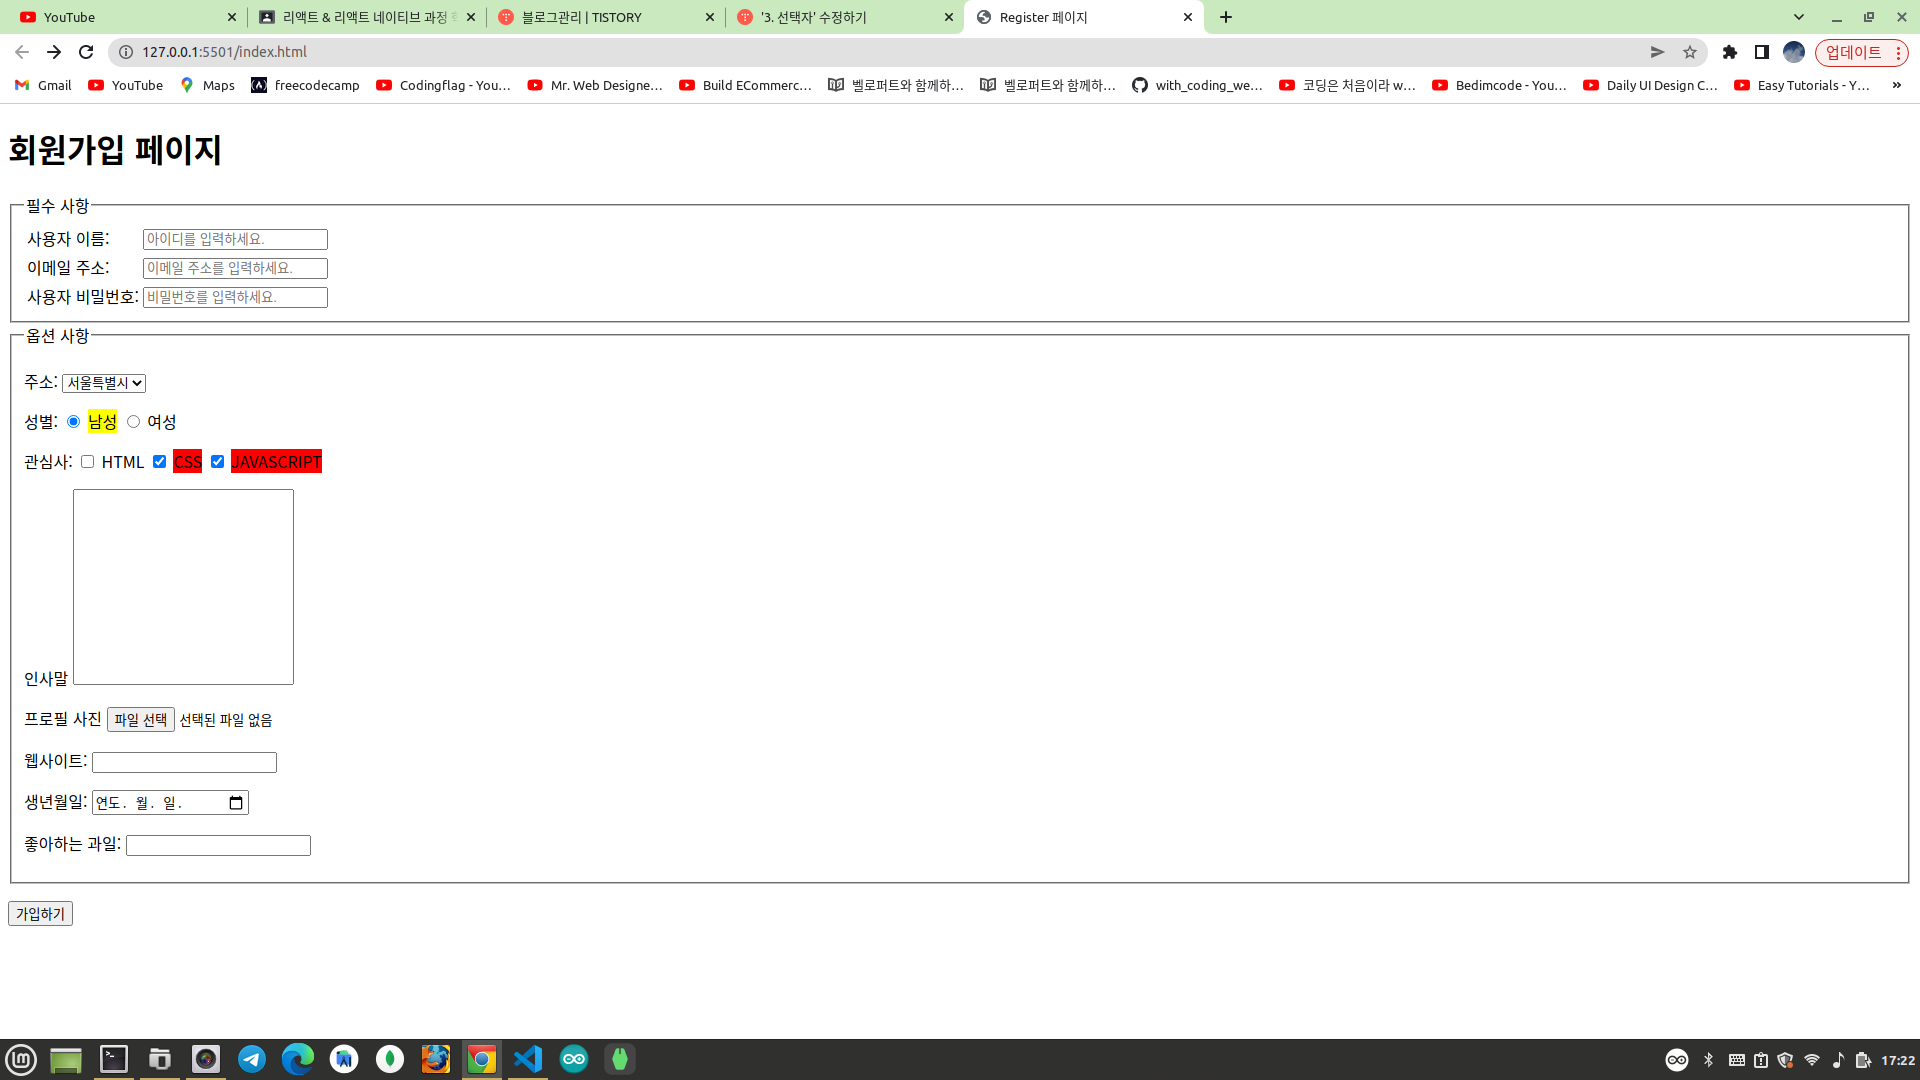
해당 폼에서 성별을 선택하거나 관심사에 체크 표시를 할때 해당 선택옵션에 하이라이트를 적용하려고 한다. 이때 상태 선탁자를 사용해서 아래와 같이 작성하면 된다. 이렇게 하면 라디오 버튼이나 체크박스 중에서 사용자가 선택한 옵션에 하이라이트를 적용한다. 인접 형제 선택자를 이용하여 사용자가 선택한 input 요소와 인접한 바로 다음 label 을 선택한다.
input[type="radio"][name="gender"]:checked + label {
  background-color: yellow;
}
input[type="checkbox"]:checked + label {
  background-color: red;
}
아래와 같이 하이라이트가 잘 적용된다.
마지막으로 내부링크를 활용하여 링크를 클릭하면 링크와 연결된 컨텐츠에 스타일을 적용해보자! 아래와 같이 코드를 수정한다.
<!DOCTYPE html>
<html lang="ko">
    <head>
        <meta charset="UTF-8">
        <title>Register 페이지</title>
        <style>
            textarea {
            resize: none;
            }
        </style>
        <link rel="stylesheet" href="style.css">
    </head>
    <body>
        <h1>회원가입 페이지</h1>

        <h3>선택목록</h3>
        <p>
            <a href="#mandatory">필수사항</a>
            <a href="#optional">옵션사항</a>
        </p>

        <form action="/" method="post">
            <fieldset id="mandatory">
                <legend>필수 사항</legend>
                <table>
                    <tr>
                        <td><label for="username">사용자 이름: </label></td>
                        <td><input type="text" placeholder="아이디를 입력하세요." id="username" required></td>
                    </tr>
                    <tr>
                        <td><label for="useremail">이메일 주소: </label></td>
                        <td><input type="email" placeholder="이메일 주소를 입력하세요." id="useremail" required></td>
                    </tr>
                    <tr>
                        <td><label for="userpassword">사용자 비밀번호: </label></td>
                        <td><input type="password" placeholder="비밀번호를 입력하세요." id="userpassword" required></td>
                    </tr>
                </table>
            </fieldset>

            <fieldset id="optional">
                <legend>옵션 사항</legend>
                <p>
                    <label for="address">주소: </label>
                    <select name="address" id="address">
                        <option value="seoul">서울특별시</option>
                        <option value="busan">부산광역시</option>
                        <option value="deagu">대구광역시</option>
                    </select>
                </p>
                <p>
                    <span>성별: </span>
                    <input type="radio" id="male" name="gender" value="남성">
                    <label for="male">남성</label>
                    <input type="radio" id="female" name="gender" value="여성">
                    <label for="female">여성</label>
                </p>
                <p>
                    <span>관심사: </span>
                    <input type="checkbox" id="html" name="html" value="HTML">
                    <label for="html">HTML</label>
                    <input type="checkbox" id="css" name="css" value="CSS">
                    <label for="css">CSS</label>
                    <input type="checkbox" id="javascript" name="javascript" value="JAVASCRIPT">
                    <label for="javascript">JAVASCRIPT</label>
                </p>
                <p>
                    <label for="message">인사말</label>
                    <textarea name="message" id="message" cols="30" rows="10"></textarea>
                </p>
                <p>
                    <label for="profile">프로필 사진</label>
                    <input type="file" id="profile" name="profile" accept="image/png, image/jpeg">
                </p>
                <p>
                  <label for="website">웹사이트: </label>
                  <input type="url" id="website" name="website">
                </p>
                <p>
                  <label for="birth">생년월일: </label>
                  <input type="date" id="birth" name="birth">
                </p>
                <p>
                  <label for="fruit-choice">좋아하는 과일: </label>
                  <input id="fruit-choice" name="fruit-choice" list="fruit-flavors">
                  <datalist id="fruit-flavors">
                    <option value="apple">
                    <option value="banana">
                    <option value="orange">
                    <option value="mango">
                    <option value="watermelon">
                  </datalist>
                </p>
            </fieldset>
            <p>
                <input type="submit" value="가입하기">
            </p>
        </form>
    </body>
</html>
수정된 부분은 다음과 같다. 사용자 선택에 대한 목록이 추가되었다.
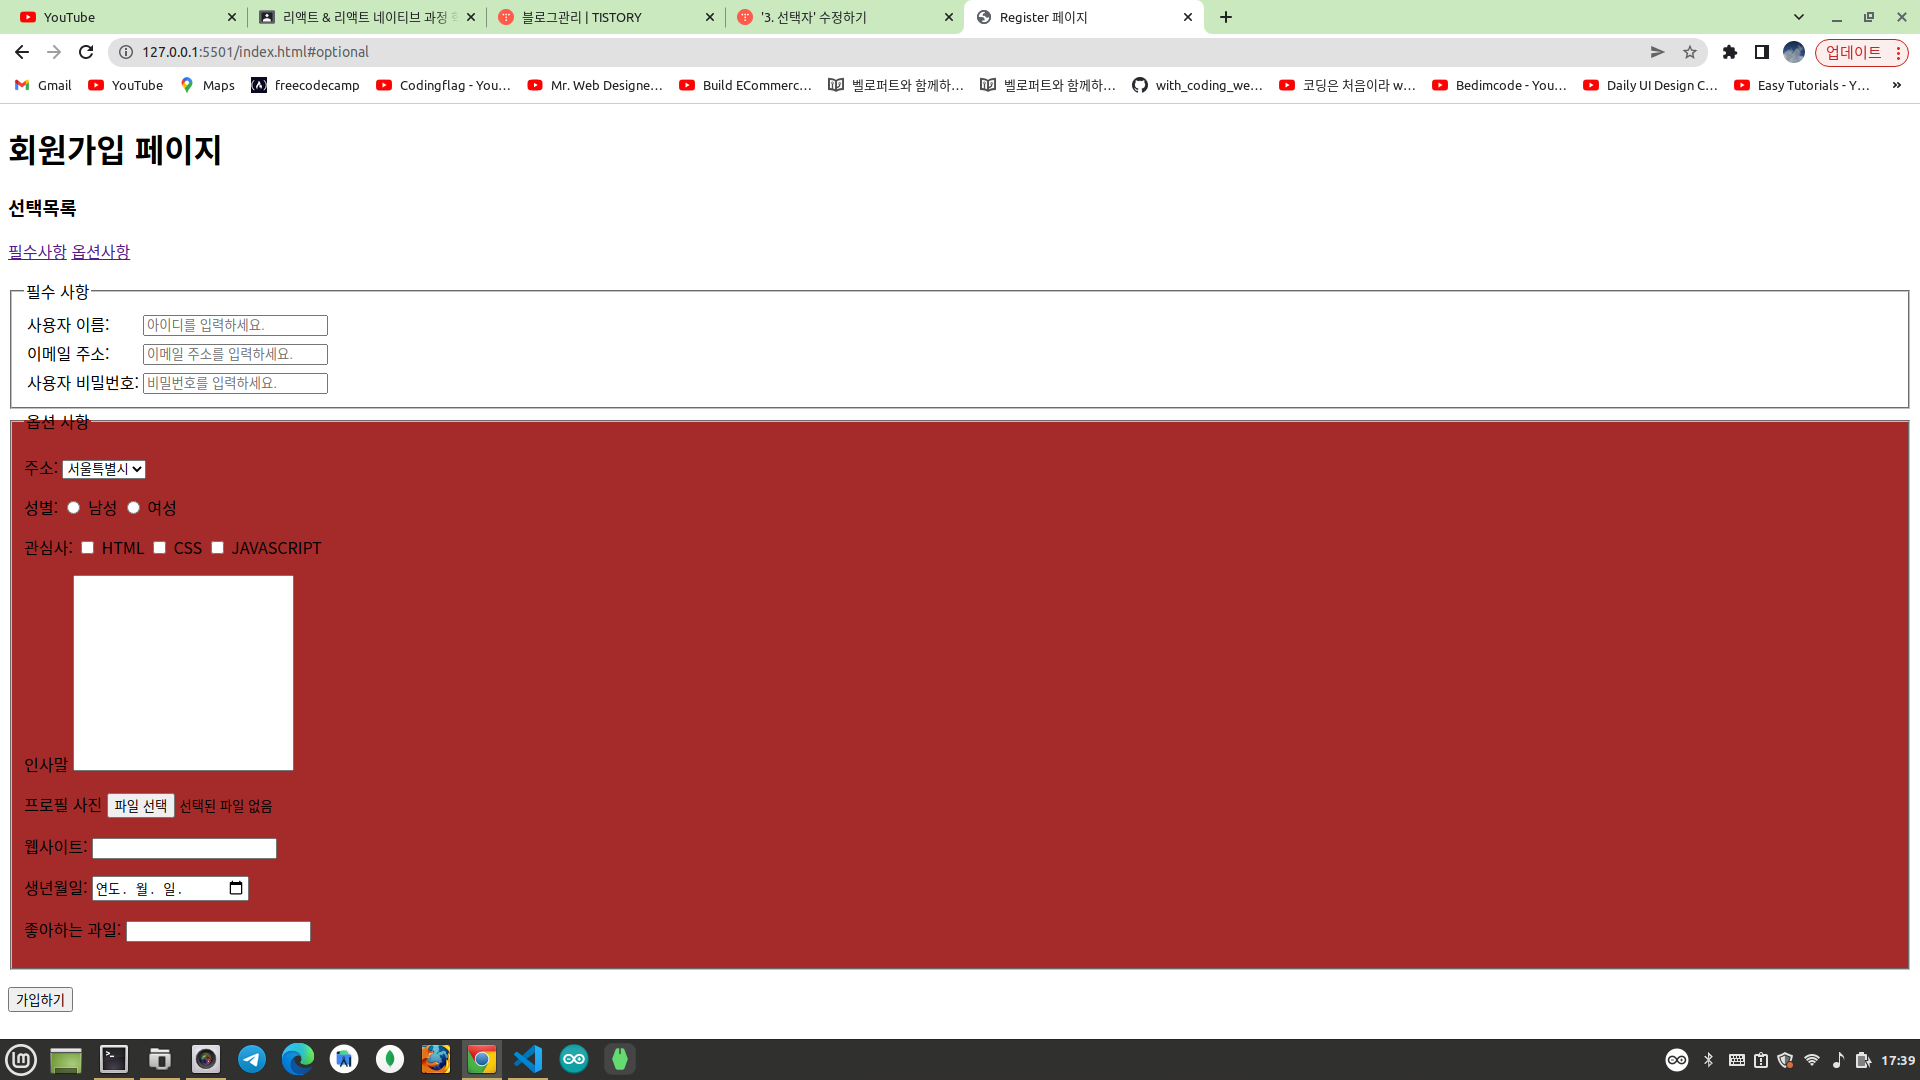
<h3>선택목록</h3>
<p>
    <a href="#mandatory">필수사항</a>
    <a href="#optional">옵션사항</a>
</p>
<form action="/" method="post">
<fieldset id="mandatory">
</fieldset>
<fieldset id="optional">
</fieldset>
</form>a 태그의 href 속성에서 샵(#)을 이용하여 링크를 클릭할때 웹페이지 내부에서 해당 id 값을 설정한 컨텐츠에 스타일을 설정하기 위해서는 다음과 같이 target 이라는 상태 선택자를 활용하면 된다.
#mandatory:target{
  background-color: orange;
}
#optional:target{
  background-color: brown;
}
선택목록에서 "필수사항"을 선택하면 필수사항 폼 영역이 선택된다. 반대로 "옵션사항"을 선택하면 옵션사항 폼 영역이 선택된다.

CSS 선택자 연습 사이트
CSS Diner
A fun game to help you learn and practice CSS selectors.
flukeout.github.io
'프론트엔드 > HTML & CSS 강의' 카테고리의 다른 글
| 플럭스박스(flexbox) 활용 (0) | 2023.06.24 |
|---|---|
| 4. 박스모델 (Box Model) (0) | 2023.06.15 |
| 2. 색상과 단위 (0) | 2023.06.12 |
| 1. CSS 문법 (0) | 2023.06.12 |
| 11. 폼 요소의 종류 (0) | 2023.06.10 |